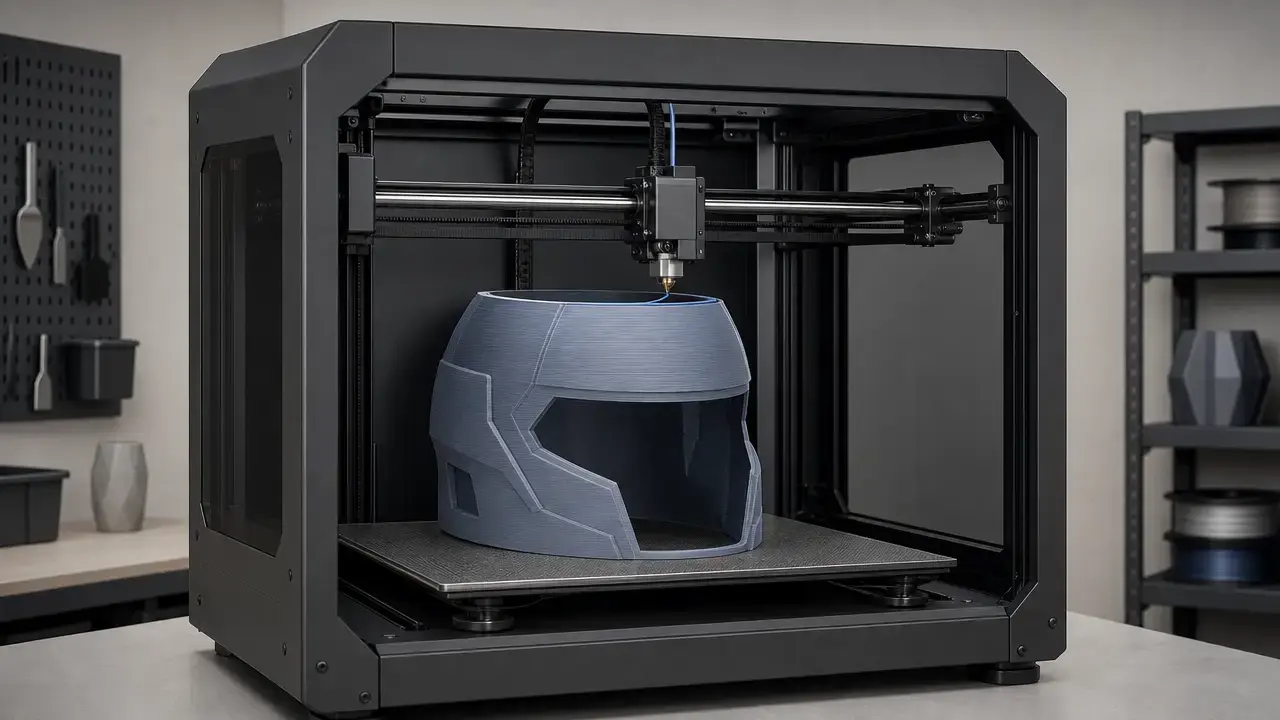

Summary + fast decision aid
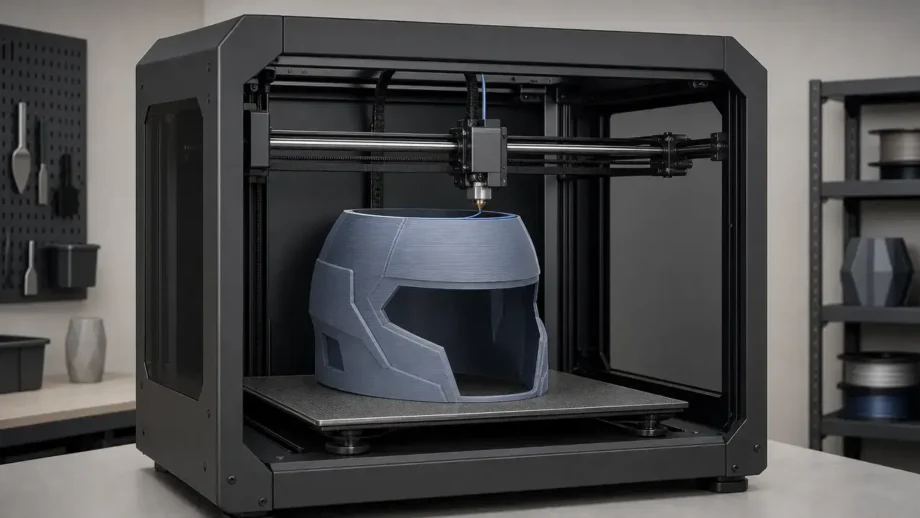
The best 3d printer for cosplay is usually the printer class that fits your largest real part with the fewest compromises, not the machine with the longest feature list. For most cosplay props and many cosplay armor parts, FDM/FFF is the practical default because it scales well, is easier to split and assemble, and usually creates a friendlier finishing workflow than resin. In standards language, those two process families are material extrusion and vat photopolymerization. [S01]
Before you buy, measure the file in its intended print orientation and compare it to the printer’s usable space, not just the advertised box size. Safety belongs in that first decision too: NIOSH frames desktop 3D printing as a multi-hazard workflow that can involve ultrafine particles, chemicals or solvents, heat, moving parts, and, in some systems, lasers during maintenance, and it also publishes a separate 40-page control guide. [S04] [S05]
| Cosplay need | Printer class to shop | Minimum practical specs | Examples (only if evidence-qualified) |
|---|---|---|---|
| Small prop inserts, detail parts, helmet trims | 256 mm enclosed FDM printer | Around 256 × 256 × 256 mm, stable PLA/PETG workflow, reliable slicing support | Bambu Lab P1S is an evidence-qualified 256 mm enclosed example. Caveat: 256-class space still means many helmet files will need rotation compromises or part splitting. [S11] [S27] |
| Helmet shells, forearm or shin armor, medium props | 300 mm enclosed FDM printer | Roughly 300 mm-class X/Y, taller Z, reliable bed adhesion, manageable split-part workflow | Prusa CORE One L is an evidence-qualified 300 mm enclosed example. Caveat: 300 × 300 × 330 mm is more forgiving than 256-class, but many full helmets still need smart orientation or splitting. [S14] [S28] [S29] |
| Full armor panels, long prop barrels, large curved parts | 420 mm open large-format FDM printer | About 420 × 420 × 500 mm class, rigid motion, realistic long-print workflow | Anycubic Kobra 3 Max Combo is an evidence-qualified 420 mm-class example. Caveat: the huge open frame and 90 °C bed ceiling increase space and material-workflow tradeoffs. [S16] [S30] |
| Highly detailed greebles, emblems, or molding masters | Resin printer as a secondary machine | Detail-first workflow, wash and cure setup, strict PPE and ventilation | Use resin selectively for detail parts rather than as the default path for oversized wearable armor. [S01] [S06] [S21] [S22] |
Exact pricing, availability, firmware behavior, and bundled accessories should be rechecked right before publication or purchase.
How we chose (and how you should measure): sizing method first
This shortlist starts with method, not brand. A printer is only a strong cosplay fit if it can actually fit the part you want to make and if any recommendation-level language is supported by both official specs and at least one independent hands-on review. The sizing workflow is simple: 1) open the STL or CAD file in a slicer and read the bounding box, 2) compare that box to the printer’s nominal X/Y/Z limits, 3) apply usable-volume caveats such as purge paths, toolhead overlap, edge margins, or dual-extruder constraints, and 4) decide whether the part should print in one piece or through planned part splitting. For shopping, 256, 300, 350, and 420 mm classes are useful buckets, but they are only heuristics. A “350 mm printer” is not a guarantee that every helmet will fit. [S02]
A few terms are worth separating once. Accuracy is how close the finished part is to the intended dimensions. Repeatability is how consistently the printer can hit the same result again. Resolution is the smallest motion or feature step the machine can attempt. Surface finish is the visible or tactile quality left on the part. ISO/ASTM 52902 exists partly to remind buyers that geometric capability claims are benchmark- and measurement-dependent, so a small layer height does not automatically mean better fit. [S02] This matters even more on printers with multiple toolheads. Bambu Lab’s H2D lists 325 × 320 × 325 mm in single-nozzle mode, 300 × 320 × 325 mm in dual-nozzle mode, and 350 × 320 × 325 mm as the total volume for two nozzles, which is not the same as one seamless printable box. [S12] Raise3D’s Pro3 Plus shows the same pattern in a different form, listing 300 × 300 × 605 mm for single extrusion and 255 × 300 × 605 mm for dual extrusion. [S19]
FDM/FFF is usually the default for cosplay armor and big props
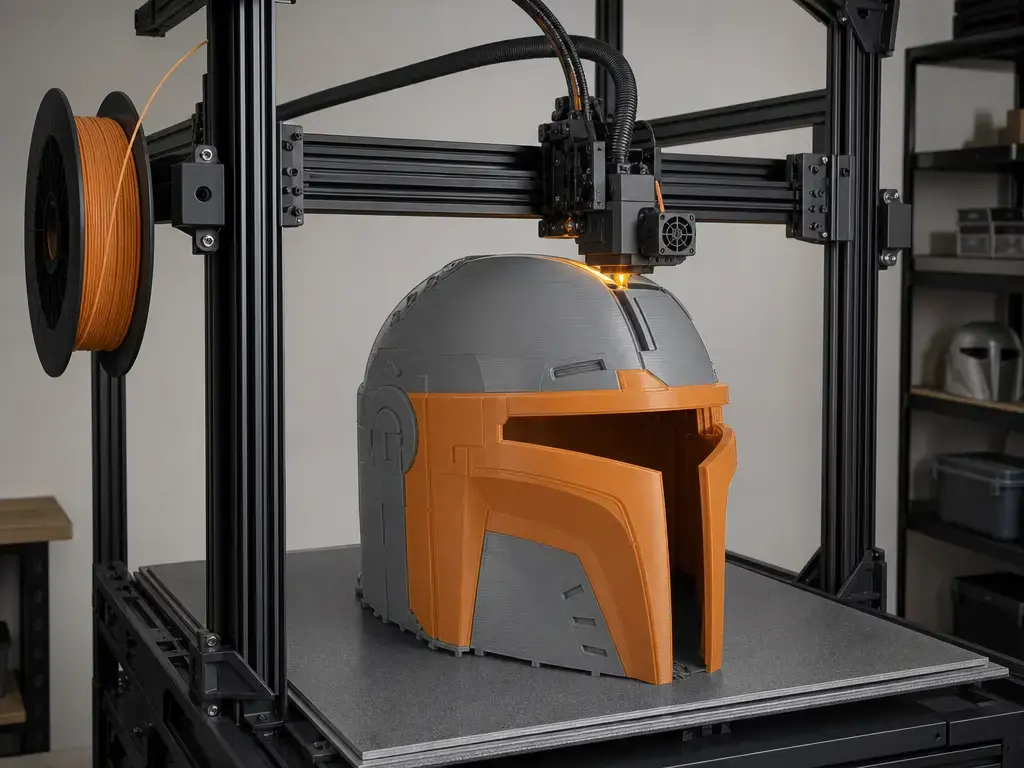
FDM/FFF is the common hobby term for the standards family called material extrusion. In that process, a heated nozzle lays down thermoplastic filament road by road and layer by layer until the part is complete. For cosplay, that makes it easy to scale from small accessories to larger shells, easier to split and glue back together, and more forgiving for the sanding and priming work that usually follows. ISO/ASTM 52900 is the terminology anchor for that process family. [S01]
That is why so much cosplay 3d printing starts with filament. Large wearable shells, armor plates, and prop bodies are generally easier to size, print, repair, and finish in material extrusion than in a resin-first workflow.
The catch is mechanical behavior. Material-extruded parts are anisotropic, which means they do not perform the same way in every direction. NIST IR 8059 discusses raster-angle effects and cites literature showing modulus reductions on the order of 11% to 37%, which is why orientation is a structural decision, not just a cosmetic one. [S03] For armor, strength is not the same as durability, and neither is the same as heat resistance. Strength is how much load a part can take before failing. Durability is how well it survives handling, packing, repeated wear, and minor knocks. Heat resistance is whether it keeps its shape when the environment gets hot. A shell printed with the “stronger” filament name can still crack if the layers are asked to peel apart, and a tough wearable part can still soften if it sits in a hot car. In practice, the best 3d printer for cosplay armor is usually the one that lets you control orientation, adhesion, and repeatability across large parts, not the one that simply advertises a giant chamber. Resin still matters, but mainly as a companion process for detail parts, emblems, and masters rather than the default route for full wearable shells. [S03]
Resin printing: best for detail parts, not the default for wearable armor
In standards language, common desktop resin workflows fall under vat photopolymerization. That process cures liquid resin layer by layer with light, which is why it is useful for crisp emblems, fine panel details, small accessories, and molding masters where visible cleanup matters more than raw part size. ISO/ASTM 52900 is the terminology anchor here. [S01] A large resin machine can still look impressive on paper: Anycubic’s Photon Mono M7 Max lists a 298 × 164 × 300 mm print volume, 46 × 46 μm XY resolution, and a 0.01 to 0.15 mm layer-height range. Even this large resin example is narrow compared with many large-format filament printers, so many armor jobs still trend toward splitting. [S20]
For wearable armor, resin is usually the exception rather than the default. Rigid post-cured parts can be less forgiving along skin-contact edges, and the workflow adds washing, curing, and cleanup every time. NIOSH notes that vat photopolymerization can release uncured resin particles and gases, and that solvent cleaning introduces added concerns, including the need for ventilation and controls. [S06] Formlabs also notes that its Form 4 and Form 4L generation printers use 405 nm LEDs rather than a laser, and its safety guidance calls for ventilation, nitrile or neoprene gloves, eye protection, and avoidance of closed, unventilated spaces. [S21] Its post-processing guidance also centers solvent washing, commonly with IPA or TPM. [S22] For cosplay, resin usually works best as a secondary workflow for detail, not as the default choice for large wearable shells.
Core buying criteria for cosplay (the non-negotiables)
For the best 3d printer for cosplay props or armor, evaluate machines in this order: real fit first, then material workflow, then long-print reliability and throughput, then finishing burden, then safety. A printer that looks impressive in marketing can still be a poor cosplay fit if the part does not fit the usable build volume, if the room cannot support the heat or emissions, or if the machine turns every large shell into a repair-heavy finishing project. NIOSH’s hazard framing and its 2024-103 guide are useful reminders that siting and control planning belong in the buying decision, not as an afterthought. [S04] [S05]
- Build volume versus usable volume. Check the file’s bounding box in the slicer, not just the headline spec. Dual nozzles, purge areas, bed margins, and toolhead overlap can reduce what fits in practice. [S12] [S19]
- Enclosure or chamber needs. Decide early whether you need an enclosed printer for draft control, odor management, or hotter materials.
- Bed adhesion strategy. Large cosplay parts live or die by the first layers, so a stable plate, leveling routine, and bed-temperature behavior matter more than flashy speed claims.
- Long-print reliability. Armor shells and big props are marathon jobs. A machine that can hold calibration and recover from interruptions is worth more than a high spec-sheet speed alone.
- Noise, footprint, and room placement. A large 3d printer for cosplay can dominate a desk or workshop corner before the first spool is loaded.
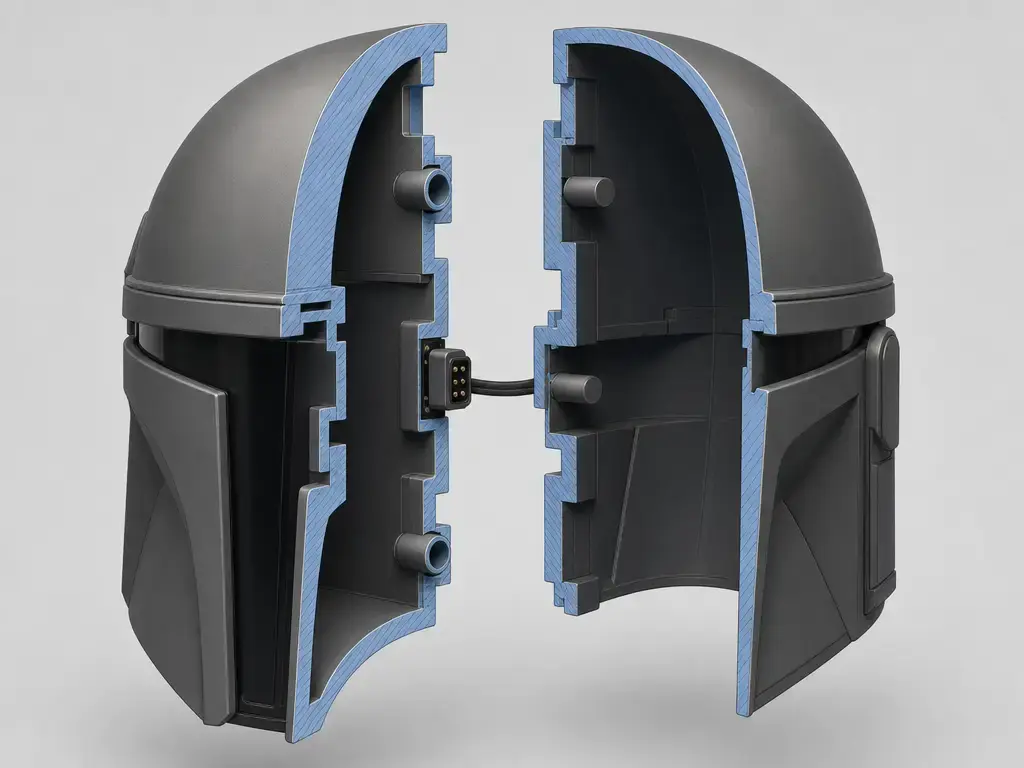
- Slicer tools for cutting and joining. Planned splitting is part of the workflow, not a failure case. PrusaSlicer’s cut tool supports Plug, Dowel, Snap, and dovetail mode, which is useful when a helmet, chest shell, or prop body must be divided on purpose. [S09]
- Nozzle ecosystem. Check whether common nozzle sizes and wear-resistant options are easy to source for coarse shells or finer detail work.
- Spare parts and support. Belts, nozzles, plates, sensors, and hot-end parts should be replaceable without drama.
- Finishing effort. The best machine for cosplay is not just the one that prints the part, but the one that leaves a surface you can realistically sand, prime, and paint.
- Safety and ventilation. If a printer or material choice raises the heat, solvent, or emissions burden, that should change where and how you operate it. [S04] [S05]
Printer classes (with evidence-qualified examples)
There is no universal winner for the best 3d printer for cosplay. The safer approach is to recommend by class and use case, because a small accessory set, a full helmet, and a long prop barrel do not ask the same thing from a machine. Industrial pellet, robotic-arm, and metal systems are outside the scope here. For recommendation-level wording below, each model has both official specifications and at least one independent hands-on review. If a model is discussed only from its spec sheet, treat it as an example of a class, not a final pick. [S11] [S27] [S14] [S28]
The 256 mm enclosed class is the compact starting point for many buyers. Bambu Lab’s P1S defines the category with a 256 × 256 × 256 mm build volume, 300 °C maximum hotend temperature, 100 °C maximum build-plate temperature, and 500 mm/s maximum toolhead speed, and it has independent hands-on review support. [S11] [S27] For cosplay, that makes it a credible choice for smaller props, repeatable accessory parts, and armor pieces that you already expect to split. Caveat: 256-class printers still require more helmet splitting and orientation compromise than the larger buckets.
The 300 mm enclosed class is where armor work starts to feel less constrained. Prusa’s CORE One L lists 300 × 300 × 330 mm build volume, an actively heated chamber up to 60 °C, a 290 °C nozzle, and a 120 °C bed, with two independent reviews available. [S14] [S28] [S29] For cosplay buyers who want a more controlled enclosure and more thermal headroom than a basic open-frame machine, this is an evidence-qualified step up. Caveat: even at 300 × 300 mm X/Y, many full helmets still need careful orientation or planned part splitting.
The 350 mm enclosed class is where one-piece helmets become more plausible, but still not guaranteed. Creality’s K2 Plus is the class-defining official example here, listing 350 × 350 × 350 mm build volume, 600 mm/s maximum print speed, 30,000 mm/s² acceleration, a 350 °C nozzle, a 120 °C bed, a 60 °C chamber, and 35 kg net weight. [S15] For cosplay, that is attractive because larger armor panels and bulkier helmets become easier to place without awkward cuts. Caveat: 350-class does not mean “never split,” and a 35 kg enclosed machine asks for real space and a sturdy surface.
The 420 mm open large-format class is the closest consumer printers get to a one-piece-first cosplay workflow. Anycubic’s Kobra 3 Max Combo lists 420 × 420 × 500 mm build volume, 300 mm/s recommended speed, 600 mm/s maximum speed, 10,000 mm/s² acceleration, a 300 °C nozzle, and a 90 °C bed, and it has an independent hands-on review. [S16] [S30] Elegoo’s Neptune 4 Max is another evidence-qualified big-bed option at 420 × 420 × 480 mm with 500 mm/s maximum speed and a 300 °C nozzle, backed by independent review coverage. [S17] [S31] [S32] These machines fit the large format 3d printer for props category well. Caveat for the Kobra 3 Max: the footprint is huge and the open frame plus 90 °C bed ceiling make hotter material workflows less forgiving. Caveat for the Neptune 4 Max: open-frame printing can work for ABS or ASA on paper, but convenience and warp resistance are much less predictable than on a well-enclosed machine. [S16] [S17]
A few adjacent fits deserve separate mention. Bambu Lab’s A2L is an open-frame large-format example with 330 × 320 × 325 mm build volume, 80 °C maximum bed temperature, 300 °C maximum nozzle temperature, 500 mm/s stated speed, 12.8 kg weight, and independent review coverage. [S10] [S26] Caveat: the size is appealing for PLA and PETG cosplay parts, but the open-frame design and 80 °C bed limit make it less natural for hotter armor materials. Bambu’s H2D is more nuanced: official specs list 325 × 320 × 325 mm in single-nozzle mode, 300 × 320 × 325 mm in dual-nozzle mode, and 350 × 320 × 325 mm as the total two-nozzle volume, and an independent review specifically flags how awkward that can be in practice. [S12] [S13] Caveat: do not read the “350 mm” figure as one seamless dual-nozzle workspace. QIDI’s Plus 4 is an evidence-qualified hot enclosed option at 305 × 305 × 280 mm, with chamber temperature up to 65 °C, print-head temperature up to 370 °C, bed temperature up to 120 °C, 600 mm/s maximum speed, and acceleration up to 20,000 mm/s². [S18] [S33] Caveat: it is materially capable, but its X/Y footprint is still smaller than 350-class and 420-class cosplay machines. Raise3D’s Pro3 Plus remains relevant if very tall parts or dual-extrusion workflows matter, with 300 × 300 × 605 mm single-extruder volume and 255 × 300 × 605 mm dual-extruder volume. [S19] Caveat: that dual mode cuts usable X enough to matter for cosplay layouts.
Build volume vs usable volume: how to split parts on purpose
Nominal build volume is the box size on the spec sheet. Usable volume is the smaller space you actually get once you account for edge margins, purge motion, toolhead limits, dual-nozzle overlap, and the orientation the part needs for strength or supports. That difference matters because a helmet or chest plate can fit on paper and still fail after rotation in the slicer. Bambu’s H2D is a clear example because its single-nozzle, dual-nozzle, and total-volume numbers are different. [S12] Raise3D’s Pro3 Plus shows the same idea in tall-printer form, with dual extrusion cutting usable X from 300 mm to 255 mm. [S19]
When a part does not fit, planned part splitting is often the better workflow, not a defeat. Material extrusion is anisotropic, so seam location and print orientation both affect final strength. NIST IR 8059 cites raster-angle effects with modulus reductions of roughly 11% to 37%, which is why hidden seams are also mechanical decisions. [S03] For helmets, seams can hide along visor lines, trim breaks, or vent bands. For chest plates, split along natural panel lines or under raised details. For long props, break the model where the geometry already suggests it, such as hilt to blade or barrel to receiver. PrusaSlicer’s cut tool is useful here because it supports Plug, Dowel, Snap, and dovetail mode for alignment planning. [S09]
- Orient the model for strength first, not just for slicer convenience.
- Split at hidden seams or natural panel boundaries.
- Add alignment features so the sections self-register.
- Reinforce joints that will see real handling loads.
- Test-fit before final adhesive work.
- Glue the sections.
- Fill the seam.
- Sand until the surface reads as one part.
Speed claims vs real cosplay throughput (overnight helmets, multi-day armor)
Printer speed claims need plain-language decoding. Max toolhead speed is how fast the motion system may move under some conditions. Acceleration is how quickly it gets up to that speed. Volumetric flow is how much melted plastic the hotend can actually push. Layer height and nozzle size change how much material each pass deposits. Supports, cooling, and sharp geometry force slowdowns. Because all of those interact, the buyer metric that matters most is the slicer’s estimated time for your real helmet, armor plate, or prop file, not a headline “500 mm/s” or “600 mm/s” number. [S11] [S15] [S16]
That is why large beds do not automatically create short print times. A bigger plate can reduce the need for part splitting, but a helmet is still a large shell with long perimeter paths, support decisions, and many repeated layers, and big armor parts can easily become multi-day jobs. A large format 3d printer for props helps mainly by letting you print fewer separate pieces, not by changing the geometry limits of the process.
The official specs illustrate the gap between motion capability and real throughput. Anycubic separates 300 mm/s recommended speed from 600 mm/s maximum speed on the Kobra 3 Max, with acceleration up to 10,000 mm/s². [S16] Creality’s K2 Plus advertises 600 mm/s and 30,000 mm/s². [S15] Bambu’s P1S lists 500 mm/s maximum toolhead speed. [S11] Those figures describe what the motion system can do, not guaranteed cosplay productivity. Independent review coverage of the Kobra 3 Max is useful here because it grounds expectations in actual large-format use rather than a single speed headline. [S30] Do not rank cosplay printers by maximum mm/s alone.
Materials for cosplay: choose by heat, wear, and finishing workload
For cosplay props and cosplay armor, material choice is usually a balance between heat exposure, impact and scuff resistance, and how much finishing labor you can tolerate. Indoor display parts can favor easy printing and easier sanding. Convention-worn armor usually needs a better compromise between stiffness and toughness. Anything that may live in a hot car trunk or under summer sun needs more thermal margin. Flexible trim and straps belong to a different material family than rigid shells. Fine detail accessories may justify a resin or detail-first filament workflow. Orientation still matters regardless of the spool label, because NIST’s cited raster-angle evidence shows that print direction can materially change behavior. [S03]
One label warning matters here: PLA+ and PLA Pro are not standardized terms unless they are tied to a named technical data sheet. Properties should be treated as brand-specific unless the manufacturer publishes actual test data. Polymaker’s PolyLite PLA Pro, for example, lists heat deflection temperatures of 59 °C at 0.45 MPa and 58 °C at 1.8 MPa under ISO 75 conditions. [S24] That does not make every “PLA Pro” spool equivalent. For hotter use cases, Prusa’s ASA guide is a better named example, stating temperature resistance up to 93 °C with recommended printing around 260 °C nozzle temperature and 105 °C first-layer / 110 °C other-layer bed temperatures. [S23] That does not make every ASA identical either, but it shows why material choice for cosplay should be condition-based, not branding-based.
- Indoor display props: PLA or PLA-like materials are usually the easiest starting point if the part will live indoors and away from heat. [S24]
- Convention wear: tougher PLA-family products or ASA can make sense depending on your enclosure, environment, and tolerance for finishing work. Orientation and seam planning still matter as much as the material name. [S03]
- Hot car trunk or summer outdoor use: ASA-type materials are a safer starting point because they are built around higher thermal margin than typical PLA-family materials. [S23] [S24]
- Flexible trim and straps: use flexible filaments where bend and comfort matter more than a crisp painted shell.
- Fine detail accessories: resin or smaller-detail filament setups can reduce visible cleanup on tiny parts, but the extra wash, cure, and handling burden should earn its place. [S20] [S22]
- Durability note: a “stronger” filament label cannot rescue poor seam placement or weak layer orientation. [S03]
Post-processing reality check (where the surface finish really comes from)
Large cosplay prints are usually finished, not simply removed from the bed and painted. The visible result comes from the workflow after printing as much as from the machine itself. ISO/ASTM 52902 is a useful guardrail here because it treats geometric capability as measurement-dependent; in plain terms, dimensional fit and visual smoothness are not the same thing. [S02]
For split parts, the first half of the chain is mechanical: support removal → assembly → seam work → filler → sanding. If the model was cut intentionally, the connector plan can make assembly much easier, and PrusaSlicer’s cut workflow is relevant because it provides connector types built for part-to-part alignment. [S09] In practice, the best seam is one that is both visually easy to hide and mechanically easy to reinforce.
Then comes the cosmetic half: filler primer → paint → clear. Filler primer reveals low spots and print texture, sanding levels them, paint makes flaws more obvious, and clear only looks good when the shape underneath is already clean. Smaller layer height or a smaller nozzle can reduce sanding time, but they do not automatically make a part more accurate or more likely to fit. Fit comes from orientation, slicer decisions, repeatability, and machine behavior; finish comes from the post-processing chain that follows. [S02]
Safety & workspace: what’s acceptable at home
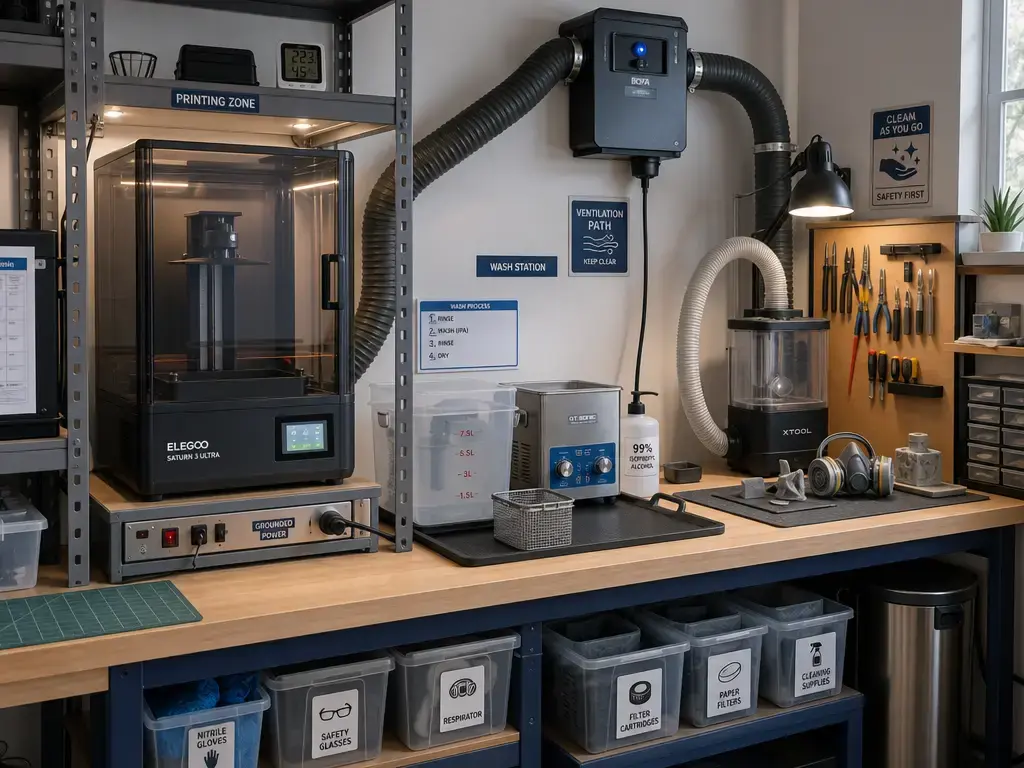
For routine cosplay 3d printing, the first question is not just noise or smell. NIOSH describes desktop 3D printing as a workflow that can involve ultrafine particles smaller than 100 nanometers, chemicals or solvents, heat, moving parts, and lasers during maintenance on some systems. [S04] It also publishes a 40-page guide, publication 2024-103, for schools, libraries, makerspaces, and small businesses, and the same control logic maps well to home workshops. [S05] In practical terms, that means bedrooms, closets, and poorly ventilated corners are poor places for routine printing. Put the machine in a dedicated work area with airflow, stable power, and clear space around hot and moving parts.
Hotter filament workflows deserve extra caution. ABS- and ASA-class printing may be attractive for more heat-tolerant props, but higher temperatures and longer print times raise the bar for enclosure control, ventilation, and unattended-print judgment. One 2022 review reported median particle emission rates of 2.2 × 10^10 particles/min for ABS, 6.0 × 10^8 particles/min for PLA, and 3.9 × 10^9 particles/min for other filaments, which is useful as ventilation context but not as a safe-versus-unsafe ranking by itself. [S25] CPSC’s voluntary-standards page also points to UL 2904, and the UL document includes a test condition using a printer configuration that allows a four-hour printing time while extruding feedstock. [S07] [S08] The takeaway is practical: place hotter workflows farther from living and sleeping space, manage airflow deliberately, and be more conservative about leaving long jobs unattended.
Resin adds a different burden. NIOSH says vat photopolymerization can release uncured resin particles and gases, and solvent cleaning such as IPA handling adds its own hazards. [S06] Formlabs’ safety guidance calls for nitrile or neoprene gloves, eye protection, protective clothing, and avoidance of closed, unventilated spaces, while also stressing careful solvent handling. [S21] That means a workable home setup needs separate zones for printing, solvent washing, curing, and cleanup. Sanding and finishing extend the exposure chain further: filament dust, cured resin dust, filler dust, and spray-paint overspray all belong in the plan. The practical hierarchy is simple: do not run routine printing in bedrooms or closets, ventilate printing and solvent steps, separate resin washing from general living space, control sanding dust, and store uncured resin and flammable cleanup chemicals like active workshop materials rather than casual craft supplies. [S04] [S05] [S06] [S21]
What changed in 2025–2026 for cosplay printing
For buyers, the recent shift is less about a single breakthrough than about more consumer printers crossing the line from “possible for cosplay” to “practical for larger parts.” Larger beds, more enclosed machines, more heated chambers, and more mature splitting tools all make the buying decision more size-specific than it used to be. [S09]
The clearest examples are in the current size bands. Bambu’s A2L pushes an open consumer machine to 330 × 320 × 325 mm. [S10] Creality’s K2 Plus brings a consumer enclosed 350-class option with a 350 × 350 × 350 mm build volume and a 60 °C chamber. [S15] Anycubic’s Kobra 3 Max and Elegoo’s Neptune 4 Max show that 420-class beds are now realistic shopping targets for large format 3d printer for props use. [S16] [S17] At the same time, multi-tool or dual-nozzle systems make it more important to read the fine print: the H2D’s single-nozzle, dual-nozzle, and total-volume figures are different, and an independent review specifically highlights how confusing that can be in practice. [S12] [S13] On the software side, connector-aware cut tools such as PrusaSlicer’s Plug, Dowel, Snap, and dovetail options mean planned splitting is now a normal buyer-relevant capability rather than an expert-only workaround. [S09]
Choosing the best 3D printer for cosplay (decision framework + update note)
There is no single universal winner for the best 3d printer for cosplay. If your biggest real part fits a 256 mm enclosure, a machine in that class can be enough. If you want more room for helmets or armor plates without moving to a giant footprint, 300 mm and 350 mm enclosed machines are the practical middle ground. If your main goal is fewer seams on large props and larger armor panels, the 420 mm class is where the workflow changes most. The right answer is the printer class that fits the model’s real bounding box, the material you actually plan to use, and the finishing workload you can realistically absorb. [S11] [S14] [S15] [S16]
Updated on: September 5, 2026. Specs, firmware, safety guidance, availability, and prices must be rechecked immediately before publication. That recheck matters because usable volume can differ materially from headline volume on multi-tool systems. Bambu’s H2D changes from 325 × 320 × 325 mm in single-nozzle mode to 300 × 320 × 325 mm in dual-nozzle mode, while Raise3D’s Pro3 Plus drops to 255 × 300 × 605 mm in dual-extruder operation. [S12] [S19]
FAQ
What is the best 3D printer for cosplay props?
There is no single best machine for every prop. A 256-class enclosed printer can handle many smaller parts and accessories, while 300-class and 350-class machines reduce splitting on bulkier pieces. If long prop bodies or very large curved parts are the main goal, 420-class beds are much more forgiving. [S11] [S14] [S15] [S16]
What is the best 3D printer for cosplay armor?
For armor, the best choice is usually the printer class that fits the helmet, chest plate, or shoulder shell with the fewest cuts while still matching your material workflow. Enclosed 300-class or 350-class machines are often the most balanced answer, while larger open 420-class beds reduce seams but ask more from room placement and material control. [S14] [S15] [S16]
Do I need a large format 3D printer for props, or can I split parts?
You can absolutely split parts on purpose, and many experienced builders do. Planned seams are usually better than forced seams. PrusaSlicer’s cut tool supports Plug, Dowel, Snap, and dovetail mode, which helps with alignment and assembly. A large-format printer mainly reduces how often you need to split. [S09]
Is FDM/FFF or resin better for cosplay 3D printing?
FDM/FFF is usually the default for wearable armor and big props because it scales better and is easier to assemble and finish. Resin is better used as a companion workflow for detail parts, masters, and small accessories, but it adds washing, curing, solvent handling, and stricter ventilation needs. [S06] [S21] [S22]
How much build volume do cosplay helmets and chest plates need?
Use the bounding-box method first. Open the real file, read the dimensions in the slicer, then compare them to usable X/Y/Z. In practice, 256-class machines are more split-heavy, 300-class machines are more armor-capable, 350-class machines are more helmet-friendly, and 420-class beds make one-piece jobs more plausible. [S11] [S14] [S15] [S16]
Do dual-nozzle or dual-extruder printers reduce usable build volume?
Yes. That is one of the easiest spec traps to miss. Bambu’s H2D lists 325 × 320 × 325 mm for single-nozzle printing, 300 × 320 × 325 mm for dual-nozzle printing, and 350 × 320 × 325 mm as total two-nozzle volume, which is not one seamless workspace. Raise3D’s Pro3 Plus also drops to 255 × 300 × 605 mm in dual-extruder mode. [S12] [S19]
How do I evaluate accuracy vs resolution when I need parts to fit?
Do not use layer height as a stand-in for fit. ISO/ASTM 52902 treats geometric capability as benchmark- and measurement-dependent, so accuracy, repeatability, resolution, and surface finish should be judged separately. The practical test is whether the actual part dimensions, seam plan, and repeatability produce an assembly that fits. [S02]
Sources
- S01 — ISO. ISO/ASTM 52900:2021 — Additive manufacturing — General principles — Fundamentals and vocabulary. Accessed September 5, 2026. https://www.iso.org/standard/74514.html
- S02 — ISO. ISO/ASTM 52902:2023 — Test artefacts — Geometric capability assessment. Accessed September 5, 2026. https://www.iso.org/standard/79683.html
- S03 — NIST. NIST IR 8059 — Materials Testing Standards for Additive Manufacturing of Polymer Materials. Accessed September 5, 2026. https://nvlpubs.nist.gov/nistpubs/ir/2015/NIST.IR.8059.pdf
- S04 — CDC/NIOSH. Safe 3D Printing is for Everyone, Everywhere. Accessed September 5, 2026. https://www.cdc.gov/niosh/bulletin/2024/safe-3d-printing.html
- S05 — CDC/NIOSH. Approaches to Safe 3D Printing: A Guide for Makerspace Users, Schools, Libraries, and Small Businesses. Accessed September 5, 2026. https://www.cdc.gov/niosh/docs/2024-103/pdfs/2024-103.pdf
- S06 — CDC/NIOSH. Safe Desktop Vat Photopolymerization 3-D Printing. Accessed September 5, 2026. https://www.cdc.gov/niosh/media/pdfs/2025/01/Safe-3D-Printing.pdf
- S07 — U.S. CPSC. Additive Manufacturing/3D Printing — Voluntary Standards. Accessed September 5, 2026. https://www.cpsc.gov/Regulations-Laws–Standards/Voluntary-Standards/Additive-Manufacturing-3D-Printing
- S08 — UL. ANSI/CAN/UL 2904 (1st Edition). Accessed September 5, 2026. https://chemicalinsights.ul.org/wp-content/uploads/2022/12/ANSI-UL-2904_1_en.pdf
- S09 — Prusa Knowledge Base. Cut tool. Accessed September 5, 2026. https://help.prusa3d.com/article/cut-tool_1779
- S10 — Bambu Lab. Bambu Lab A2L — Technical Specifications. Accessed September 5, 2026. https://bambulab.com/en/a2l/specs
- S11 — Bambu Lab USA Store. Bambu Lab P1S product page and specifications. Accessed September 5, 2026. https://us.store.bambulab.com/products/p1s
- S12 — Bambu Lab USA Store. Bambu Lab H2D product page and specifications. Accessed September 5, 2026. https://us.store.bambulab.com/products/h2d
- S13 — Tom’s Hardware. Bambu Lab H2D review. Accessed September 5, 2026. https://www.tomshardware.com/3d-printing/bambu-lab-h2d-review
- S14 — Prusa. CORE One L official product and specifications page. Accessed September 5, 2026. https://www.prusa3d.com/p/core-one-l/
- S15 — Creality. K2 Series 3D Printers — K2 Plus specifications. Accessed September 5, 2026. https://www.creality.com/products/k2-series
- S16 — Anycubic Store. Kobra 3 Max Combo specifications. Accessed September 5, 2026. https://store.anycubic.com/products/kobra-3-max-combo
- S17 — Elegoo. Neptune 4 Max product page and specifications. Accessed September 5, 2026. https://www.elegoo.com/collections/fdm-printers/products/neptune-4-max-fdm-3d-printer
- S18 — QIDI Tech. QIDI Plus 4 technical specifications. Accessed September 5, 2026. https://qidi3d.com/pages/qidi-plus-4-techspecs
- S19 — Raise3D. Pro3 Plus product page and build volume specifications. Accessed September 5, 2026. https://www.raise3d.com/products/raise3d-pro3-plus-3d-printer/
- S20 — Anycubic Store. Photon Mono M7 Max specifications. Accessed September 5, 2026. https://store.anycubic.com/products/photon-mono-m7-max
- S21 — Formlabs. Safety with Formlabs SLA products. Accessed September 5, 2026. https://formlabs.com/support/Safety-Formlabs-SLA-printers
- S22 — Formlabs. What post-processing is required? Accessed September 5, 2026. https://formlabs.com/support/What-post-processing-is-required
- S23 — Prusa Knowledge Base. ASA. Accessed September 5, 2026. https://help.prusa3d.com/article/asa_1809?product=mmu1
- S24 — Polymaker. PolyLite PLA Pro — product page and spec table. Accessed September 5, 2026. https://shop.polymaker.com/products/polylite-pla-pro
- S25 — Building and Environment. A review of emission characteristics and control strategies for particles emitted from 3D fused deposition modeling (FDM) printing. Accessed September 5, 2026. https://www.sciencedirect.com/science/article/pii/S0360132322005819
- S26 — TechRadar. Bambu Lab A2L review. Accessed September 5, 2026. https://www.techradar.com/pro/bambu-lab-a2l-3d-printer-review
- S27 — Tom’s Hardware. Bambu Lab P1S review. Accessed September 5, 2026. https://www.tomshardware.com/reviews/bambu-lab-p1s
- S28 — Tom’s Hardware. Prusa CORE One L 3D printer review. Accessed September 5, 2026. https://www.tomshardware.com/3d-printing/prusa-core-one-l-3d-printer-review
- S29 — TechRadar. Original Prusa Core One L review. Accessed September 5, 2026. https://www.techradar.com/pro/original-prusa-core-one-l-3d-printer-review
- S30 — Tom’s Hardware. Anycubic Kobra 3 Max Combo review. Accessed September 5, 2026. https://www.tomshardware.com/3d-printing/anycubic-kobra-3-max-combo-review
- S31 — Tom’s Hardware. Elegoo Neptune 4 Max review. Accessed September 5, 2026. https://www.tomshardware.com/3d-printing/elegoo-neptune-4-max-review
- S32 — TechRadar. Elegoo Neptune 4 Max review. Accessed September 5, 2026. https://www.techradar.com/pro/elegoo-neptune-4-max-review
- S33 — 3DPrint.com. Qidi Plus 4 3D Printer Review: Hotter Than The Competition? Is it Safe? Accessed September 5, 2026. https://3dprint.com/313877/qidi-plus-4-3d-printer-review-hotter-than-the-competition-is-it-safe/