
Summary: What Makes the Best Table for a 3D Printer?
A table for 3d printer use is best when it is rigid, does not rack, fits the printer’s real working footprint, and is comfortable to work around, not simply when it is heavy. A good 3D printer table should support the machine without wobble, stay level on the floor, and leave room for loading, maintenance, and cable or spool movement. For fast printers such as the Bambu Lab A1, listed at 500 mm/s maximum toolhead speed and 10,000 mm/s² maximum toolhead acceleration, firm support matters because the machine can excite a weak desk even at modest mass. [10]
Here, stability means resistance to tipping, rocking, or creeping, while rigidity means resistance to bending, twisting, and racking. Reducing vibration or noise transmitted into the furniture, floor, or walls is also not the same as reducing ringing on the printed part: Klipper describes ringing, echoing, ghosting, or rippling as a surface defect caused by mechanical vibrations from quick direction changes, and input shaping is meant to reduce that printer-dynamics problem. [15] In practice, the best support is usually a stiff, non-racking table with sensible height and enough mass or damping to limit shake, rather than a surface that is merely heavy. [10] [15]
Quick Chooser: Match the Table to Your Printer Type and Your Goal
If you are asking what is the best table for a 3d printer, the answer depends on the problem you are trying to solve. A compact printer can work well on a modest desk if the structure is rigid and level. A fast bedslinger benefits more from anti-racking structure and footprint. A taller enclosed machine needs better load planning and clearance. A resin setup needs a stable, level, easy-to-clean surface with room for handling and consumables. Manufacturer numbers are useful examples, not universal thresholds: the Bambu Lab A1 is listed at 8.3 kg with up to 10,000 mm/s² acceleration, while UltiMaker’s S8 guidance says the support surface must be suitable for a total printer-plus-material load of about 35 kg. [10] [14]
| Printer type / setup | Primary risk | Table priority | Good first move |
|---|---|---|---|
| FFF bedslinger (fast travel, moving bed) | Furniture shake, resonance, tipping on narrow stands | Rigidity, anti-racking, footprint | Lower and widen the stand; brace against racking; consider a mass base plus isolation only if noise transmission is the issue |
| CoreXY / enclosed filament | Taller mass, transmitted noise, calibration sensitivity | Rigid, level surface with adequate load rating | Use a solid bench or cabinet base; avoid tall shelving; keep center of gravity low |
| Resin/MSLA desktop | Spills, leveling, handling space | Level, stable, cleanable surface | Use a solid cabinet or bench with a wipeable top and organized accessory space |
| Heavy prosumer + accessories | Total station load, clearance, lifting | Load rating, space, stability | Verify rated capacity, plan rear and side clearance, and avoid flimsy desks |
The best choice matches the printer’s motion, mass, and workspace needs. For a compact open-frame machine, a rigid desk may be enough. For a high-speed bedslinger, a heavier, better-braced stand usually works better. For a printer that already has a stiff frame but is bothering the room with noise, a damped or isolated base may help, provided the underlying furniture is already stiff enough.
Why Terminology and Problem Framing Matter
Additive manufacturing vocabulary is standardized for a reason. ISO/ASTM 52900:2021, Edition 2, was published in 2021-11, is 28 pages long, and was confirmed in 2025. [1] In a workstation article like this one, the value of that standard is discipline: use printer type and process language carefully, and do not confuse a furniture problem with a process-control problem.
That distinction keeps the diagnosis clear. A support problem shows up as wobble, racking, rocking, poor leveling, or lack of space. A printer-dynamics problem shows up as resonance-related motion during printing and can appear as ringing or similar artifacts. Both matter, but they are not the same mechanism and should not be treated as if one fix automatically solves the other.
Stability First: Rigidity, Racking, Footprint, and Tipping
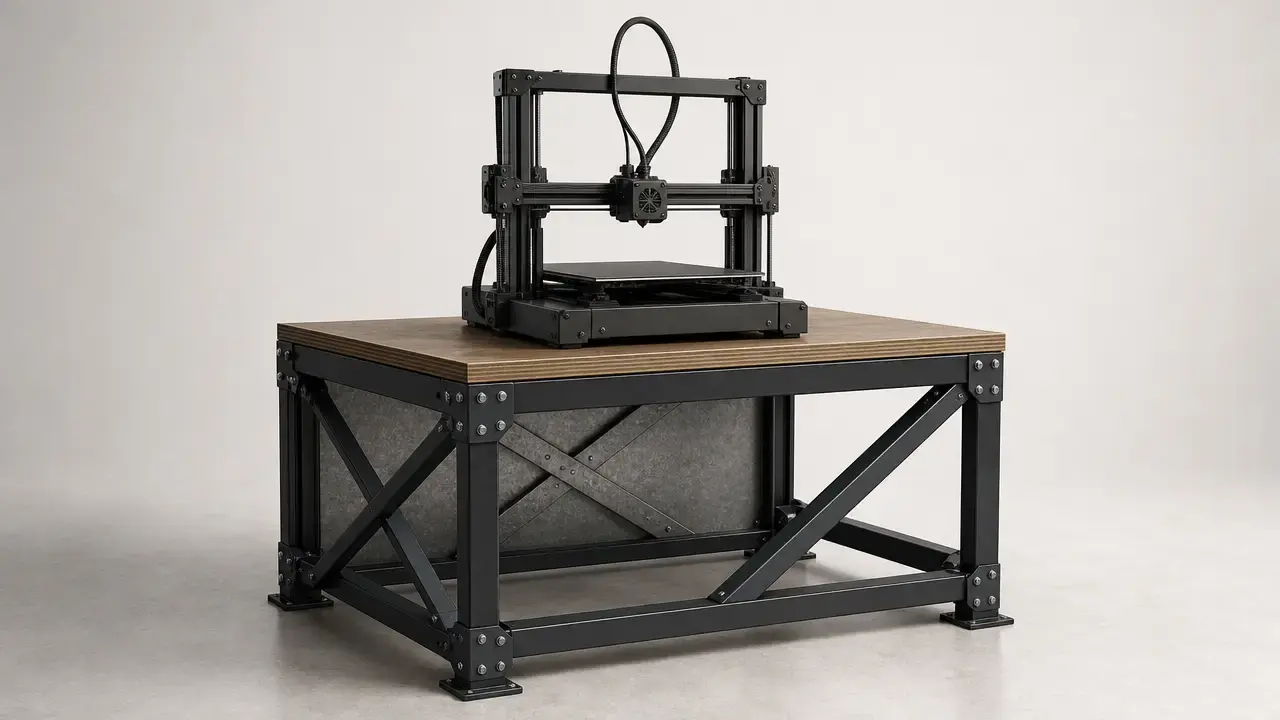
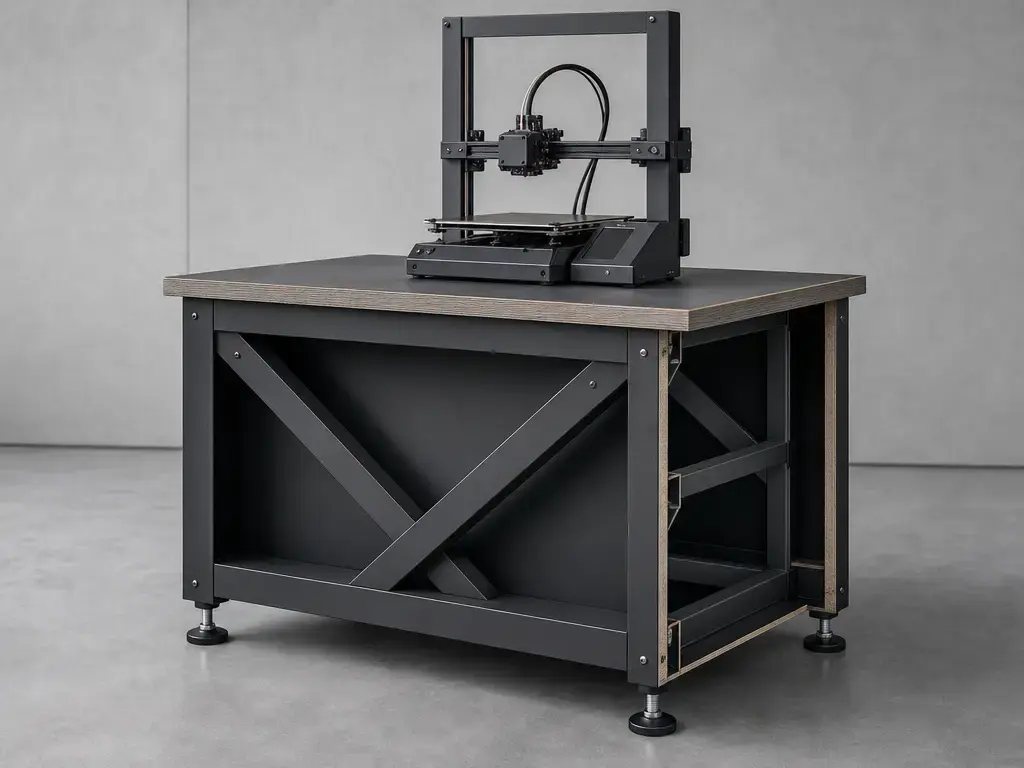
A thick top is not automatically a good table for 3D printer use if the base flexes, twists, or rocks. What matters first is the whole structure: a wide stance, resistance to racking, and a load path that carries printer weight into the floor without noticeable sway. USDA Forest Products Laboratory guidance notes that diagonal braces closer to 45° provide greater racking resistance. [3] That is why a braced cabinet or bench often outperforms a heavier but underbuilt tabletop. No reliable figure was found for a universal maximum allowable wobble, tabletop deflection, or acceleration-transfer threshold for desktop 3D printers in the standards and setup documents cited here.
- Stability — resistance to tipping, rocking, or creeping as the printer moves.
- Rigidity — resistance to bending, twisting, and racking in the support itself.
- Footprint / overturning — the base area that helps keep the center of gravity inside the support polygon.
- Level support vs. bed leveling — a level table is the boundary condition; the printer’s bed-leveling system is a separate compensation step.
A practical check starts with the stand, not the slicer. If the base can be nudged side to side, it will likely move under acceleration too. If the legs or side panels rack easily, adding printer mass will not cure that weakness. A broader footprint and a lower center of gravity improve resistance to tipping, especially on tall shelves or narrow carts. Leveling feet can help the furniture sit flat on an uneven floor, but they do not replace the printer’s own bed or gantry calibration.
Stability checklist
- No visible wobble when the empty support is pushed lightly from the side.
- Braced legs, cross-bracing, or a shear panel to resist racking.
- Enough depth and width for bed travel, cables, and attachments.
- Published furniture load rating, if available.
- Top sits level and the base contacts the floor properly.
- Heavy items stored low to keep the center of gravity down.
- Support remains stable on the actual floor, not just in theory.
How Much Table Capacity Do You Need? (Non-Fabricated Load Framework)
Start with station load, not package weight. A table for 3d printer use must carry the printer itself plus the items that stay on the station during use: filament or resin, build plates, tools, sidecar accessories, cable management, and any added mass base. Product mass matters because that is what remains on the furniture. Shipping mass matters only for delivery, unboxing, and lifting. Prusa lists the MK4S at 7 kg with overall dimensions of 500 × 550 × 400 mm without spool. Bambu Lab lists the A1 at 8.3 kg and 465 × 410 × 430 mm. Formlabs lists the Form 4 at 18.3 kg with printer dimensions of 39.8 × 36.7 × 55.4 cm. [9] [10] [11]
Station load worksheet
- Printer mass.
- Consumables kept on the station, such as spools or resin.
- Add-ons and peripherals, such as a material station, enclosure accessories, or a paver/tile mass base.
- Tools or post-processing items that live on the same surface.
- Published furniture load rating, if available.
Formlabs also separates Form 4 shipment weight from product weight: the printer ships at 22.6 kg, but the product itself is 18.3 kg. [12] [13] UltiMaker’s S8 guidance is a useful heavier example: the support surface must be flat, level, and strong enough for about 35 kg including materials, and a Material Station adds 22 kg if used. [14] If a furniture maker does not publish a load rating, no reliable figure was found for that item from the source set here, so conservative selection is wiser than guesswork. Dynamic forces matter too, but mainly as a rigidity and racking problem rather than extra vertical weight: a table may easily hold the load and still move too much when the printer changes direction.
Vibration and Resonance: What Problem Are You Solving?
When people talk about 3d printer vibration damping, they often combine two different goals. Outcome 1: less vibration and noise transmitted into the desk, floor, or walls. Outcome 2: fewer print artifacts such as ringing or ghosting on the part itself. Table changes often help the first outcome. They do not automatically solve the second. Klipper defines ringing, echoing, ghosting, or rippling as a surface defect caused by mechanical vibrations from quick direction changes, and input shaping is meant to reduce that printer-motion effect. [15]
This matters because even a light machine can excite weak furniture. The Bambu Lab A1 is listed at 10,000 mm/s² maximum toolhead acceleration, enough to make a flexible desk respond even though the printer’s net weight is only 8.3 kg. [10] A better support can reduce transmitted motion and room noise, but it should not be treated as a guarantee of improved dimensional accuracy. Independent research does support the idea that vibration signals are relevant to print-quality monitoring: one peer-reviewed study used build-plate and extruder/table vibration data to predict surface roughness in fused deposition modelling. [17] The useful takeaway is limited but important: table interventions often target transmission into the environment, while input shaping or resonance compensation targets the printer’s own dynamic response.
Rigidity vs Mass Loading vs Damping vs Isolation (Don’t Treat Them as Interchangeable)
These are related but not interchangeable. Rigidity makes the support less likely to flex or rack. Mass loading adds inertia so the assembly is harder to move. Damping turns some vibrational energy into heat. Isolation tries to reduce transmission between the printer and what it sits on. A support can benefit from more than one of these, but one method does not replace another.
| Method | What it changes physically | Helps most with | What it does not fix |
|---|---|---|---|
| Rigidity | Reduces flex and racking in the structure | Wobble, sway, desk motion | Printer resonance by itself |
| Mass loading | Increases inertia of the base | Small disturbances, felt vibration | A weak frame that twists easily |
| Damping | Dissipates some vibrational energy | Noise and some vibration peaks | Large structural motion |
| Isolation | Reduces the transmission path | Desk/floor vibration transfer | Internal printer dynamics |
Snowdon’s NBS Handbook 128 notes that, under stated assumptions, a two-stage system above the secondary resonance can fall as 1/ω⁴, or 24 dB/octave, compared with 12 dB/octave for a simple system. [2] The same source also warns that adding only 0.05 M of mass may be ineffectual at reducing transmissibility much below the unloaded case except at very high frequencies. [2] That is why a symbolic concrete paver on flimsy furniture is not a structural fix: a small added mass cannot substitute for a support that is rigid enough in the first place.
Concrete Paver, Foam Pad, Rubber Feet, or a 3D Printer Anti Vibration Table?
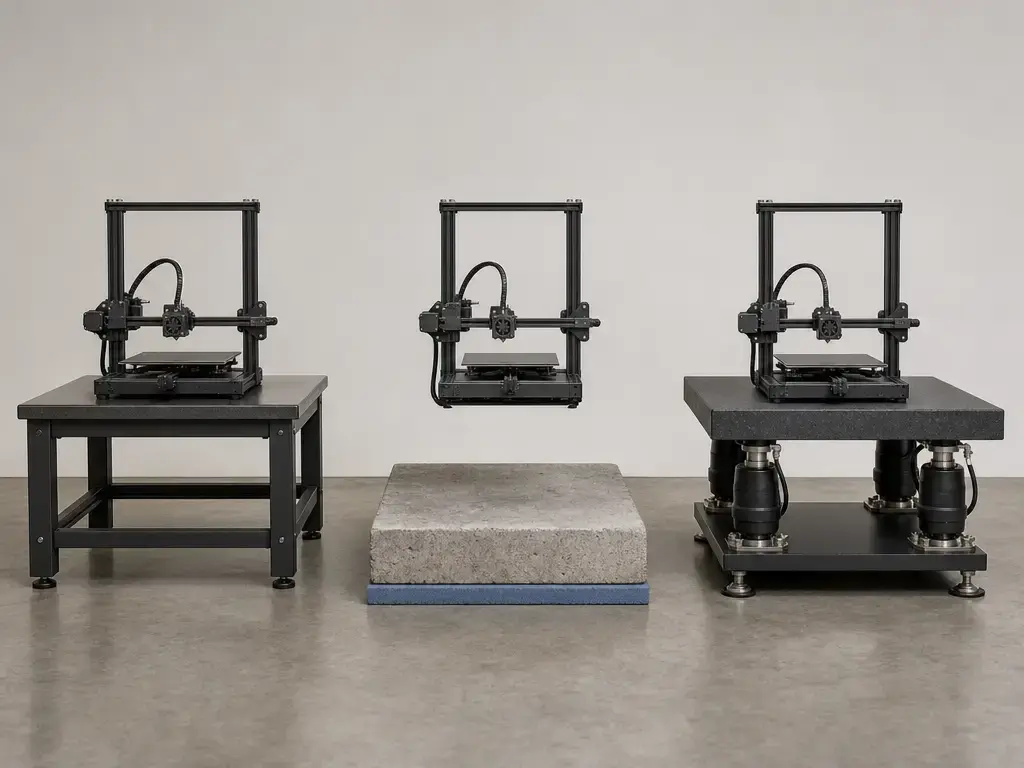
A concrete paver, a foam pad, rubber feet, and a marketed 3d printer anti vibration table do not solve the same problem. Some mainly add mass, some add compliance, some add damping, and some combine several effects. General vibration theory supports mass plus a compliant layer as a transmissibility strategy under the right assumptions, but that is general theory, not a printer-specific guarantee. [2] Structural bracing still matters because an unbraced stand can rack even if the top is heavy, and diagonal bracing near 45° improves racking resistance. [3]
| Option | Best use | Main caution | Evidence level |
|---|---|---|---|
| Heavy rigid workbench / braced stand | General FFF and resin stability | Can still transmit noise; can still rack if poorly braced | Manufacturer guidance plus structural principle [3] |
| Mass base (paver/tile) + compliant layer under it | Reducing transmitted vibration or noise; calming a lightweight top | Added weight; can be ineffective if too small; a soft layer directly under the printer can allow wobble | General vibration theory [2] |
| Manufacturer feet / rubber feet | Convenience and mild isolation | Does not fix table racking, rocking, or tipping | Generic hardware guidance |
| Lab optical isolation table | Sensitive photonics or metrology setups | Cost, size, and over-spec for most desktop printing goals | Optical-table application guidance [19] |
Specialized optical isolation tables are a different class of hardware. Thorlabs describes active optical table supports as isolating in the 3–50 Hz range and positions them for very vibration-sensitive work such as interferometry, holography, and nanopositioning in quiet environments. [19] That is measurement hardware, not a default requirement for consumer desktop printing. For most users, the useful order is simpler: make the furniture rigid first, then add mass, damping, or isolation only if the support is already stiff and the remaining problem is transmission rather than structural weakness.
Best Desk Height for 3D Printer Use (Ergonomics You Can Actually Apply)
There is no single best desk height for 3d printer use that fits every person and every machine. NIH ORS says no specific desktop height is recommended, and light-duty desk work should be approximately at elbow height. [4]
That elbow-height rule is the best starting point. NIOSH says standing workbench height depends on the task: above elbow height for precision work, just below elbow height for light work, and about 4–6 in below elbow height for heavy work. The same source says shelf reach height should not exceed 60 in. [5] A separate NIOSH HHE example gives adjustable standing hand-working heights of 38–47 in, or 42 in if the height is fixed. [6] OSHA’s workstation purchasing guide gives example adjustable ranges of 22–30 in for seated work and 36–46.5 in for standing work, again tied to elbow height, but that is best treated as a secondary example because printer work is not the same as keyboard work. [7] NIOSH also summarizes the rule plainly: most work should be performed at about elbow height. [8]
For 3D printing, pick height in three steps. First, start from your elbow height in the posture you actually use. Second, adjust for task type: loading filament, checking first layers, or resin-vat handling often favor a surface near elbow height; forceful part removal or moving the machine may be more comfortable slightly lower. Third, account for the printer’s own height. A tall enclosed printer on a tall desk can place the screen, spool path, or build area too high even if the desk seems ergonomic on paper.
Types of 3D Printer Tables and Stands: When a 3d printer stand Works, and When It Fails
Office desks usually work for light printers only if the frame is stiff and the top does not bounce under load. Heavy benches usually work better because they bring more structure to resist racking. A metal utility cart can work as a temporary 3d printer stand if the frame is broad enough and the casters lock securely; otherwise it adds motion. Cabinet bases can be good if they are well braced and level, but hollow decorative cabinets often fail the stiffness test. Floor placement can help stability in some cases because it removes a tall support from the system, but it does not automatically solve clearance, dust, or access problems.
Tall narrow shelving is the option most likely to fail. The same racking principle that favors diagonal bracing also means a wide, braced base is safer than a tall, slender one. [3] Clearance matters too: UltiMaker’s S8 guidance gives examples of 20 cm rear clearance for the spool holder and 10 cm for the Air Manager or Material Station exhaust. [14] So “it fits” is not enough; the support must fit the printer and still leave room to use it properly.
Setup Workflow: How to Test a Table for 3D Printer Use
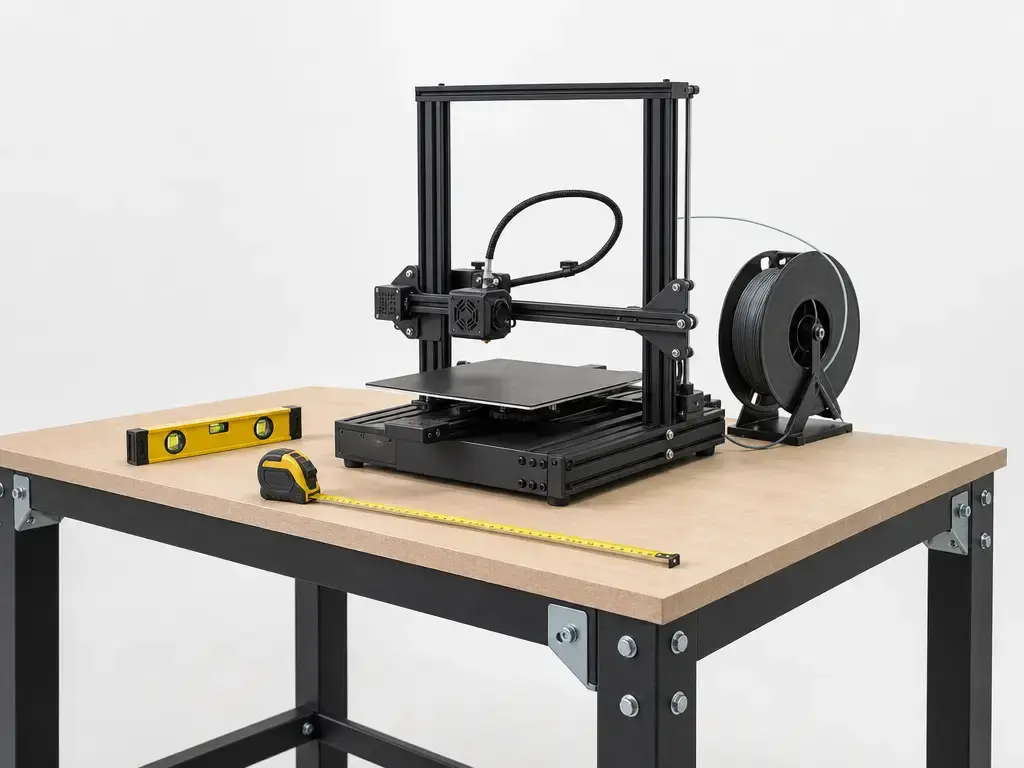
Before changing slicer profiles or firmware settings, test the support itself. A printer’s true footprint is larger than its body because it includes bed travel, rear cables, spool paths, and access space. For example, the Prusa MK4S is listed at 500 × 550 × 400 mm overall without spool, and Formlabs says the Form 4 needs minimum access dimensions of 40.7 × 47.8 × 84.4 cm, which already exceed the printer body. [9] [11] No reliable universal consumer threshold was found for acceptable wobble, dB change, or tabletop deflection in this use case, so the test has to stay comparative and practical.
Setup test sequence
- Measure the true footprint, including bed travel, spool path, and cable bend space.
- Check whether the floor and support sit level.
- Perform a rock-and-rack test on the empty support.
- Check the printer’s center of gravity relative to the support base.
- Run a fast travel move and watch for visible table motion.
- Listen for amplification of noise into the furniture or room.
- Print a ringing test only after the support passes the basic mechanical checks.
- Re-check fasteners, feet, and shelf joints after the first run.
Interpret the result in order. If the stand rocks, racks, creeps, or amplifies motion, fix that first with leveling, bracing, or a better base. If the support is quiet and stable but the print still shows artifacts, the remaining problem is more likely printer dynamics than furniture. A good table removes one variable; it does not replace motion tuning inside the printer.
Do You Need to Recalibrate Input Shaping After Changing Tables?
If your printer and firmware support input shaping or resonance calibration, a change in support stiffness is a sensible time to check it again. OrcaSlicer’s calibration guidance recommends calibrating once a year or after mechanical or structural changes such as relocation or changing the support surface. [16] That is tooling guidance, not a universal requirement for every printer, but the logic is straightforward: if the support change alters measured resonances, the old compensation may no longer match as well. Klipper’s ringing explanation points to the same mechanism by tying the defect to mechanical vibrations from rapid direction changes. [15]
Performance Metrics: What to Observe (and What Not to Overclaim)
Useful checks for a table for 3d printer use are mostly comparative, not absolute. Watch for:
- Visible wobble or sway during fast moves.
- Printer creep over repeated runs.
- Sound-level change measured the same way each time, with the same phone at the same distance.
- Ringing visibility on the same test model.
- First-layer consistency after stability is already fixed.
Do not overclaim what those observations mean. Consumer checks are not standardized metrology, and no reliable figure was found for universal pass/fail thresholds in dB, wobble, or deflection for desktop 3D printer tables. Independent research linking vibration signals to surface-quality monitoring supports the idea that vibration matters, but it does not create a consumer furniture acceptance standard. [17] Treat the metrics as before-and-after comparisons on the same machine, in the same room, with the same print, rather than as universal numbers.
Applications by Printer Type (Where the Recommendations Diverge)
Not every desktop printer asks the same thing from a support. A moving-bed filament printer loads the furniture differently from a tall enclosed unit or a resin workstation, so the best table depends on motion, mass, clearance, and workflow rather than size alone.
For bedslingers, the priority is anti-racking structure and enough footprint for the moving bed. The Bambu Lab A1 is a useful example: it is listed at 8.3 kg, measures 465 × 410 × 430 mm, and is specified at up to 10,000 mm/s² acceleration. [10] Prusa’s MK4S is another open-frame example at 7 kg and 500 × 550 × 400 mm without spool. [9] These machines benefit most from a wide, stable base that does not let the moving mass excite the whole table.
For CoreXY or enclosed filament printers, the table has to manage more height and often more total load, so rating and center of gravity matter more. UltiMaker says the S8 support surface must be strong enough for about 35 kg including materials, and a Material Station adds 22 kg if used. [14] Resin and MSLA printers shift the priority again: the surface should be level, spill-conscious, easy to clean, and large enough for consumables and part handling. Formlabs lists the Form 4 at 18.3 kg with minimum access dimensions of 40.7 × 47.8 × 84.4 cm, so the workspace has to exceed the printer body itself. [11]
Limitations and Common Mistakes
A table can reduce wobble, noise transfer, or some transmitted vibration, but it cannot turn a loose printer frame into a rigid one or replace printer-side tuning. General isolation theory says a compliant layer can reduce transmissibility in some regimes, but it is not interchangeable with rigidity and can introduce unwanted motion if the setup becomes too soft. [2] Shipping weight is also not the same as product weight: for example, Form 4 is 22.6 kg shipped versus 18.3 kg as a product. [13]
Common mistakes include:
- Using tall, narrow shelving.
- Putting soft foam directly under the printer.
- Ignoring bed-travel or cable-clearance needs.
- Stacking heavy spools or accessories high.
- Assuming a paver fixes loose mechanics or a weak stand.
- Mixing shipping weight with operating weight.
- Treating anti-vibration feet as a cure-all.
The main idea is simple: fix structure first, then add damping or isolation only when it addresses the remaining problem.
Conclusion: Choosing the Right Table for a 3D Printer
The best table for a 3D printer is the one that stays rigid, does not rack, fits the machine with room to work, and places the printer at a usable height. Bracing and anti-racking geometry remain central to support behavior, and no single desk-height number fits everyone. [3] [4]
In practice, choose the support first and the slicer second. If the table visibly shakes, racks, shifts, or makes access awkward, fix the support before chasing slicer settings. That usually means a stiffer base, better bracing, sensible footprint, and only then any damping or isolation layer that actually matches the problem.
FAQ
1) What is the best table for a 3D printer?
Usually, it is a rigid, non-racking support with enough footprint for the printer’s full motion and enough height to work comfortably. A heavier table can help, but only if the structure itself is stiff.
2) Do anti vibration tables help 3D printers?
Sometimes, but only for the problem they are meant to solve. They can reduce vibration or noise transmitted into furniture and floors, but they do not automatically fix ringing or poor mechanics inside the printer. Optical isolation tables are aimed at vibration-sensitive photonics or metrology work, not as a default answer for desktop printing. [19]
3) How do I reduce 3D printer vibrations on a table?
Start with the furniture: tighten fasteners, improve bracing, level the base, and keep heavy items low. If the support is already rigid, then added mass, rubber feet, or a compliant layer under a mass base may help with transmission into the room.
4) What is the best desk height for 3D printer use?
There is no single universal number. Elbow height is the anchor principle, then you adjust for the task: light work near elbow height, more forceful work slightly lower, and precision work slightly higher. [4] [5] [8]
5) Can I put a 3D printer on the floor?
Sometimes floor placement helps stability because it removes a tall support from the system. It can also hurt access, increase dust exposure, and make loading, monitoring, or maintenance awkward, so it only makes sense when the workflow still works.
6) Expert: Should I rerun input shaping or resonance compensation after moving the printer or changing the support surface?
If your printer and firmware support it, yes, that is a reasonable check. OrcaSlicer’s guidance treats relocation and support-surface changes as reasons to recalibrate, and the same logic applies when the measured resonances may have shifted. [16] [15]
Sources
- ISO/ASTM 52900:2021 — Additive manufacturing vocabulary (Edition 2) — Standard —
https://www.iso.org/standard/74514.html - NBS Handbook 128 (Snowdon) — Vibration isolation: use and characterization (Issued May 1979) — Official handbook —
https://nvlpubs.nist.gov/nistpubs/Legacy/hb/nbshandbook128.pdf - USDA / Forest Products Laboratory — Agriculture Handbook 252 (racking/diagonal bracing principle) — Official —
https://www.govinfo.gov/content/pkg/GOVPUB-A-PURL-gpo21815/pdf/GOVPUB-A-PURL-gpo21815.pdf - NIH ORS — Ergonomics prevention (desk height ~ elbow height; no single height) — Official —
https://ors.od.nih.gov/sr/ds/healthandwellness/ergonomics/pages/prevention.aspx - NIOSH/CDC — Elements of Ergonomics Programs (Pub. 97-117) (standing bench height logic; reach guidance) — Official —
https://stacks.cdc.gov/view/cdc/11244/cdc_11244_DS1.pdf - NIOSH/CDC — HHE Report 2019-0057-3390 (standing working height range example) — Official —
https://www.cdc.gov/niosh/hhe/reports/pdfs/2019-0057-3390.pdf - OSHA eTool — Computer Workstations purchasing guide (adjustable height examples) — Official —
https://osha.prod.pace.dol.gov/etools/computer-workstations/checklists/purchasing-guide - NIOSH/CDC — Ergonomic interventions in shipyards: Adjustable workstation (elbow-height principle; last reviewed 2012) — Official —
https://archive.cdc.gov/www_cdc_gov/niosh/topics/ergonomics/ergship/adjust.html - Prusa — MK4S product technical parameters (dimensions/mass/build volume) — Manufacturer —
https://www.prusa3d.com/product/original-prusa-mk4s-3d-printer/ - Bambu Lab — A1 technical specifications (dimensions/mass/speed/acceleration) — Manufacturer —
https://bambulab.com/pl/a1/tech-specs - Formlabs — Compare Formlabs 3D printers (Form 4 dimensions/weight/access envelope) — Manufacturer —
https://formlabs.com/global/compare/3d-printers/ - Formlabs — Receiving & unboxing Form 4 (packaged dims/weight; stable level workspace) — Manufacturer —
https://formlabs.com/support/Receiving-and-unboxing-your-Form-4-generation-printer/ - Formlabs — Dimensions & shipping weights of packages (Form 4 shipping vs product weight) — Manufacturer —
https://formlabs.com/support/What-are-the-dimensions-and-shipping-weights-of-the-packages/?language=de - UltiMaker — S8 Installation and user manual (surface, weight, clearance) — Manufacturer —
https://um-support-files.ultimaker.com/manuals/user-manual/S8/EN-UltiMakerS8-V1.4-2025-07.pdf - Klipper documentation — Resonance Compensation (ringing/ghosting explanation) — Primary firmware documentation —
https://www.klipper3d.org/Resonance_Compensation.html - OrcaSlicer wiki — Input shaping calibration (relocation/support changes guidance) — Tooling documentation —
https://github.com/orcaslicer/orcaslicer/wiki/input_shaping_calib - International Journal of Production Research (PDF hosted by UCF) — Surface roughness prediction using vibration signals (DOI: 10.1080/00207543.2018.1505058) — Peer-reviewed —
https://www.mae.ucf.edu/dazhongwu/wp-content/uploads/2019/06/Predictive-Modeling-of-Surface-Roughness-in-Fused-Deposition-Modeling-Using-Data-Fusion.pdf - Penn State PURE record — bibliographic confirmation for IJPR paper (year/issue/pages/DOI) — Academic repository —
https://pure.psu.edu/en/publications/predictive-modelling-of-surface-roughness-in-fused-deposition-mod/ - Thorlabs — Active Vibration Isolation Optical Table Supports (3–50 Hz; interferometry/holography use cases) — Instrumentation manufacturer —
https://www.thorlabs.us/NewGroupPage9.cfm?ObjectGroup_ID=1095