
Summary
E-steps calibration is the firmware motion conversion that tells the extruder E-axis how many stepper steps correspond to a unit of commanded E movement, so it sits at the base of the extrusion stack rather than in slicer tuning. In Marlin, M92 sets steps-per-unit, and G0/G1 can command E motion with F expressed in current units per minute. In practice, the safe order is mechanical check → E-steps or rotation_distance → flow and pressure tuning. [4] [7]
Terminology and where “E-steps” fits in material extrusion
For generic technical writing, “material extrusion” or “FFF” is the cleaner label because it describes the process without tying it to a single company’s mark, even though many users still search for “FDM” when they mean desktop filament printing. In that context, extruder steps are a firmware motion setting, not a material property or a slicer profile parameter. [2]
ISO/ASTM 52900:2021 is a useful terminology anchor. The ISO listing identifies it as Edition 2, published in November 2021 and confirmed in 2025, so it remains a current reference point for additive-manufacturing vocabulary. Stratasys’s legal page separately lists FDM among its trademarks, which is why neutral articles usually prefer generic process language while still acknowledging the term readers commonly search for. [1] [2]
A short, sourced lineage (why Marlin/Klipper terminology differs)
RepRap launched in 2005, and the Darwin machine in the Science Museum Group collection is dated 2007. That helps explain why early hobby printers exposed motion settings so openly. Marlin later became a standalone open-source project on August 12, 2011, after being derived from Sprinter and grbl. Different firmware families grew out of that modifiable culture, so one ecosystem still talks in steps-per-unit while another presents the same mechanical problem as rotation_distance. [23] [3] [14]
E-steps calibration basics (what it is—and what it isn’t)
E-steps calibration corrects the extruder’s steps-per-unit value so commanded filament movement and actual filament movement match as closely as the hardware allows. In Marlin, that setting lives in M92. [4]
In ordinary hobby use, people say “extruder steps per mm calibration,” and that is usually close enough. Marlin’s own documentation is broader: M92 is steps-per-unit, and the unit is only usually millimeters. If inch mode is active, the unit changes, and on SCARA or other rotating axes Marlin can use steps per degree instead of steps per distance. The practical lesson is simple: if base feed distance is wrong, later slicer tuning can appear correct for the wrong reason because flow changes may mask a motion error instead of fixing it. [4]
E-steps is not a general print-quality fix. It does not directly solve ringing, cooling problems, nozzle pressure lag, or a partial clog. It sets the baseline conversion between commanded E motion and motor motion, and that baseline should be correct before you adjust material-specific flow controls or pressure compensation. [4] [15]
Preflight (do this before you measure anything)
Firmware state can invalidate the test before the first extrusion move. Record the current value first with M92 or M503, confirm whether E is in relative or absolute mode, decide how you will handle G92 E0, check whether volumetric extrusion is active, and make sure a flow override is not hiding the real feed distance. Marlin’s docs are explicit that M200 changes E from linear millimeters to cubic millimeters, and M221 applies a flow percentage to all E moves. [4] [6] [8] [9] [10] [11] [12]
- Inspect the extruder first for drive-gear debris, poor idler tension, loose fasteners, and obvious slip or grinding. [25]
- Heat the hotend to an appropriate printing temperature before the default test, because the primary documented workflow is through a ready-to-extrude hotend. [14]
- Record the current setting with
M92or, on older Marlin setups,M503before you change anything. [4] [6] - Confirm whether your toolchain expects
M83relative E orM82absolute E, and plan yourG92 E0reset deliberately rather than hiding it mid-test. [8] [9] [10] - Query
M200if needed, and disable volumetric extrusion withM200 S0when you want plain linear filament-distance testing. [11] - Check
M221and the slicer’s own flow or extrusion-multiplier settings so you do not confuse a proportional override with a motion-conversion error. [12] [20] - Treat
M302only as an advanced diagnostic boundary for special cases such as cold-extrusion testing, not as the default calibration path. [13]
How to do E-steps calibration (primary workflow: heated nozzle, slow extrusion)
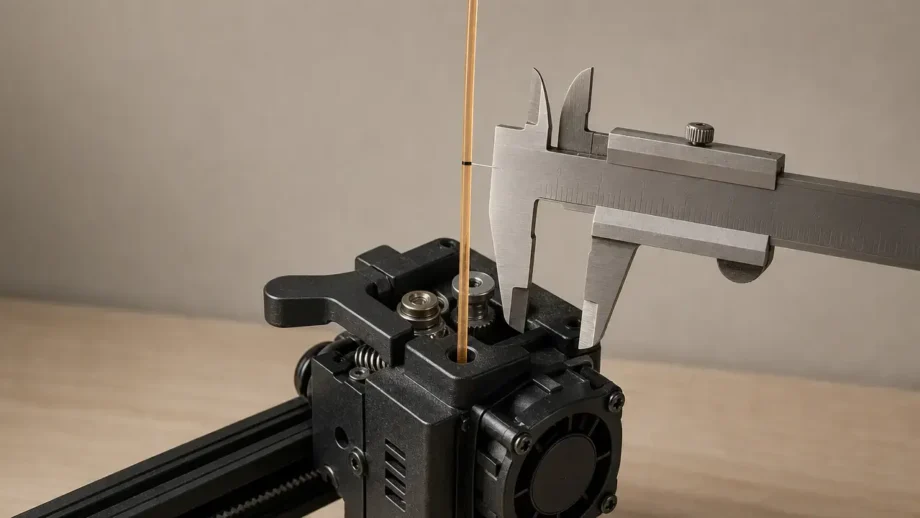
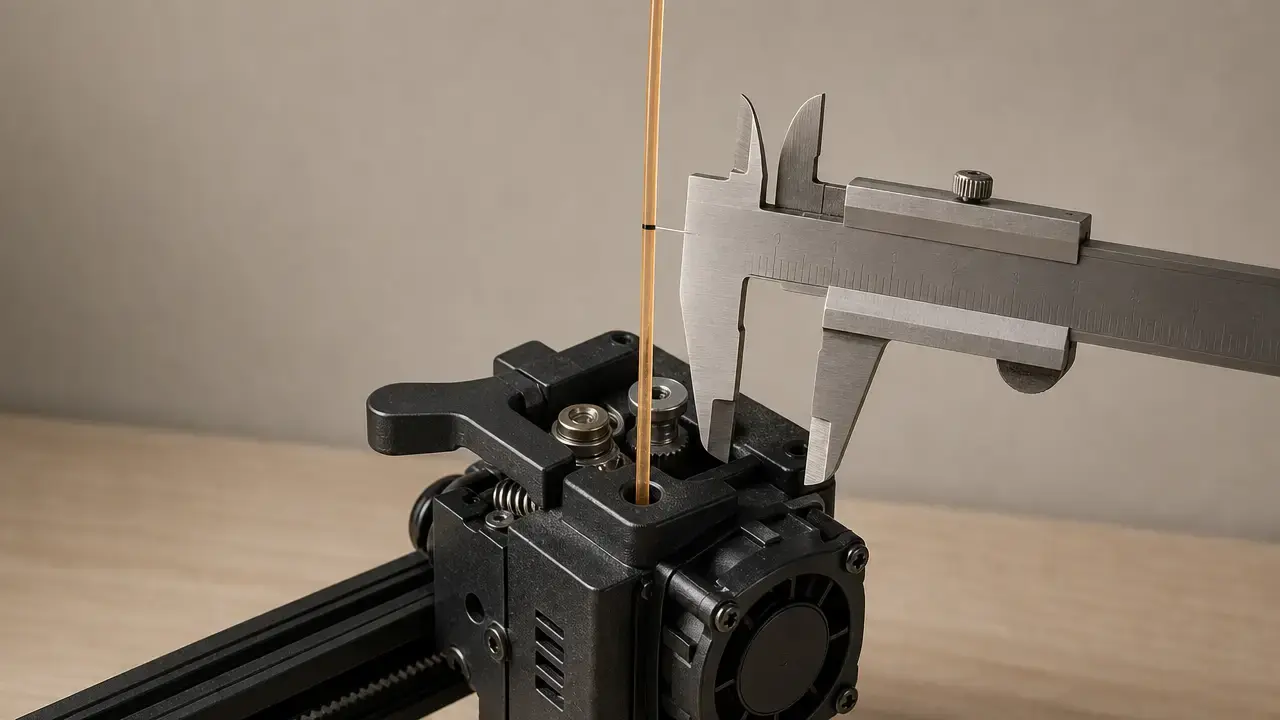
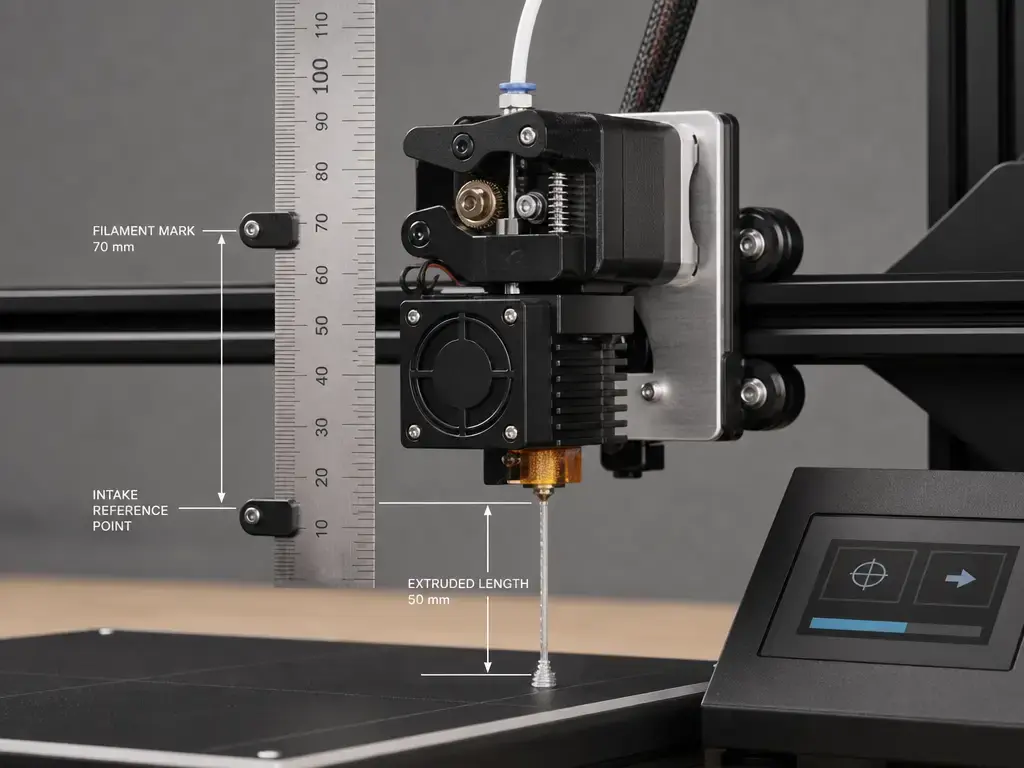
For a first pass at how to do E-steps calibration, use a heated-nozzle, through-hotend test rather than a cold or unloaded feeder test. Klipper’s official extruder procedure uses that setup, asks for a mark around 70 mm from the extruder intake, and specifies a slow 50 mm extrusion with G91 and G1 E50 F60. That slow rate matters because higher extrusion pressure can skew the result. In Marlin terms, F here is still feed rate in current units per minute, so F60 is a deliberate measurement move, not a normal print move. [14] [7]
- Inspect the drive mechanics and clean the hob or drive gear if you see dust, slip marks, or grinding. [25]
- Heat the hotend to the filament’s normal printing temperature. [14]
- Record the current extruder setting first —
M92/M503in Marlin, or the currentrotation_distancevalue in Klipper. [4] [6] [14] - Put E in a known state: in Marlin,
M83is the common safe choice for relative E, andG92 E0resets the extruder position counter. [8] [10] - Mark the filament about 70 mm above a fixed reference at the extruder intake and measure that distance carefully with calipers. [14]
- If you are following Klipper’s documented sequence, use
G91and thenG1 E50 F60for a slow 50 mm extrusion test. [14] - Wait for the move to finish, then measure the new distance from the same reference point to the mark and calculate actual extruded distance from the difference. [14]
- Calculate the corrected value using the Marlin or Klipper formula in the next section instead of guessing. [14] [17]
- Apply the new value — for example,
M92 E...in Marlin or arotation_distanceedit in Klipper. [4] [14] - Repeat the measurement at least once before saving or committing the change. If results are inconsistent, troubleshoot the hardware or method instead of saving bad numbers. Klipper specifically says to repeat if the 50 mm test differs by more than about 2 mm. [14]
- Persist the result where applicable, such as
M500in Marlin. [5] - Verify with readback —
M503in Marlin — and do a confirmatory re-test. [6]
Diagnostic feeder-isolation tests exist, but they are advanced variants, not the main documented workflow here. The official Klipper method is still a heated, through-hotend measurement, and Marlin’s M302 belongs on the diagnostic side of the boundary, not the default side. [14] [13]
How to calculate extruder steps per mm (Marlin) and why the ratio direction matters
If you are wondering how to calculate extruder steps per mm, use proportional correction: keep the current value, compare requested extrusion with actual extrusion, and scale the setting by that ratio. For Marlin, the target is M92, so the usual correction is to multiply the old steps-per-unit value by requested distance divided by actual distance. Klipper uses the inverse abstraction — distance moved per full stepper revolution — so the ratio flips even though the physical goal is the same. If actual extrusion is short, Marlin steps/mm increases while Klipper rotation_distance decreases. [4] [14] [17]
Marlin: newstepspermm = oldstepspermm × (requestedextrudemm / actualextrudemm). [4] [17]
Klipper: newrotationdistance = oldrotationdistance × (actualextrudemm / requestedextrudemm). [14]
Hypothetical example, not a recommended value: if a Marlin printer is set to 93 steps/mm, you request 100 mm, and the printer actually extrudes 97 mm, the corrected value is 93 × (100 / 97), which increases the setting because the measured motion came up short. [4] [17]
Firmware & settings taxonomy (Marlin vs Klipper vs slicer knobs)
A lot of confusion comes from mixing three different layers of control. E-steps or rotation_distance is the static conversion layer that maps commanded E movement to motor motion. Flow controls such as M221 or slicer extrusion multipliers change the amount of material requested after that. Pressure-control tools such as Linear Advance or Pressure Advance try to compensate for transient nozzle-pressure lag during acceleration and deceleration. Those layers are related, but they are not interchangeable. [12] [14] [15] [16] [21]
Some ecosystems expose the higher layer more prominently than the lower one. Prusa describes total flow as firmware flow multiplier times slicer extrusion multiplier, OrcaSlicer defines Flow Ratio as a proportional extrusion control and Pressure Advance as pressure-lag compensation, and Bambu’s P2S manual routes the user to Flow Dynamics and Flow Rate calibration on the Bambu Studio Calibration page rather than centering the process on a user-facing steps/mm setting. If your printer vendor foregrounds those workflows and does not document low-level extruder motion settings, follow the vendor workflow instead of forcing a hidden firmware parameter. [20] [21] [22]
| Setting | Where it lives | What it changes | When to tune |
|---|---|---|---|
E-steps / steps per unit (M92) |
Marlin-style firmware | Static conversion from commanded E movement to motor steps | After extruder drive changes or measured feed-distance error. [4] |
rotation_distance |
Klipper config | Distance per motor revolution | Klipper extruder calibration or hardware changes. [14] |
| Flow / extrusion multiplier | Slicer or firmware (M221) |
Proportional material amount applied to extrusion | Per filament, material, color, or spool, after base motion is correct. [12] [20] [21] |
| Pressure advance / linear advance | Firmware or slicer | Dynamic pressure-lag compensation | Corner blobs, starts/stops, and accel/decel artifacts, not static distance error. [15] [16] [21] |
Performance outcomes (what E-steps can improve—and what it can’t)
A corrected E-steps value improves the baseline accuracy of a controlled extrusion move. That matters because systematic under-feed or over-feed at the motion-conversion layer distorts everything downstream: flow changes look more effective than they really are, material comparisons become less reliable, and later tuning turns into compensation for the wrong problem. Once the mechanical feed distance is right, higher-level controls such as extrusion multiplier or Flow Ratio become easier to interpret in the way Prusa and OrcaSlicer describe them — as proportional, material-facing adjustments rather than fixes for basic drive calibration. [20] [21] [4]
What it does not do is solve every print artifact by itself. Corner bulging, seams, ringing, cooling defects, and pressure-lag behavior can all remain even after the extruder’s base feed distance is correct. [15] [21]
The research literature helps explain why the effect is real but not universal. In one PLA study, the extrusion multiplier was varied from 0.97 to 1.05 and measured porosity fell from 5.82% to 0.05% as the factor increased, but that is a study-specific result rather than a universal hobby target. Another paper emphasizes that the usable process window depends on material, feeding unit, extruder geometry, heating element, nozzle, filament-diameter variation, and feed-wheel wear or deposits. A third study modeled feeding rates of 40, 60, and 80 mm/min and found the lowest pressure drop at 40 mm/min, which helps justify slow measurement moves without turning that number into a rule for every printer. [24] [25] [26]
Uncertainty, repeatability, and “when not to touch E-steps”
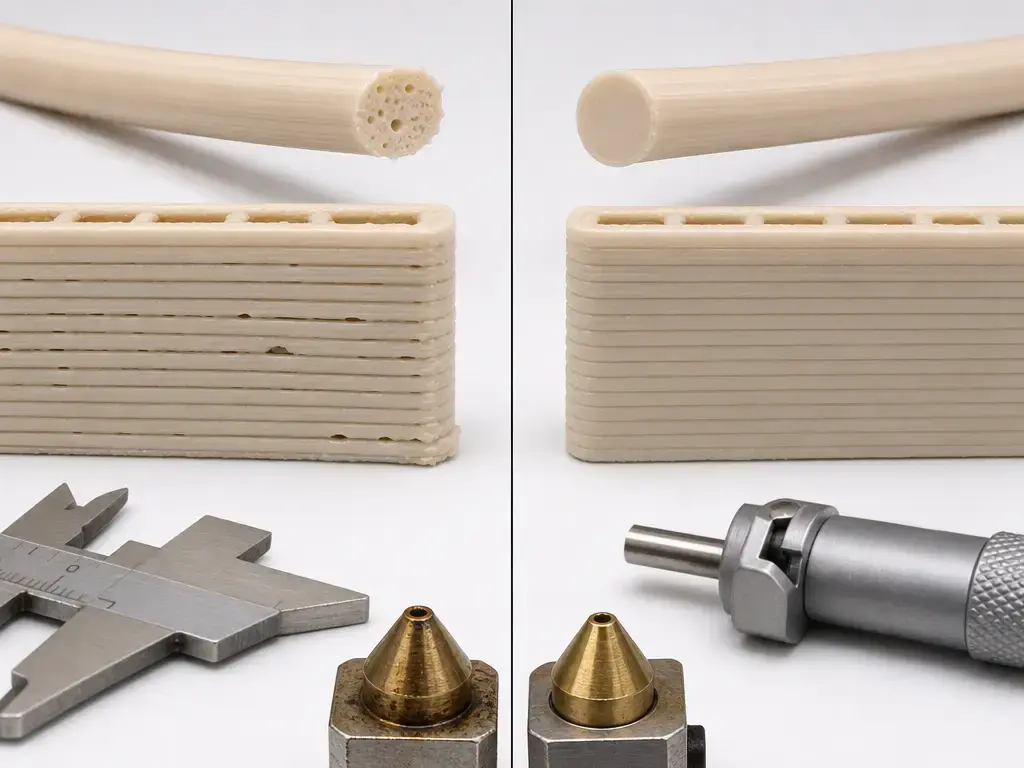
E-steps tuning only makes sense when the measurement is repeatable. Changing reference points between runs, squeezing the filament differently with calipers, measuring on an oval section, testing with a dusty drive wheel, or pushing through a partial clog can create enough variation that a firmware change is the wrong response. Klipper’s guidance is useful here but should stay in Klipper’s lane: if its 50 mm test differs by more than about 2 mm, repeat the procedure rather than trusting the first pass. Outside that specific documented case, no reliable figure was found for a universal hobby threshold, so the better rule is to require at least one repeat measurement and consistent results before saving anything. [14] [25] [21]
- Keep the reference point identical on every run. [14]
- Use the same caliper placement each time, and note filament ovality instead of assuming a perfect round cross-section. [25]
- Check for slip, grinding, dust, and partial-clog symptoms before changing firmware values. [25]
- Repeat the test before updating the setting, and keep the “more than about 2 mm on a 50 mm test” rule tied only to Klipper’s documented procedure. [14]
- If you are trying to fix a filament-specific surface issue, change flow or extrusion multiplier first — not E-steps — because Flow Ratio is proportional output control, while Pressure Advance addresses pressure lag. [20] [21]
Troubleshooting (fast symptom-to-cause guide)
When E-steps calibration seems to fail, check state and persistence before assuming the math is wrong. On Marlin, M500 saves configurable settings to EEPROM, M503 reports active runtime settings, M82 and M83 change how E commands are interpreted, G92 E0 resets the position counter, and M200 can switch E from linear distance to volumetric extrusion. In vendor-managed ecosystems, the visible calibration tool may live in the slicer instead. [5] [6] [8] [9] [10] [11] [22]
| Symptom | Likely cause | Check / fix |
|---|---|---|
| Value reverted after reboot | EEPROM not saved or not writable | Re-enter the value, use M500, and confirm with M503. [5] [6] |
| Measured extrusion is inconsistent between repeats | Slip, partial clog, or measurement error | Clean the gear, inspect the filament path, and repeat the test slowly from the same reference point. [14] [25] |
| Extrusion commands do not match expectations | E absolute/relative confusion or missing G92 E0 |
Confirm M83 vs M82, and reset E position deliberately. [8] [9] [10] |
| Numbers are wildly wrong or nonsensical | Volumetric extrusion is enabled | Check M200, and disable linear/volumetric mismatch with M200 S0 if needed. [11] |
No access to E-steps or rotation_distance |
Appliance-style workflow | Use the vendor’s exposed calibration tools, such as the flow controls documented in Bambu Studio. [22] |
| Extrusion is uniformly high or low but mechanics are consistent | Flow override or slicer flow setting | Check M221 and the slicer’s flow or extrusion multiplier before changing E-steps again. [12] [20] |
Practical applications (when to check E-steps)
E-steps calibration becomes relevant when the mechanical ratio between motor motion and filament motion changes, or when the controller’s step-generation context changes enough that you want to verify the stored value again. Common triggers include extruder swaps, geared retrofits, motor changes, driver or mainboard changes, and microstepping changes. Marlin’s configuration docs also support DISTINCT_E_FACTORS, which means multi-extruder machines may legitimately need separate E values for separate tools. [27] [4]
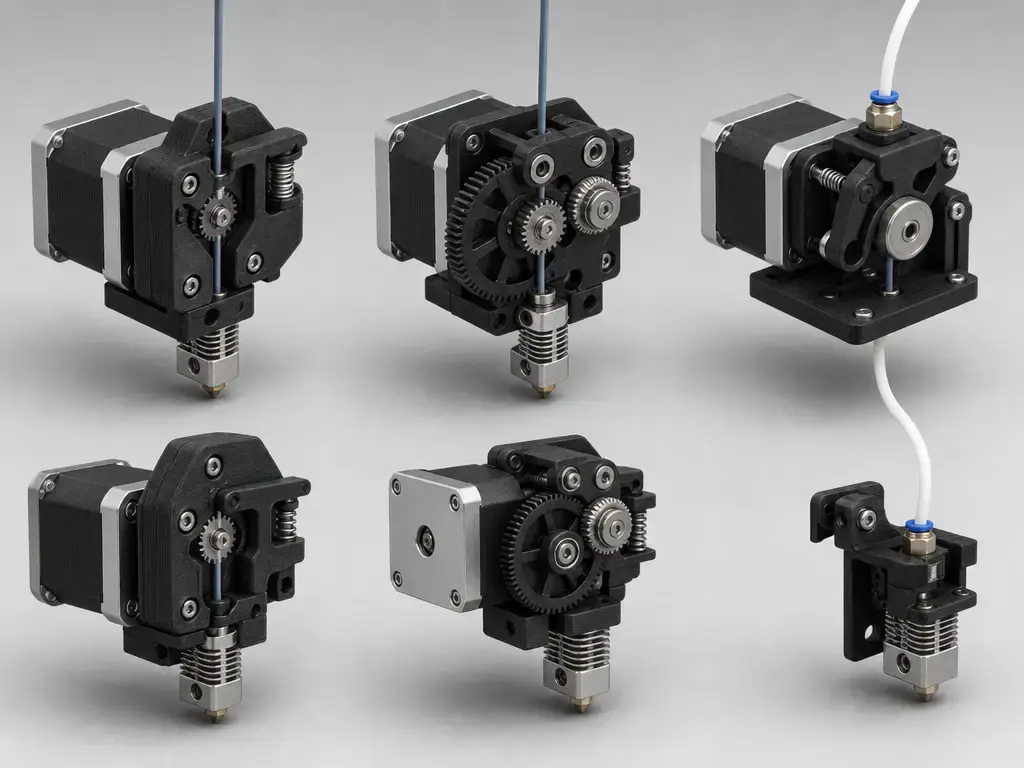
Manufacturer examples are useful as examples, not as targets to copy blindly. Bondtech says the BMG uses a 3:1 reduction and gives 415 as the E-step value for that model, while its QR 1.75 mm example is 476.5. Micro Swiss’s Bowden Dual Gear instructions say to set 130 steps/mm and then fine-tune flow or extrusion multiplier in the slicer afterward. Those are model-specific starting points, and clones or visually similar extruders may use different gearing and therefore different numbers. [18] [19] [20]
- Recheck extruder steps after changing extruder gears, the stepper motor, the driver or mainboard, or microstepping settings. [4] [27]
- Treat any geared-extruder retrofit as a new calibration case. Bondtech’s BMG 415 and QR 476.5 figures are examples for those specific products, not universal values. [18]
- Recheck after a Bowden or direct-drive conversion, because the extruder hardware itself may have changed. [19]
- Calibrate when a controlled mark-and-measure test shows a consistent feed-distance error across repeats. [14] [17]
- Do it before deep slicer flow or extrusion-multiplier tuning on a modified or unknown machine. [20] [21]
- On multi-extruder Marlin systems, check whether each tool needs its own stored factor under
DISTINCT_E_FACTORS. [27]
Current research & market context (short and fenced)
The current papers cited here explain extrusion physics, pressure behavior, and porosity tradeoffs. They do not establish a universal hobby E-steps target. One study links extrusion-multiplier changes to porosity outcomes, another emphasizes setup-specific process windows and feeder-condition effects, and a third shows that higher feed rates can raise modeled pressure drop in its test setup. Those findings support cautious, slow measurement and careful interpretation, not a single number that every printer should chase. [24] [25] [26]
On the market side, consumer documentation increasingly exposes calibration through flow-facing tools instead of firmware-facing steps/mm screens. Bambu’s P2S manual is a clear example because it documents Flow Dynamics and Flow Rate calibration on Bambu Studio’s Calibration page. That does not make motion calibration irrelevant; it changes which layer the user can actually access. [22]
E-steps calibration: Final takeaways
E-steps calibration belongs at the bottom of the extrusion stack: check mechanics first, correct the extruder’s base motion conversion second, and tune flow or pressure behavior only after that baseline is stable. Use the heated-nozzle measurement workflow for the motion layer, then keep M221-style flow changes and Linear Advance or Pressure Advance in their own layer. [14] [12] [15]
FAQ
What is E-steps calibration in 3D printing?
E-steps calibration is the process of correcting the extruder’s motion-conversion value so commanded E-axis movement matches actual filament movement. In Marlin, that value is handled by M92, which sets steps-per-unit rather than a material setting. It is the baseline motion check that should come before filament-specific flow tuning. [4]
How do you do E-steps calibration on Marlin firmware with M92?
Use a heated nozzle, mark the filament from a fixed reference point, extrude a known distance slowly, measure what actually moved, calculate the proportional correction, apply it with M92 E..., and only then save it with M500. M503 is useful for reading back the active settings before and after the change. [4] [5] [6] [14] [17]
How to calculate extruder steps per mm (and why can the ratio direction be confusing)?
For Marlin-style E-steps, the correction is old × requested / actual, because you are increasing or decreasing steps-per-unit. For Klipper, the correction is old × actual / requested, because rotation_distance describes distance per motor revolution instead. So a short extrusion makes Marlin steps/mm go up, but Klipper rotation_distance go down. [4] [14] [17]
Is esteps tuning for extruder the same as flow rate calibration / extrusion multiplier?
No. Esteps tuning corrects the mechanical motion-conversion layer, while flow controls change material output proportionally after that. Marlin’s M221 applies flow percentage to all E moves, and Prusa explicitly describes total flow as firmware flow multiplier times slicer extrusion multiplier. Use E-steps first, then flow tuning if the filament still needs it. [12] [20]
Do Klipper printers use E-steps calibration or rotation distance?
Klipper uses rotation_distance, not Marlin-style E-steps. The goal is the same — accurate filament feed — but the abstraction is different, so the correction formula runs in the opposite direction from Marlin’s steps/mm formula. Klipper’s documented extruder procedure is still a heated, slow, mark-and-measure test through the hotend. [14]
What should I check if my E-steps calibration changes after reboot or never “sticks”?
First verify that the setting was actually saved. In Marlin, M500 writes configurable settings to EEPROM, while M503 reports the active runtime settings. Also rule out E-mode confusion, hidden G92 E0 resets, and volumetric extrusion under M200, because any of those can make a correct calibration look wrong. [5] [6] [10] [11]
Sources
- ISO/ASTM 52900:2021 — Additive manufacturing fundamentals and vocabulary (ISO listing page).
https://www.iso.org/standard/74514.html - Stratasys — Legal Information.
https://www.stratasys.com/en/legal/legal-information/ - Marlin — What is Marlin?
https://marlinfw.org/docs/basics/introduction.html - Marlin — M92 Set Axis Steps-per-unit.
https://marlinfw.org/docs/gcode/M092.html - Marlin — M500 Save Settings.
https://marlinfw.org/docs/gcode/M500.html - Marlin — M503 Report Settings.
https://marlinfw.org/docs/gcode/M503.html - Marlin — G0/G1 Linear Move.
https://marlinfw.org/docs/gcode/G000-G001.html - Marlin — M83 E Relative.
https://marlinfw.org/docs/gcode/M083.html - Marlin — M82 E Absolute.
https://marlinfw.org/docs/gcode/M082.html - Marlin — G92 Set Position.
https://marlinfw.org/docs/gcode/G092.html - Marlin — M200 Volumetric Extrusion Diameter.
https://marlinfw.org/docs/gcode/M200.html - Marlin — M221 Set Flow Percentage.
https://marlinfw.org/docs/gcode/M221.html - Marlin — M302 Cold Extrude.
https://marlinfw.org/docs/gcode/M302.html - Klipper — Rotation distance.
https://www.klipper3d.org/Rotation_Distance.html?h=step - Marlin — Linear Advance.
https://marlinfw.org/docs/features/lin_advance.html - Marlin — M900 Linear Advance Factor.
https://marlinfw.org/docs/gcode/M900.html - E3D — Extruder steps per mm guide (PDF).
https://dozuki-guide-pdfs.s3.amazonaws.com/pdf/e3d-online/guide_96_en.pdf - Bondtech — Firmware updates for Bondtech extruders.
https://www.bondtech.se/knowledge-base/firmware-updates-for-bondtech-extruders/ - Micro Swiss — Bowden Dual Gear Extruder installation instructions.
https://store.micro-swiss.com/pages/installation-instructions-for-micro-swiss-bowden-dual-gear-extruder - Prusa — Extrusion multiplier calibration.
https://help.prusa3d.com/article/extrusion-multiplier-calibration_2257 - OrcaSlicer — Material Flow Ratio and Pressure Advance.
https://github.com/OrcaSlicer/OrcaSlicer/wiki/material_flow_ratio_and_pressure_advance - Bambu Lab — P2S 3D Printing User Manual (PDF).
https://csm.bblcdn.com/hub/9425242c00344b0e801b6179f9a243aa.pdf - Science Museum Group — RepRap “Darwin” object entry.
https://collection.sciencemuseumgroup.org.uk/objects/co8357315/darwin-reprap-self-replicating-3d-printer-generation-i - Progress in Additive Manufacturing — PLA extrusion multiplier study.
https://link.springer.com/article/10.1007/s40964-024-00646-5 - Progress in Additive Manufacturing — In-line extrusion force measurement.
https://link.springer.com/article/10.1007/s40964-022-00385-5 - ScienceDirect — Feeding rate and extrusion pressure modeling.
https://www.sciencedirect.com/science/article/pii/S2213846323000391 - Marlin — Configuring Marlin.
https://marlinfw.org/docs/configuration/configuration.html