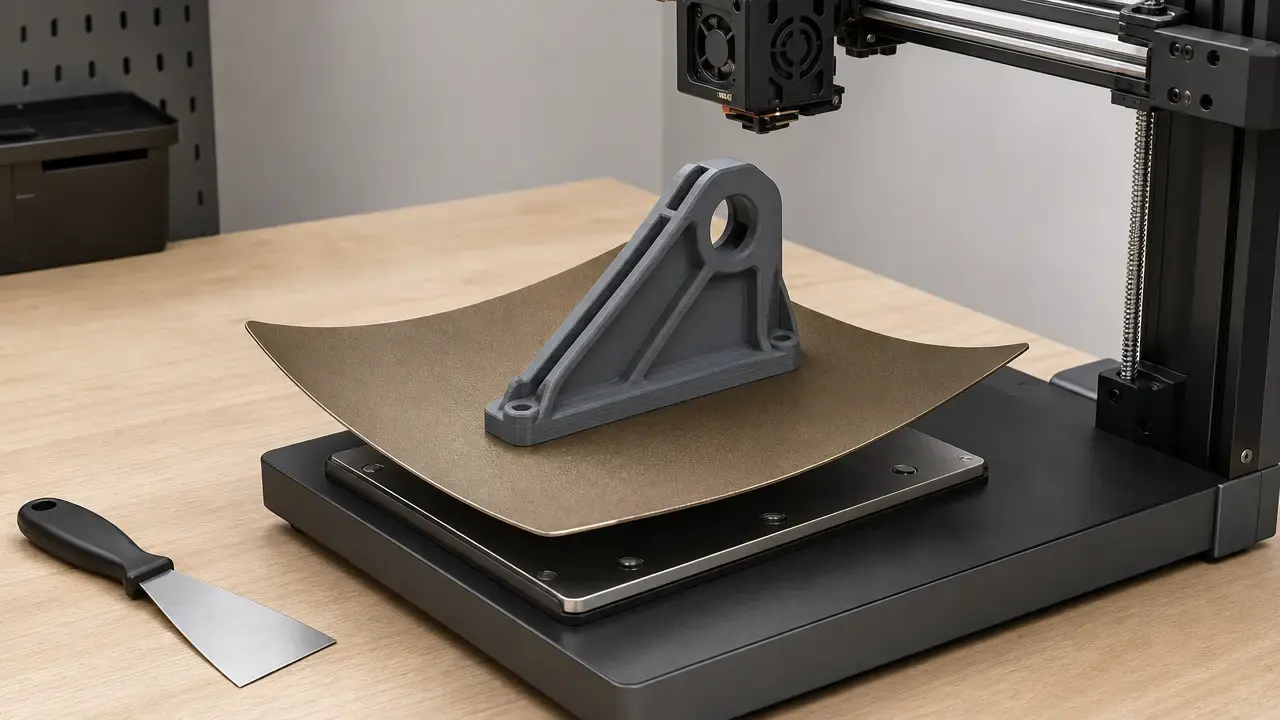

Summary
If you are asking how to remove 3D print from bed, let the build plate cool first, remove and flex it only if that plate is designed to flex, loosen one edge instead of pulling from the top, and use a scraper only as the last step at a nearly parallel angle on a stable surface. Stop if force, slipping, or damage signs increase. [15] [21]
Before you pry: 60-second checklist
Removal starts with setup, not strength.
- Before you touch the print…
- Move or park the toolhead and make sure hot parts are out of your reach before you put your hands in the machine. [21]
- Check whether the build plate is removable, flexible, fixed, or glass, because the first safe move depends on that. [7] [20]
- Confirm the surface type before you choose a method: smooth PEI, textured PEI, glass, or a specialty coating all release differently. [8] [12] [23]
- Clear a flat work area so the plate stays supported and your hands stay out of the tool path. [21]
- If you expect to scrape, wear safety glasses and consider a fixture or clamp instead of holding the plate with one hand while prying with the other. [21]
Identify your build surface first
Here, bed means the heated platform, build plate means the printing surface you remove or print on, and sheet means a removable spring-steel plate. That distinction matters because the surface usually determines the release method more than the part shape does.
| Surface category (examples) | Temperature state for removal | Best first move | Main risk + check before next print |
|---|---|---|---|
| Removable spring-steel PEI sheet (Prusa/Flashforge-style) | Room temperature. [7] | Remove the sheet and flex it gently from different directions. [7] [17] | Do not over-bend or crease it. Some PEI-family sheets, such as Prusa satin, are designed to release after cooling and explicitly should not go in the freezer. [10] |
| Textured PEI spring-steel (Bambu Textured PEI as example) | Wait for 35 °C or lower. [12] | Let it cool, then flex gently if the part still holds. [12] | Pulling early can make removal harder; check for residue before the next print. [12] |
| Smooth PEI | Cool fully; no universal number. [8] | Work from an edge after cooling. [8] [15] | PETG can bond hard enough to damage smooth PEI without a separation layer. [8] |
| Glass plate (UltiMaker-style) | Cool first; any water method happens only after the plate is removed. [20] | Remove the glass plate from the printer before approved water or scraper steps. [20] | Never flex glass, and watch for chipping if removal force is rising. [19] [20] |
| Soft specialty coating (SuperTack-style) | Manufacturer-specific. One official Bambu page says to heat the plate to 50 °C if the print is sticking too tightly. [23] | Recheck the current plate instructions, then follow that specific release method. [23] | Do not generalize a reheating exception to other coatings. [23] |
| Resin metal build platform — contrast only, not covered | Different workflow. [22] | Do not apply filament-printer removal steps here. [22] | Resin-platform sanding at 80–120 grit and freezer troubleshooting belong to resin docs, not FFF plate handling. [22] |
If your exact surface is not listed, treat removal as surface-specific rather than universal. Cooling helps in general, but flexing, reheating, water use, and tool choice depend on the plate material and the manufacturer’s instructions. [6] [7] [20] [23]
Step-by-step removal workflow
Build-plate removal is an escalation process: cool first, use the plate’s intended motion second, open one strong edge third, and scrape only if the earlier steps fail. There are no universal cooldown minutes. One plate may specify room temperature, while another gives a threshold such as 35 °C or lower. [7] [12]
Step 1 — Let the bed and print cool (unless your plate maker says otherwise)
Cooling is the default release step because adhesion usually drops as the part and plate settle after printing. Research on build-plate heating and cooling treats lower adhesion after cooldown as a practical control method, but the target state is still surface-specific. Use a threshold when the maker gives one, such as 35 °C or lower on Bambu’s textured PEI example, and otherwise wait for room temperature or the manufacturer’s stated release point. [6] [12] [7]
Step 2 — If the plate is removable, remove it and flex only as designed
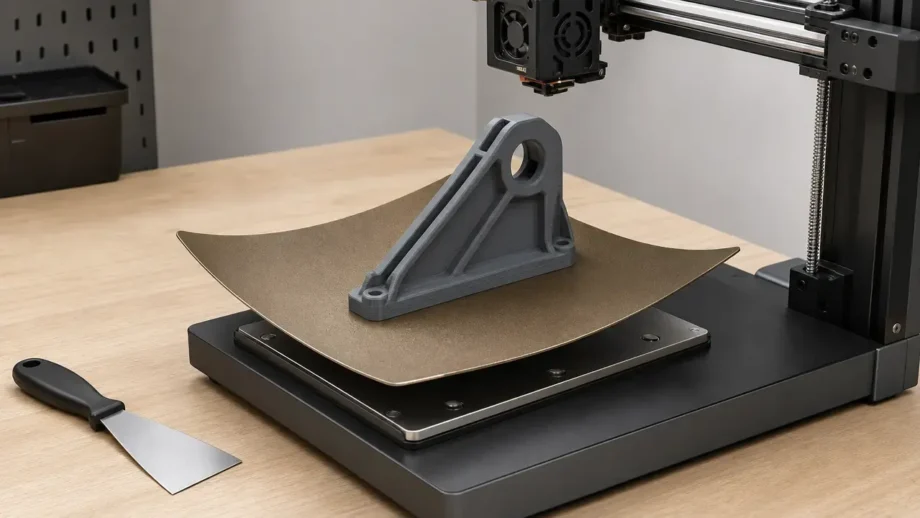
If your printer uses a flexible steel or spring-steel sheet, take the plate out first and flex it gently instead of prying inside the printer. Prusa’s baseline is to wait until room temperature and then bend the sheet inward and outward, while Flashforge’s Adventurer 5M guidance is to remove the flexible plate, let it cool, and bend it to release the part. Do not flex rigid glass. [7] [17] [20]
Step 3 — Loosen an edge, not the top (reduce leverage on fragile features)
If the part still holds, start at a corner, brim, raft, or other strong edge instead of pulling up from the top. That reduces the chance of cracking thin walls, legs, or decorative features. If a brim or raft is present, use that sacrificial edge first. Keep the plate supported, keep the tool moving away from your body, and do not hold the part with one hand while prying with the other. [15] [21]
Step 4 — Use a scraper only at a low angle / nearly parallel
A scraper is a controlled release tool, not a chisel. Slide it in at a low angle, keep it nearly parallel to the surface, and work into an existing gap instead of driving straight down into the coating. Flashforge’s current removal guide says nearly parallel, and its Creator 3 manual says parallel to the build plate. Keep your free hand out of the tool path. [15] [16] [21]
Step 5 — Stop if force is increasing (diagnose before you damage the plate)
Rising force is a warning, not a challenge. Stop if the tool starts slipping, the model begins to crack, the coating looks like it is lifting, or glass chipping becomes a risk. At that point, the problem is usually that the surface is still too warm, the wrong release method is being used for that plate, or the first layer was too aggressively bonded during printing. [15] [19] [21]
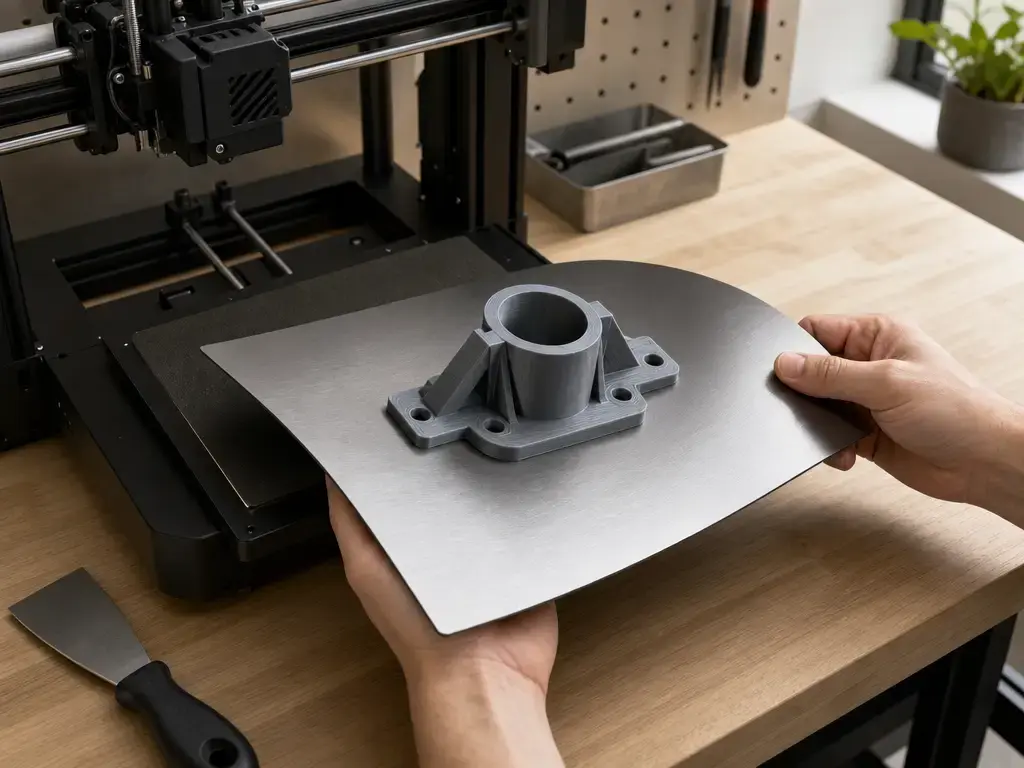
If your 3D print is stuck to the bed
When a print refuses the normal sequence, change methods instead of adding force.
- Confirm the plate has actually reached its release state, such as room temperature or 35 °C or lower where specified. [7] [12]
- Flex from multiple directions only if the plate is spring steel or another removable flexible sheet. [7] [17]
- Work one strong edge, brim, or raft instead of a thin fin or fragile corner. [15]
- If you must scrape, keep the tool nearly parallel and the plate supported on a stable surface; clamp or fixture it when needed. [15] [21]
- Use water only if the plate is removed and the manufacturer supports that workflow, such as specific glass-plus-glue cases. Do not pour liquid into the printer. [20] [15]
- Follow manufacturer exceptions only when they are explicit. For example, Bambu’s official SuperTack page says to heat the plate to 50 °C if a print is sticking too tightly. [23]
- If damage signs appear, sacrifice the print, not the plate. [19] [21]
Abort the attempt if the plate starts bowing the wrong way, the tool keeps slipping, the model is cracking, or the surface shows damage. Plate damage is usually costlier than one failed part, and persistent over-adhesion usually points back to surface choice, temperature, or first-layer setup rather than a lack of leverage. [15] [21]
Why prints stick too hard
Bed adhesion has to do two opposite jobs: it has to hold the first layer firmly during printing, then let go without damaging the part or plate after printing. Research on fused filament fabrication describes that balance directly and reports that adhesion forces can rise significantly when the bed runs slightly above the material’s glass-transition region. Cooling is therefore part of the release strategy, not just a pause before cleanup. [5] [6]
The usual causes are mechanical and thermal. First-layer calibration is explicitly about nozzle-to-surface distance, so a nozzle that starts too close can press the first layer deeply into the surface. Higher bed temperature, a large flat contact patch, residue on the plate, and overly thick adhesive all push the system toward stronger holding force. PETG on smooth PEI is the high-consequence example because the surface itself can be damaged if no separation layer is used. [11] [5] [8]
Common causes of over-adhesion
- Removing while the plate is still warm. [6] [12]
- Nozzle too close, causing first-layer over-compression. [11]
- Bed temperature set high enough to increase bonding force. [5]
- A large flat first layer, brim, or raft that leaves more area to release at once. [15]
- A dirty plate, leftover residue, or a cleaning routine the plate maker warns against. [5] [10]
- A material/surface mismatch, especially PETG on smooth PEI without a separation layer. [8]
- A glue or coating layer applied too heavily or outside the intended workflow. [5] [15]
The physics is general, but the exceptions are surface-specific manufacturer rules. Cooling helps many prints release, yet a glass plate, a flexible PEI sheet, and a specialty coating can still require different end-of-print handling. [6] [7] [20] [23]
Tools & safety
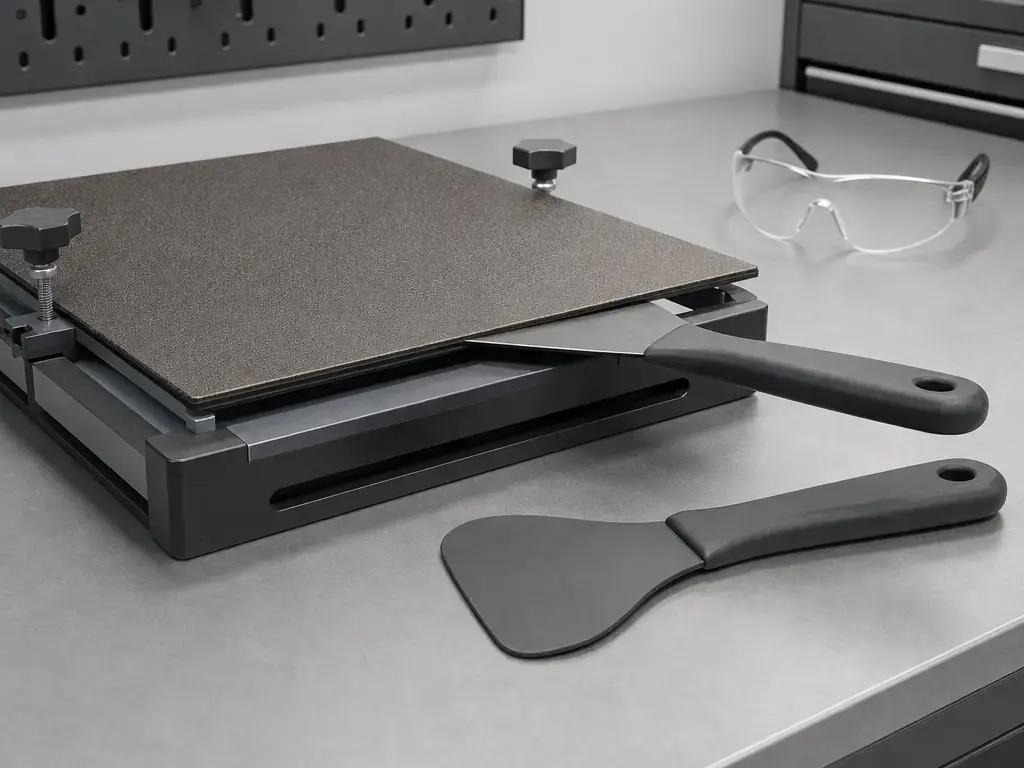
For most removals, the default-safe tools are a plastic scraper and a rounded spatula. Flashforge supports low-angle scraper use, and UltiMaker’s S6 manual is a useful reminder that some plates are hot and delicate enough to need extra caution: its build plate can exceed 100 °C, and on its flexible plate UltiMaker warns to use only plastic tools with round edges because metal tools may damage the surface. Use metal only where the plate maker permits it. [15] [19]
Avoid unless manufacturer permits
- Razor blades
- Knives
- Screwdrivers
- Damaged or chipped scrapers
- Steep-angle chiseling into coatings
Those tools and motions are the most likely to gouge coatings, chip glass, or slip under force. [15] [19] [21]
Safety matters most when a print needs scraping or heavy edge work. MIT EHS advises a stable work surface, tool direction away from your body, and no one-hand hold-while-pry technique. Safety glasses are a good default for scraper work, and a fixture or clamp is the safer choice in schools, makerspaces, or other high-force setups. Cut-resistant gloves can help, but only if they do not reduce your control. [21] [19]
Material-specific gotchas
To remove PLA print from build plate safely, start with cooling and then test whether the part releases cleanly before you reach for a tool. PLA often lets go more easily after cooldown, but there is no universal PLA temperature rule for removal. Prusa’s PLA page lists 215 °C for the first layer, 210 °C for other layers, and a 60 °C bed, but that is a vendor profile example, not a universal PLA recipe. [5] [9]
PETG is the material where plate protection matters most. Prusa warns that clean smooth PEI can bond strongly enough to peel or damage the PEI, which is why a separation layer such as PVA glue is recommended when that surface pairing is unavoidable. TPU is different: it is not always the hardest material to remove, but soft parts can stretch or peel if you pull upward. Flashforge’s Adventurer 5M documentation notes that TPU or other flexible materials may need a scraper on that platform family, so treat TPU removal as geometry- and surface-dependent rather than universally easy or difficult. [8] [17]
Resin is a different workflow. Formlabs’ platform guidance mentions 80–120 grit sanding and a freezer troubleshooting step in that resin context, but that does not validate freezing FFF glass or PEI plates. [22]
Prevent it next time
Prevention is not about making adhesion weak. It is about getting a first layer that holds during printing and still releases cleanly later. The same levers keep appearing across sources because they control the bond from the start: cleaning, leveling or distance setup, coatings or glue, and bed temperature. [5]
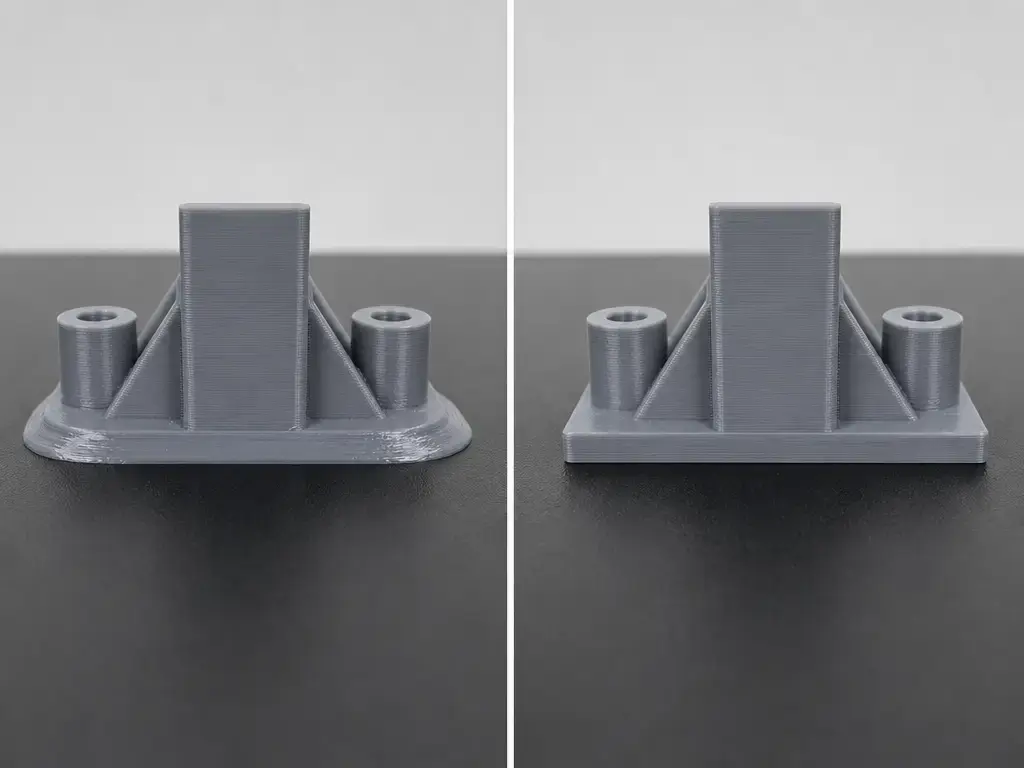
A too-close nozzle leaves visible clues: elephant-foot-like flare, abnormally wide first-layer lines, a glossy or over-flattened base, and a pattern where removal routinely requires scraping. First-layer calibration is specifically nozzle-to-surface distance calibration, so if those signs show up, rerun your printer’s first-layer or Z-offset procedure before changing several other variables at once. Also confirm that the plate is seated correctly and that the surface matches the active profile. [11] [15]
After a stuck print, do these before the next one…
- Clean the surface the way the plate maker recommends. [5] [10]
- Reduce first-layer over-compression by rechecking the printer’s first-layer or Z-offset setup. [11]
- Re-evaluate bed temperature in small steps; Flashforge’s example is 5 °C at a time, but that is not a universal rule. [15]
- Add a separation layer where the material and surface call for it, especially PETG on smooth PEI. [8]
- Use brim or raft strategy deliberately when you need grip, but remember that more contact area can also make release harder. [15]
Current research + why manufacturers publish plate-specific rules now
Recent work on controlled heating and cooling treats adhesion as something you can tune, not just tolerate. That helps explain why plate-maker instructions are getting more specific: instead of vague “cool down before removal” language, some now name a release threshold such as 35 °C or lower, while others still use room temperature as the release point for a spring-steel sheet. The shift is practical, because the build surface itself has become part of the release method. [6] [12] [7]
Conclusion
For a reliable answer to how to remove 3D print from bed, identify the surface first, cool it to the maker’s release state, flex only the sheets designed to flex, and keep scraping as a last step. If parts keep feeling welded on, the long-term fix is usually first-layer distance, temperature, or material-to-surface setup rather than more force at removal time. [7] [15] [11]
FAQ
How to remove a 3D print from bed without breaking it?
Cool the plate first, then use the surface’s intended release method: flex a removable steel sheet, work an edge on rigid surfaces, and scrape only as a last step at a nearly parallel angle. If resistance keeps increasing, stop and reassess instead of forcing it. [7] [15] [21]
My 3D print is stuck to the bed — what’s the safest first move?
Stop pulling and confirm the surface type and temperature state first. A flexible sheet may need removal and gentle flexing, while glass or other rigid plates should stay within their approved off-printer release methods. [7] [20] [21]
Why does cooling help some prints pop off, and why do some plates behave differently?
Cooling changes adhesion and contraction behavior after printing, so the bond often weakens as the part and plate settle. But the exact release point still depends on the surface: one maker may specify room temperature, while another gives a threshold such as 35 °C or lower. [5] [6] [7] [12]
Can PETG damage a smooth PEI sheet, and how do separation layers prevent it?
Yes. Prusa warns that PETG can bond strongly enough to damage smooth PEI, which is why a separation layer such as PVA glue is recommended on that pairing. The separation layer creates a controlled interface so the part releases from the sacrificial layer instead of tearing at the PEI itself. [8]
Is it safe to use water to remove a stuck print?
Only in approved off-printer workflows. UltiMaker’s glass-plate guidance uses water only after the glass plate is removed, and Flashforge separately warns not to pour liquid directly into the printer. [20] [15]
Should I put the build plate in the freezer to release a stuck print?
Generally, no. Prusa explicitly says never put its satin sheet in the freezer, and resin-platform freezer troubleshooting from Formlabs does not transfer to FFF glass or PEI handling. [10] [22]
Sources
- ISO — ISO/ASTM 52900:2021 standard page: https://www.iso.org/standard/74514.html
- ISO — ISO/ASTM 52903-1:2020 standard page: https://www.iso.org/standard/67290.html
- ANSI / ISO preview PDF — ISO/ASTM 52900:2021 preview: https://webstore.ansi.org/preview-pages/ISO/preview_ISO%2BASTM%2B52900-2021.pdf
- SME — 3D printing glossary PDF: https://www.sme.org/globalassets/sme.org/training/certifications/additive-manufacturing-certification/3d-printing-glossary.pdf
- Spoerk et al. (2018) — Bed temperature vs. adhesion in FFF: https://journals.sagepub.com/doi/10.1080/14658011.2017.1399531
- MDPI Electronics (2023) — Build plate heating/cooling study: https://www.mdpi.com/2079-9292/12/8/1918/htm
- Prusa Knowledge Base — Flexible steel sheets (guidepost): https://help.prusa3d.com/article/flexible-steel-sheets-guidepost_2195
- Prusa Knowledge Base — Print surface preparation: https://help.prusa3d.com/article/print-surface-preparation_686951
- Prusa Knowledge Base — PLA: https://help.prusa3d.com/article/pla_2062
- Prusa Knowledge Base — Satin steel sheet: https://help.prusa3d.com/article/satin-steel-sheet_196526
- Prusa Knowledge Base — First Layer Calibration (MINI/MINI+): https://help.prusa3d.com/article/first-layer-calibration-mini-mini_229122
- Bambu Lab US Store — Bambu Textured PEI Plate: https://us.store.bambulab.com/products/bambu-textured-pei-plate
- Bambu Lab Community Forum — reposted SuperTack removal guidance: https://forum.bambulab.com/t/new-flexible-material-for-the-ams-ams-lite/105568?page=2
- PB Tech — Bambu SuperTack Pro Build Plate product listing: https://www.pbtech.com/product/PTABAM0596/Bambu-Lab-Accessories-Cool-Plate-SuperTack-Pro-Bui
- Flashforge official blog — How to Remove a 3D Print from the Bed Without Damage: https://www.flashforge.com/blogs/news/how-to-remove-a-3d-print-from-the-bed-without-damage
- Flashforge Creator 3 manual PDF: https://en.fss.flashforge.com/10000/software/3cb9f018f82d94349dfab838a375d6f0.pdf
- Flashforge Adventurer 5M manual PDF: https://wiki.flashforge.com/resource/adventurer_series_manual/adventurer_5m_manual.pdf
- Flashforge Docs — Printing on the Build Plate: https://www.flashforge.com/a/docs/knowledge-corner/printing-on-the-build-plate
- UltiMaker S6 user manual PDF: https://um-support-files.ultimaker.com/manuals/user-manual/S6/EN-UltiMakerS6-V1.0-2025-05.pdf
- UltiMaker 3 user manual v1.4 PDF: https://um-support-files.ultimaker.com/manuals/user-manual/UM3/Ultimaker%203%20-%20User%20manual%20EN%20v1.4.pdf
- MIT Environment, Health & Safety — Removing prints from build plates safety sheet: https://ehs.mit.edu/wp-content/uploads/EHS_0223.pdf
- Formlabs Support — Removing parts from the build platform: https://formlabs.com/support/Removing-parts-from-the-build-platform/
- Bambu Lab EU Store — Bambu Cool Plate SuperTack: https://eu.store.bambulab.com/en-at/products/bambu-cool-plate-supertack