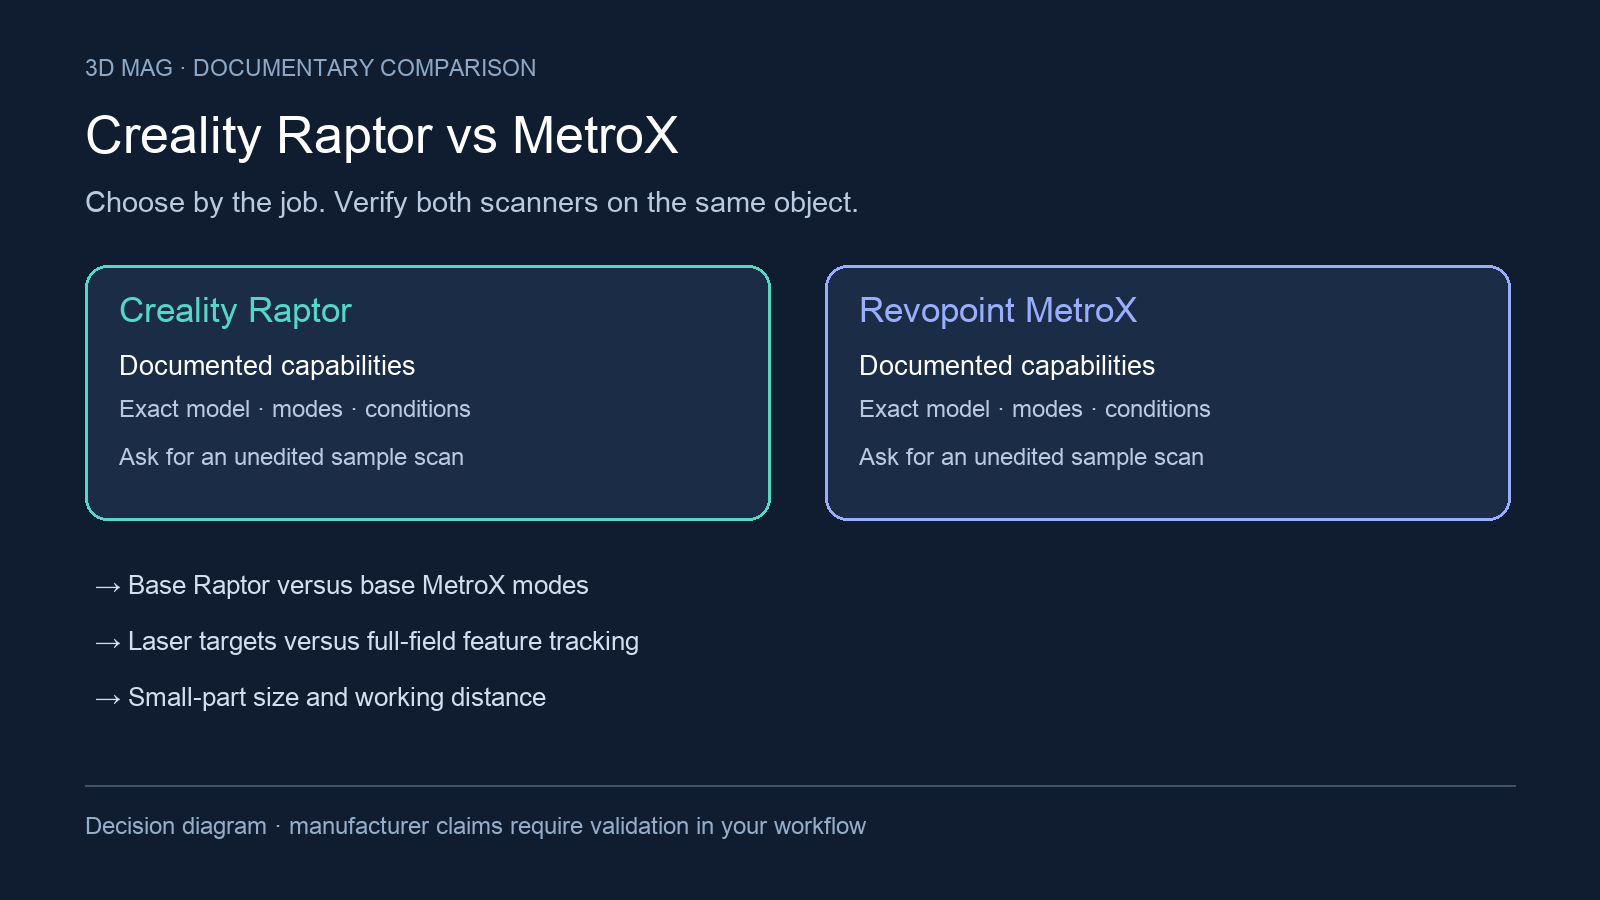

Suppose a workshop needs to copy a curved housing today and recover the shape of a small mechanical part tomorrow. A scanner has to get around the object, keep alignment and leave a mesh someone can use. This comparison covers the base CR-Scan Otter and CR-Scan Raptor; it weighs capture modes, working size and distance, measurement definitions, preparation, host devices and the final handoff.
Concise answer: evaluate Raptor first when the job specifically needs a documented blue-laser workflow for small detailed parts and the shop can manage marker setup. Evaluate Otter first when an infrared structured-light workflow, documented alignment modes, and mesh export are enough for product shells, ergonomic forms, and small-to-medium workshop parts. Defer choosing either scanner until a sample demonstration if the real parts are reflective, transparent, black, low-feature, or otherwise difficult to track, because the manufacturer documentation reviewed does not provide task-level workshop validation on the buyer’s own parts.
From a toy part to a wearable figure: the work after capture
Kevin Hofer’s Otter test for retailer Galaxus, published on 2026-06-30 and read here in Galaxus’s machine-translated English version, included a Beyblade component and a person. The toy’s curved regions scanned more readily than its flat, featureless areas; mounting the scanner on a tripod helped handling, but the mesh still needed work, although Hofer reported that the printed copy came out at the correct real size without rescaling. For the person scan, cable reach complicated moving around a colleague, whose glasses were difficult to capture. That is one reviewer’s setup, not proof of how Raptor would perform. Galaxus report
For an ergonomic shell, make the acceptance sample include both the exterior and the mounting surface: a convincing outer shape is not enough to position an insert. For a figurine, decide whether eyeglasses and other transparent details will be modelled separately. For a small machined part, request the raw mesh around recesses and edges before any cosmetic repair. Compare the whole session, including support changes and cleanup, against the time available in your shop.
Specification and workflow comparison
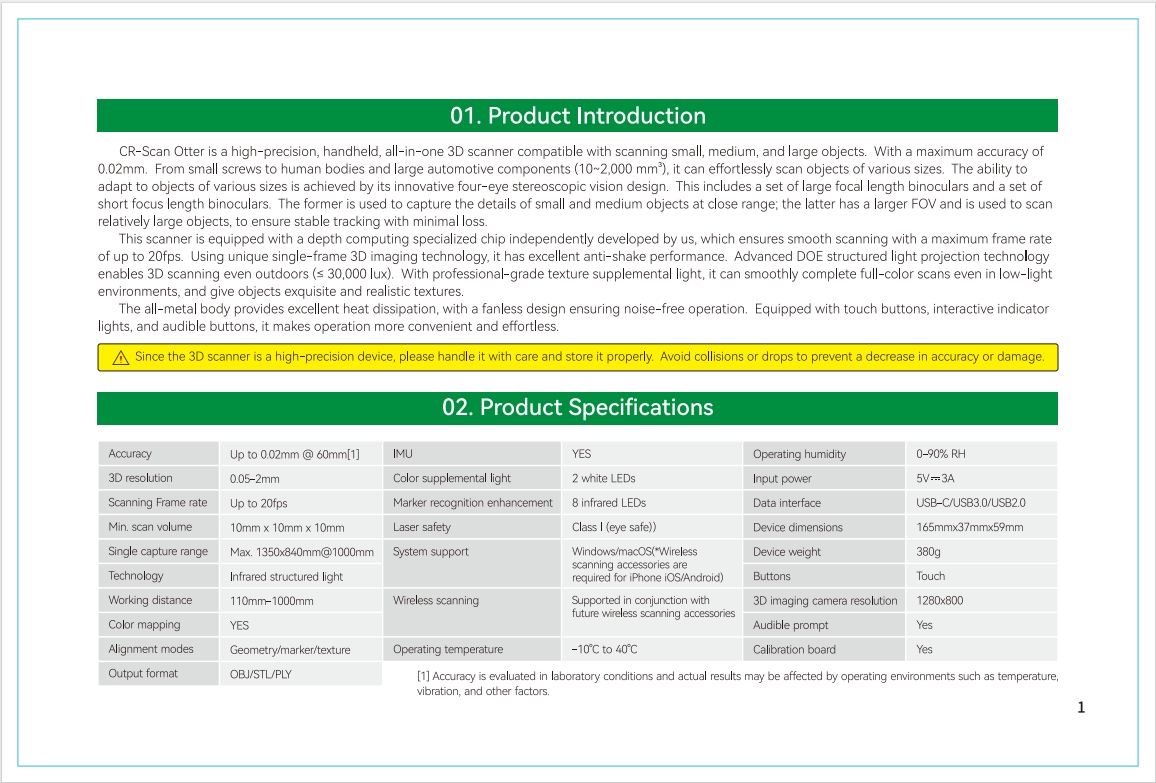
Otter numeric specifications below use a retained visual transcription of Creality’s official specification image. Raptor manual citations were checked against the English specification section; other language sections were outside this review.
| Criterion | Creality CR-Scan Otter | Creality CR-Scan Raptor | What changes the workshop choice |
|---|---|---|---|
| Exact base model and technology | The Otter manual image transcription lists infrared structured light. | The Raptor manual identifies the scanner as hybrid blue laser and NIR, and the Raptor tutorial says it includes blue laser scanning and infrared scanning. | Raptor is the documented dual-mode option here. The Otter evidence supports infrared structured light, not a laser workflow. |
| Object size and working range | The Otter transcription lists 10mm x 10mm x 10mm minimum scan volume and 110mm-1000mm working distance. | The Raptor manual says objects from 5mm-2000mm can be scanned and lists minimum scanning volumes of 5mm x 5mm x 5mm for blue light and 150mm x 150mm x 150mm for NIR. Its tutorial lists 150-400mm for blue laser and 170-1000mm for NIR. | For very small parts, Raptor has the lower documented minimum in blue-light mode. For larger handheld work, the working distance and mode-specific setup matter more than the headline object-size span. |
| Single-capture range | The Otter transcription lists Max. 1350x840mm@1000mm. | The Raptor manual lists 270mm x 170mm@300mm and 930mmx580mm@1000mm. | Capture range affects how many passes may be needed around a housing, panel, or fixture. Raptor’s documentation makes the blue-versus-NIR capture-area tradeoff explicit; Otter’s number comes from the image-transcribed excerpt. |
| Accuracy, resolution, and speed | The Otter transcription lists accuracy up to 0.02mm @ 60mm, 3D resolution 0.05-2mm, and scanning frame rate up to 20fps. | The Raptor manual lists accuracy up to 0.02mm @ 100mm for blue light and up to 0.1mm for NIR, 3D resolution 0.02-2mm and 0.1-2mm, and scanning speeds up to 60fps and up to 20fps. | Do not compare only the matching 0.02mm figures. The modes and stated distances differ, and the Raptor manual footnote ties its blue-light accuracy figure to laboratory conditions with a 100mm sphere pair. The sources label the other figures 3D resolution; separate comparable point-distance specifications were not verified for this comparison. |
| Marker and surface-prep documentation | Marker-placement and surface-prep details for Otter are not verified in the reviewed Otter source set; the Otter transcription only verifies Geometry/marker/texture alignment modes. | The Raptor tutorial says blue laser mode requires circular reflective marker assistance; for smaller objects, markers can be placed on the desktop or scanning pad, while larger objects need markers on the object surface. The same tutorial says infrared mode is suitable for larger targets 150-2000mm and enables markerless scanning. | Raptor has the clearer documented prep split by mode. For Otter, do not infer missing marker guidance as missing capability; ask for a demonstration of the intended alignment mode on the actual part. |
| Alignment, color, and mesh-oriented outputs | The Otter transcription lists color mapping, Geometry/marker/texture alignment modes, and OBJ/STL/PLY output. | Raptor’s tutorial describes pointcloud fusion, meshing, color mapping, and importing scanned files for later processing. | Both documented workflows are mesh-oriented. Creality’s FAQ says scanned STL mesh data must be imported into reverse-engineering software to become a STEP solid CAD model. |
| PC dependency | Creality’s performance page lists recommended Windows guidance for the Otter series including Windows 10 / 11, Intel Core i7 12th Gen or above, RTX 3060 or higher, and 16 GB RAM or more. | Creality’s performance page lists recommended Windows guidance for Raptor including Windows 10 / 11, Intel Core i7 12th Gen or above, RTX 3060 with 6GB VRAM or higher, and 32 GB RAM or more. | A shared shop laptop may decide the purchase before scanner specifications do. Treat these as current vendor recommendations, not a guarantee that every driver, cable, or wireless setup will work. |
| Wireless phone accessory | Otter requires the Scan Bridge for Otter Series (Creality phone and accessory requirements). | Raptor requires the Scan Bridge for Raptor Series; the included-bridge exception names Raptor X, not base Raptor (Creality phone and accessory requirements). | Budget and verify the bridge for the exact scanner; wireless operation is not an accessory-free phone connection. |
| Recommended Android phone | Snapdragon 8gen1 or above, Android 10.0+, and 8GB+ RAM (Creality phone and accessory requirements). | Snapdragon 8gen3 or above, Android 10.0+, and 12GB+ RAM (Creality phone and accessory requirements). | The Raptor-series recommendation calls for a newer chipset and more RAM. These are vendor recommendations, not measured performance. |
| Recommended iPhone | A15 or higher, iOS 15+, and 6GB+ RAM (Creality phone and accessory requirements). | A16 or higher, iOS 15+, and 8GB+ RAM (Creality phone and accessory requirements). | Check chip, OS, and memory together; an OS version alone is insufficient. |
How the choice changes in a workshop
For small mechanical parts on a bench, the useful distinction is not just the published accuracy number. It is how the scanner keeps tracking while preserving access to edges, holes, fasteners, bosses, and datum faces. Raptor’s blue laser mode has the clearer documented preparation path for this situation: markers are required, but for smaller objects the tutorial says the markers can be placed on the desktop or scanning pad rather than on the part.
For larger parts, Raptor’s preparation burden changes. Its tutorial says larger objects need markers on the object surface for blue-laser work, while its infrared mode is described as a markerless option for larger targets. That creates a practical tradeoff: use the laser workflow when the part and setup can tolerate markers, or use the infrared workflow when reach, surface access, or keeping markers off the object is more important. The documents support that mode tradeoff, not a blanket claim that one scanner will produce better reverse-engineering results in every shop.
Otter is easier to evaluate when the shop wants an infrared structured-light route and does not need a documented laser mode. The Otter evidence here is a manual image transcription, so a buyer should ask a seller to confirm the same figures from current product documentation and then demonstrate the intended alignment mode: geometry, marker, or texture. That is especially important for low-feature housings, smooth molded parts, and surfaces where texture or geometry may not give the software enough tracking information.
Hardware belongs in the scanner budget. Compare the PC requirements in the table with the phone-and-bridge route before choosing. Creality does not recommend Google Pixel phones and excludes Samsung Exynos devices, some Dimensity or Kirin devices, and HarmonyOS; check the exact handset against Creality phone and accessory requirements. For either scanner, ask the seller to demonstrate the actual phone, bridge variant, application version, and scan mode you intend to use.
Scoped choices
Choose a Raptor demonstration first if the typical job is small brackets, machined prototypes, bolts, trims, and fine workshop features where a documented blue-laser mode is valuable. The buyer should make the demo use the intended marker plan, point distance, exposure setup, and downstream CAD workflow rather than only viewing a finished mesh.
Choose an Otter demonstration first if the parts are product shells, ergonomic models, medium-sized housings, and general workshop objects where infrared structured light, color mapping, geometry/marker/texture alignment, and OBJ/STL/PLY export match the deliverable. The unresolved question is not whether Otter has published specifications; it is whether that workflow handles the actual material, finish, and tolerance requirement.
Defer choosing either model if the required deliverable is direct editable CAD, CNC-ready STEP, or an inspection report. Creality’s FAQ states that scanned triangular mesh data must be imported into post-processing reverse-engineering software to convert STL into a STEP solid CAD model. A useful demo should include the raw scan project, fused point cloud, mesh, exported file, CAD reconstruction, and a dimensional check against the original part.
Also defer if the work centers on reflective, transparent, or black parts, or on smooth objects with too few tracking features. The source set does not give model-specific measured performance for those cases. Resolve these questions before purchase: which mode will be used, where will markers go, will spray or surface preparation be needed, what computer and software version will be used, how will alignment be verified, and what separate software will turn the mesh into the required engineering deliverable?
Sources
This comparison uses manufacturer documentation and cited reports; 3D Mag did not conduct hands-on testing. Publisher sponsorship.