
Verdict: Choose the Workflow, Then the Bundle
For a p1s combo vs p2s combo decision, separate the printer platform from the included material system. The machines share the same nominal build volume, but differ in stock wear-path parts, bed-temperature limits, sensing, camera, display, filtration listings, and material positioning. The material-system choice matters just as much: the original AMS focuses on sealed, desiccant-assisted storage and switching, while AMS 2 Pro adds active drying. [S1] [S2] [S7] [S9]
There are three practical paths: P1S with the original AMS, P1S with AMS 2 Pro, or P2S with AMS 2 Pro. Published specifications define capability boundaries, not a guaranteed print time, dimensional result, or overall quality outcome. The P2S launched on October 14, 2025, and Bambu Lab states that the P1S remains available and fully supported. [S6] [S12]
Side-by-Side Specs: Printer Platform
Both machines are material-extrusion systems in ISO/ASTM terminology, although Bambu Lab identifies their printing technology as Fused Deposition Modeling in the specification sheets. This table compares the printer platforms independently of the AMS generation included in a regional bundle. [S10] [S1] [S2]
Maximum toolhead speed is a declared motion limit, not an average print speed. The published hotend-flow figures also use different test geometries, so they cannot support a universal percentage-faster claim. [S1] [S2]
| Metric | P1S platform | P2S platform | Why it matters |
|---|---|---|---|
| Build volume | 256 × 256 × 256 mm³. [S1] | 256 × 256 × 256 mm³. [S2] | Defines the nominal maximum part envelope. |
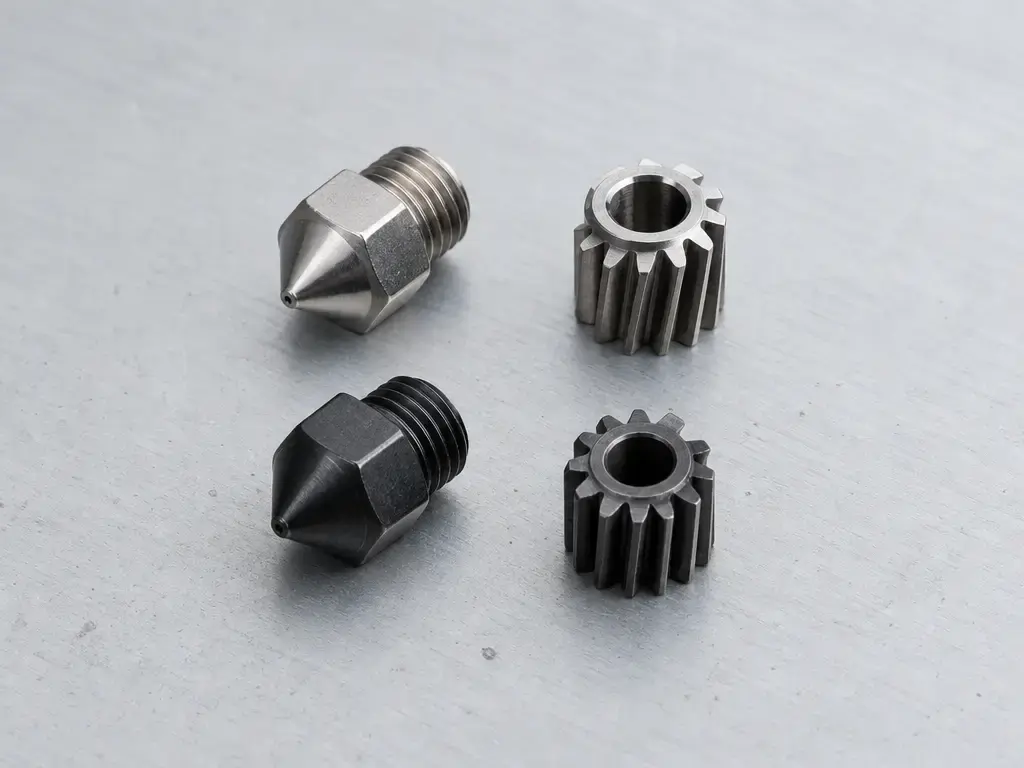
| Stock installed nozzle + extruder gear material | Stainless-steel nozzle; steel gears. [S1] | Hardened-steel nozzle; hardened-steel gear. [S2] | The stock wear-path materials differ. |
| Maximum nozzle temperature | 300°C. [S1] | 300°C. [S2] | The listed nozzle-temperature ceiling is the same. |
| Maximum bed temperature | 100°C. [S1] | 110°C. [S2] | P2S has more listed build-surface temperature headroom. |
| Maximum toolhead speed | 500 mm/s. [S1] | 600 mm/s. [S2] | A declared ceiling, not average print speed. |
| Maximum acceleration | 20 m/s². [S1] | 20,000 mm/s². [S2] | Equivalent magnitudes expressed in different units. |
| Maximum hotend flow | 32 mm³/s: ABS, 150 × 150 mm single-wall model, 280°C. [S1] | 40 mm³/s: Bambu Lab ABS, 250 mm round model, single outer wall, 280°C. [S2] | Test conditions differ. |
| Camera | 1280 × 720 low-rate camera, 0.5 fps. [S1] | 1920 × 1080, 30 fps HD camera. [S2] | Changes remote-monitoring detail and update rate. |
| Display / control | 2.7-inch, 192 × 64 display; button control interface. [S1] | 5-inch, 854 × 480 touchscreen. [S2] | Changes local interaction. |
| Filtration listing | Activated carbon filter. [S1] | Granulated coconut-shell activated carbon; VOC and particulate-matter filtration listed as supported. [S2] | Manufacturer-listed features only. |
| CF/GF positioning | Carbon- and glass-fibre-reinforced polymers: “Not Recommended.” [S1] | Supported-filament list includes named CF/GF materials. [S2] | Indicates each platform’s stated scope for filled filaments. |
Replaceable parts are shown in their stock-installed configuration. Maximum toolhead speed is not average print speed.
Filtration listings alone do not establish safe indoor-air conditions; use ventilation appropriate to the material and workspace.
Side-by-Side Specs: Material System
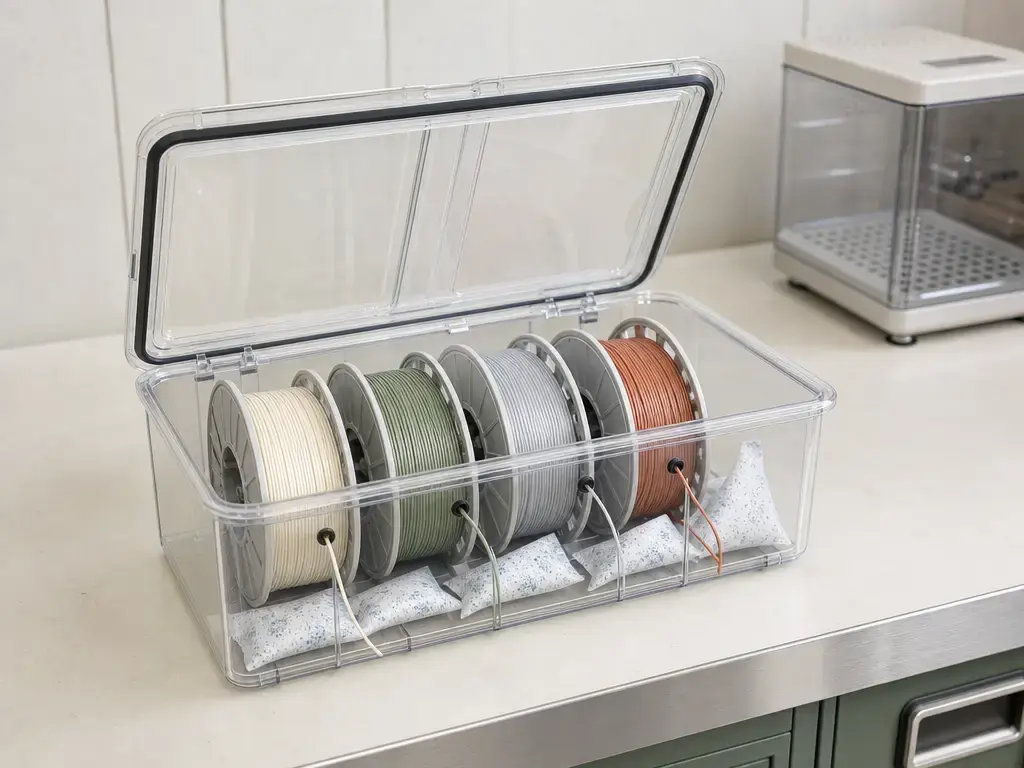
A Combo is the printer plus its included material system. That label can conceal a significant distinction: the original AMS provides automated material selection and enclosed desiccant storage, while AMS 2 Pro adds active drying. P2S AMS Combo documentation identifies AMS 2 Pro, and Bambu Lab documentation also lists a P1S AMS 2 Pro Combo guide. [S4] [S7] [S15]
| Attribute | Original AMS | AMS 2 Pro | Workflow implication |
|---|---|---|---|
| Slots / multiple AMS units | Four slots; up to four AMS units through a hub for 16 materials or colors. [S7] | Capacity is not asserted here. | Original AMS has a documented multi-unit expansion path. |
| Drying | No active dryer; enclosed storage with desiccant. [S7] | Active drying up to 65°C; starred materials cannot be fully dried within that limit. [S9] | Storage and active drying are different functions. |
| TPU | Not compatible with elastic material such as TPU. [S7] | “TPU for AMS” is listed, while generic TPU and certain TPU grades are not. [S9] | Check the filament-specific guidance before loading flexible material. |
| Spool dimensions | Not published in the cited original-AMS source. | Width 50–68 mm; diameter 197–202 mm. [S9] | Spool geometry remains a fit constraint. |
| P1/X1 adapter reality | No drying hardware. | An official Bambu Lab power adapter is required per AMS 2 Pro for drying on P1/X1-series hosts. [S8] | A P1S installation needs the appropriate adapter arrangement. |
What changes if your P1S bundle includes AMS 2 Pro?
A P1S does not become a P2S, but its material workflow can gain AMS 2 Pro active drying. On P1-series printers, that drying function requires the official power adapter for each AMS 2 Pro. [S8] [S9]
Check the listing before you compare bundles
- Printer model: P1S or P2S.
- Included material system: original AMS or AMS 2 Pro.
- Whether an official 24 V / 4 A power adapter is included or required for your intended drying scenarios. [S8] [S4]
- Stock nozzle type and material as shipped.
- Date checked and sales region.
Bundle contents vary by region and change over time; verify the exact included AMS generation and power adapter in the official listing on your purchase date.
What Actually Differs: Sensor Matrix
Filament run-out sensing and power-loss recovery are listed on both platforms, so neither is a P2S-only capability. The P2S sheet additionally lists door and tangle sensing. These entries identify listed functions, not guaranteed detection or recovery in every loading, feeding, or interruption condition. [S1] [S2]
| Feature | P1S lists? | P2S lists? | Notes |
|---|---|---|---|
| Filament run-out | Yes. [S1] | Yes. [S2] | Listed on both. |
| Power-loss recovery | Yes. [S1] | Yes. [S2] | Listed on both. |
| Filament odometry | Optional with AMS. [S1] | With AMS. [S2] | AMS-dependent listing. |
| Door sensor | Not listed. [S1] | Yes. [S2] | Listed by P2S only. |
| Tangle sensor | Not listed. [S1] | Yes. [S2] | Listed by P2S only. |
Workflow Differences That Actually Matter
Abrasive composites and the stock wear path
The stock wear path is a practical distinction for abrasive composite filaments. P1S is listed with steel gears and a stainless-steel nozzle, and its specification marks carbon- and glass-fibre-reinforced polymers as not recommended. P2S lists hardened-steel gears and nozzle hardware, alongside a supported-filament list containing several fibre-filled materials. [S1] [S2]
That can reduce the need to replace stock wear parts before exploring the listed materials. It does not guarantee successful composite printing or a particular component life. Filament conditioning, nozzle diameter, profile selection, model geometry, and end-use requirements still matter.
Temperature limits and warp-prone materials
Both platforms list a maximum nozzle temperature of 300°C, while the P2S has the higher listed bed-temperature limit: 110°C rather than 100°C. [S1] [S2] That additional build-surface thermal headroom may matter for profiles or materials that call for hotter beds.
It does not guarantee that a part will avoid warping, corner lift, or layer separation. Polymer behavior, part geometry, chamber conditions, plate preparation, cooling, and process settings also affect those outcomes.
Speed and flow: headroom versus real print time
Maximum toolhead speed, acceleration, and hotend flow are declared limits or test-specific maxima, not timed rankings of complete prints. [S1] [S2] Slicer behavior changes with feature length, direction changes, perimeter settings, infill pattern, cooling requirements, travel moves, and material-profile limits. Extrusion flow can also constrain a job before the motion system reaches its stated speed ceiling.
The published flow tests use different geometries, so they cannot yield a universal percentage-faster claim. [S1] [S2] A practical comparison requires the same model, material, nozzle, slicer version, profile, and conditioning state.
Monitoring, ergonomics, and failure-detection claims
The display and camera differences primarily affect local control and remote monitoring. A larger touchscreen changes how settings and status are accessed at the printer, while a higher-specification camera can change what is visible during remote observation. Neither feature alone demonstrates better prints, tighter dimensions, or fewer failed jobs. [S1] [S2]
Bambu Lab’s P2S launch material mentions AI error detection as a manufacturer claim. [S6] No detection-rate figure is provided there, so the claim does not establish how often the feature identifies an issue, prevents a failure, or changes production yield. The published sensor inventory is the clearer hardware boundary. [S1] [S2]
AMS and Material Conditioning: Storage vs Active Drying
Original AMS combines spool storage, automatic filament switching, and desiccant-based humidity management in an enclosed unit. It is designed to maintain loaded spools in an airtight storage environment rather than actively remove all moisture already absorbed by filament. [S7] It supports four spools, and up to four AMS units can be connected through a hub for 16 materials or colors. [S7]
Multi-material jobs require purging during material or color changes, creating waste that should be considered during job preparation. Elastic TPU is also an explicit limitation: Bambu Lab advises against using it in the original AMS. [S7]
AMS 2 Pro adds active drying and active moisture discharge while retaining enclosed storage functions. Its stated maximum drying temperature is 65°C, but the specification warns that materials marked with an asterisk require higher drying temperatures and cannot be fully dried by AMS 2 Pro. [S9] Spool dimensions remain a separate limitation: compatible filament must still fit the stated width and diameter range. [S9]
Power arrangements determine when drying is available. On P1- and X1-series printers, each AMS 2 Pro requires an official Bambu Lab power adapter for drying. [S8] In a P2S AMS Combo, the AMS 2 Pro can dry through the six-pin connection while the printer is in standby. Drying an idle AMS while the printer is printing, or drying multiple AMS 2 Pro units simultaneously, requires official adapters. [S4] [S5] Printing while drying also has firmware-dependent conditions. [S5]
Bambu Lab says its active venting dries filament “30% faster than sealed heating.” No test conditions were provided on the launch page; do not treat this as a general drying-performance coefficient. [S6]
Print Quality in Practice: What the Specs Cannot Prove
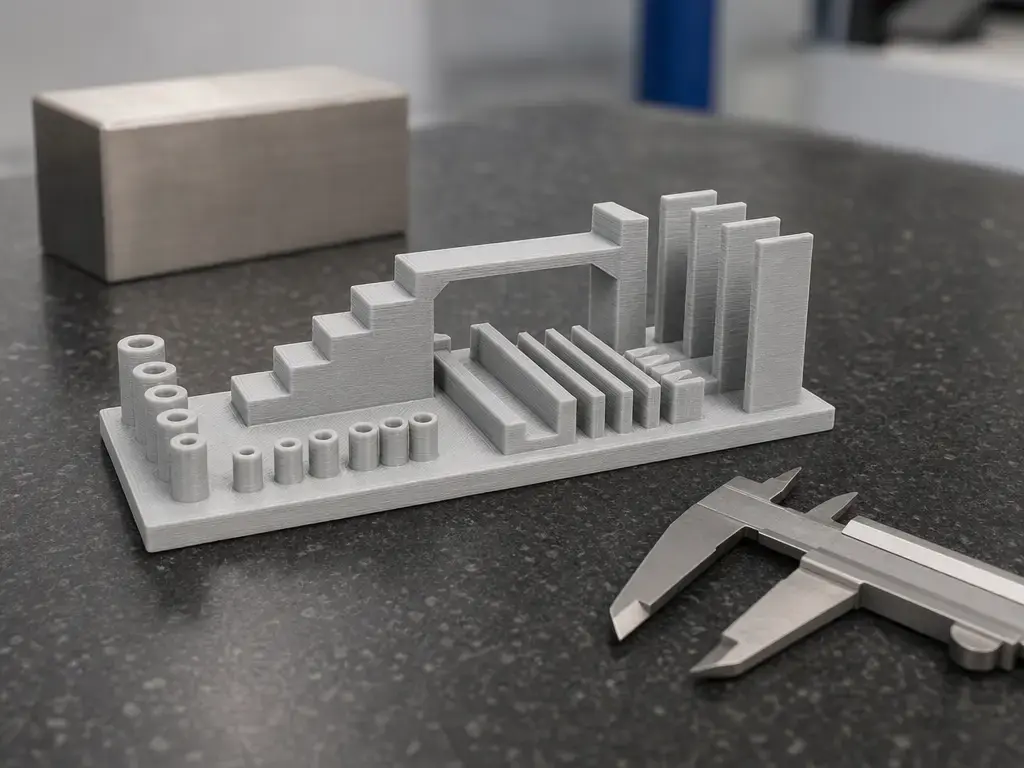
The phrase P1S Combo vs P2S print quality suggests a single ranking, but the compared specification sheets provide no shared, controlled tolerance or repeatability figure that establishes an overall winner. [S1] [S2] Material-extrusion outcomes depend on material condition, temperatures, cooling, geometry, orientation, layer settings, and motion settings. Optimization findings also do not automatically generalize across machines and setups. [S12]
A credible comparison needs the same artifact, documented settings, and an explicit measurement method. NIST additive-manufacturing test artifacts provide defined features for assessing geometry and surface roughness when measurement locations and procedures are documented. [S11] Repeatability concerns results obtained under the same procedure, observer, instrument, location, and short time interval. [S13] Accuracy is not a standalone printer number: it incorporates trueness and precision and should be reported with a reference and measurement uncertainty. [S14]
Metrics for a credible head-to-head test
- X/Y/Z deviation from CAD nominal, with the measurement tool stated.
- Repeatability across multiple identical prints, with the sample count stated.
- Surface roughness or a documented visual-scoring rubric.
- Print duration and material used.
- First-layer success or failure rate, with the sample count stated.
- Filament-conditioning method, including drying temperature and time, nozzle type and diameter, slicer version, and profile settings.
Running Costs: What Can Be Compared Without Inventing a Total
The relevant cost categories are workflow-based. Multi-material jobs can create purge waste, while abrasive or filled filaments can increase attention to replaceable wear-path parts. [S7] [S1] [S2] AMS 2 Pro can also require official adapter hardware in configurations where printer power is insufficient for drying. [S8] [S4]
P2S presents quick-swap nozzle replacement as a maintenance-workflow feature, but that does not establish a cost or reliability advantage. [S6] No total cost of ownership or fixed price is given here. Official bundle pricing and contents should be verified on publication day for the relevant United States region.
Who Should Buy Which: Three Explicit Paths
Path A — P1S + original AMS: Choose this if enclosed dry storage with desiccant and automated material switching suit your work. It is the direct fit when original-AMS TPU limitations, purge waste, and the P1S stock wear path are acceptable for your planned materials. [S1] [S7]
Path B — P1S + AMS 2 Pro: Choose this if you want the P1S platform but need AMS 2 Pro active drying. Verify the official adapter arrangement and confirm that your regular spools meet AMS 2 Pro fit requirements. [S8] [S9]
Path C — P2S + AMS 2 Pro: Choose this if you want AMS 2 Pro with the P2S platform’s stock hardened wear path, higher listed bed-temperature headroom, and different monitoring and local-control hardware. These are workflow boundaries, not guaranteed outcomes. [S2] [S9]
For most readers, the p1s combo vs p2s combo decision is a workflow decision before it is a headline-speed decision.
- Are abrasive filaments planned, and is stock hardened steel preferred?
- Is additional bed-temperature headroom relevant?
- Do the monitoring and local-interface differences matter?
- Is active drying needed, or is dry storage sufficient?
- Will a P1/X1 host need an official adapter for drying?
- Do regular spools fit AMS 2 Pro?
- Is purge waste from material switching acceptable?
- Can speed be validated with your own models and settings?
FAQ
What’s the main difference in the P1S Combo vs P2S Combo?
The comparison has two axes: printer platform and included material system. P1S and P2S differ in listed hardware, sensing, interface, and material-positioning features. Original AMS and AMS 2 Pro differ most clearly in enclosed desiccant storage versus active drying. A Combo label alone does not reveal every workflow consequence, so confirm both the printer and the AMS generation. [S1] [S2] [S7] [S9]
Do P1S and P2S have the same build volume?
Yes. Both specification sheets list a build volume of 256 × 256 × 256 mm³. [S1] [S2] This establishes the same nominal part envelope, not identical print conditions or outcomes. Installed wear-path parts, bed-temperature limits, sensor listings, interface hardware, camera specifications, AMS generation, filament condition, and selected profile can still differ.
Does the P2S Combo have better print quality than the P1S Combo?
No overall print-quality winner is established by the available specifications. The sheets do not provide a shared controlled tolerance or repeatability figure for that conclusion. [S1] [S2] A meaningful comparison needs the same artifact, documented settings and material condition, and a stated measurement method. NIST test artifacts provide a structured basis for that measured work. [S11] [S12]
Can the P1S use AMS 2 Pro, and what does that change?
P1S AMS 2 Pro Combo documentation exists, although bundle naming varies by region. [S15] The principal change is at the material-system level: AMS 2 Pro adds active drying, but its drying function on P1-series hosts requires an official Bambu Lab power adapter per AMS 2 Pro. [S8] Bundle contents vary by region and change over time; verify the exact included AMS generation and power adapter in the official listing on your purchase date.
Expert: Why can’t we convert the flow figures into a universal percentage faster?
The sheets list 32 mm³/s for P1S and 40 mm³/s for P2S, but they use different ABS descriptions and different model geometries. [S1] [S2] Flow is only one constraint on print duration. Small features, acceleration, cooling, layer settings, travel moves, supports, nozzle choice, and profile limits can determine actual time before either stated flow maximum is reached.
Expert: What does repeatability mean in a printer comparison test, and how should it be reported?
Repeatability concerns results obtained under the same procedure, observer, instrument, location, and short time interval. [S13] Report sample count, individual deviations, and measurement uncertainty rather than treating one print as conclusive. Accuracy also requires careful terminology because it combines trueness and precision. [S14] State the artifact, settings, measurement locations, instrument, and controlled conditions.
Sources
- Bambu Lab P1S technical specifications (PDF)
- Bambu Lab P2S Spec Sheet (PDF)
- Bambu Lab P2S Quick Start Guide (PDF)
- Bambu Lab P2S AMS Combo Quick Start Guide (PDF)
- Bambu Lab P2S 3D Printing User Manual V1.0 (2026.05) (PDF)
- Bambu Lab P2S Launch Post
- Bambu Lab: AMS Explained in Detail
- Bambu Lab AMS 2 Pro Quick Start Guide
- Bambu Lab AMS 2 Pro Specification Sheet
- ISO/ASTM 52900:2021 Additive Manufacturing Fundamentals and Vocabulary