
Summary
For most first-time buyers, the best 3d printer for beginners is the Bambu Lab A1 mini, mainly because it reduces setup friction without stripping away the features that keep a printer useful after the first week. Its main limitation is size: 180 × 180 × 180 mm³. [5] If you need more room for larger props, organizers, or brackets, the A1 is the larger easy alternative at 256 × 256 × 256 mm³. [6]
Choose the Ender-3 V3 SE if price matters most and the current product page still shows its $199.00 listing. [10] Choose the Elegoo Centauri Carbon if you want an enclosed value option with a 256 × 256 × 256 mm build volume and a US-page listing showing $309.00 USD alongside $419.99 USD on the same listing. [14] Choose the Prusa MINI+ if documentation, support culture, and supervised classroom or STEM use matter more than size. [15] Keep the Creality SPARKX i7 on the watchlist for now rather than treating it as the default winner. [9] Current independent roundup coverage still surfaces this same beginner pool, which is useful context but not enough reason to let a newer model skip the usual reliability caution. [17]
Ranking Methodology: How We Judged Beginner-Friendliness
No printer wins here on headline speed alone. The ranking is built around setup friction and calibration, first-layer reliability, support ecosystem, spare parts, offline or local-print practicality, build volume for normal beginner projects, and value in the buyer’s region. A machine with a smaller spec sheet can still be the better first purchase if it asks less from the user on day one. Current independent beginner roundups and broader market guides show that these are the tradeoffs shoppers are comparing now, not just raw motion numbers. [17] [18]
When readers ask what should beginners look for in a 3d printer, the answer depends on how the shortlist was built. Some printers look strong on paper, some look cheap only until shipping or warranty terms are added, and some look fast only because the marketing headline is doing too much work. A 2026 buyer also has to factor in current local stock, regional pricing, and whether the printer is well supported in the country where it will actually be used. [17] [18]
- setup friction and calibration
- first-layer reliability
- support ecosystem, spare parts, and offline or local-print use
- build volume for common beginner projects
- value and regional availability
Why Beginner Printers Got Easier
Beginner printers got easier because the machine now does more of the work that used to be manual. Auto calibration, input shaping, tuned PLA profiles, removable build plates, quieter motion systems, and cleaner first-run software have reduced the number of avoidable first-print failures. In current 2026 roundups, the recurring beginner pool includes machines like the A1 Mini, Ender-3 V3 SE, Prusa MINI+, Centauri Carbon, and SPARKX i7, which reflects how much the entry tier has shifted toward more complete out-of-box workflows. [17]
That has also changed how people shop. Modern consumer roundups are organized around ease of use, budget, enclosure, and multicolor capability rather than raw mechanical novelty alone. Broad 2026 guides still separate beginner, budget, and multicolor categories because those distinctions map more closely to real buyer experience than older hobbyist assumptions do. [18] For a first-time buyer, form factor and workflow matter more than nostalgia for the earlier, more hands-on era of desktop printing.
Why an FDM/FFF Printer Is Usually the Best First Buy
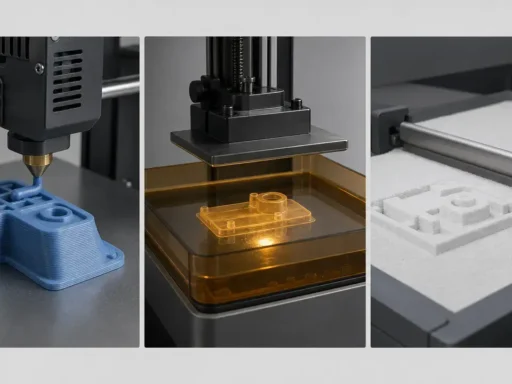
Additive manufacturing is the umbrella term for making parts layer by layer, and ISO/ASTM 52900:2021 uses material extrusion as the standards-based process label behind much of the consumer FDM/FFF language. [1] In everyday shopping terms, that is the familiar filament-and-nozzle workflow most people mean when they ask whether an FDM printer is best for beginners.
For most people, is an fdm 3d printer best for beginners? Usually yes. A beginner friendly fdm 3d printer paired with PLA is generally easier to live with than a first resin machine because the handling burden is lower. You do not have the same wash-and-cure workflow, liquid-resin handling, or messy post-processing as the default path for every print. That does not make material extrusion maintenance-free, but it does make it easier to understand and easier to recover from mistakes.

PLA is the usual starting material, but it is not emission-free, so “easy” should not be confused with “no ventilation needed.” UL 2904 Ed. 2-2023 is the emissions-testing framework worth citing when safety language comes up because it is built around tested printer and material combinations rather than blanket claims. [2] The published literature shows why that matters: ultrafine-particle emission estimates across tested desktop printer and filament combinations ranged roughly from 10^8 to 10^11 min⁻¹, PLA-related lactide was reported around 4–5 μg/min, and styrene from ABS or HIPS around 10–110 μg/min. [3] Earlier work also reported about 2.0 × 10^10 particles/min for PLA and 1.9 × 10^11 particles/min for ABS in one tested setup. [4] That is enough reason to recommend sensible ventilation without turning the subject into a panic story.
What Beginners Should Look For Before Buying
If you are asking what should beginners look for in a 3d printer, start with workflow instead of the spec sheet. The safest default is a filament printer with automatic bed leveling, sensible first-party PLA settings, a removable PEI-style build surface, and a build volume that matches the kinds of parts you actually plan to print. The A1 mini is a compact example at 180 × 180 × 180 mm³ with a 300 °C hotend, while the larger A1 stretches that to 256 × 256 × 256 mm³ and adds a bed rated up to 100 °C. [5] [6]
These features matter because they reduce failed first layers and cut down on avoidable troubleshooting. The Ender-3 V3 SE is a budget example with CR Touch auto-leveling and a 220 × 220 × 250 mm build volume, while the Adventurer 5M adds quick-detach nozzle options in 0.25 / 0.4 / 0.6 / 0.8 mm and connectivity options including Wi‑Fi, Ethernet, and USB. [10] [11] The Kobra S1 is also useful here because it makes the difference between recommended and maximum speed explicit at 300 mm/s versus 600 mm/s, and the Centauri Carbon does the same with a recommended 250 mm/s against a headline ceiling of ≤500 mm/s. [12] [14]
A beginner should also check how much the printer expects from the user after the box is open. The Prusa MINI+ remains a smaller but support-oriented benchmark at 180 × 180 × 180 mm, and the SPARKX i7 shows how feature-rich newer beginner-facing specs can look on paper with 260 × 260 × 255 mm of build volume, a 0.05–0.3 mm layer-height range, and a nozzle rated to ≤300 ℃. [15] [9] Those specs are useful, but they do not replace a clean setup path, stable first layers, and good documentation.
- automatic bed leveling
- Z-offset handling
- good first-party PLA profile
- PEI build plate
- direct drive if TPU is likely
- clear slicer workflow
- replacement nozzles and parts
- filament runout sensor
- local support and warranty
- offline use or cloud dependence
- build volume matched to projects
Beginner 3D Printer Types: Bed-Slinger, CoreXY, Enclosed, and Multicolor
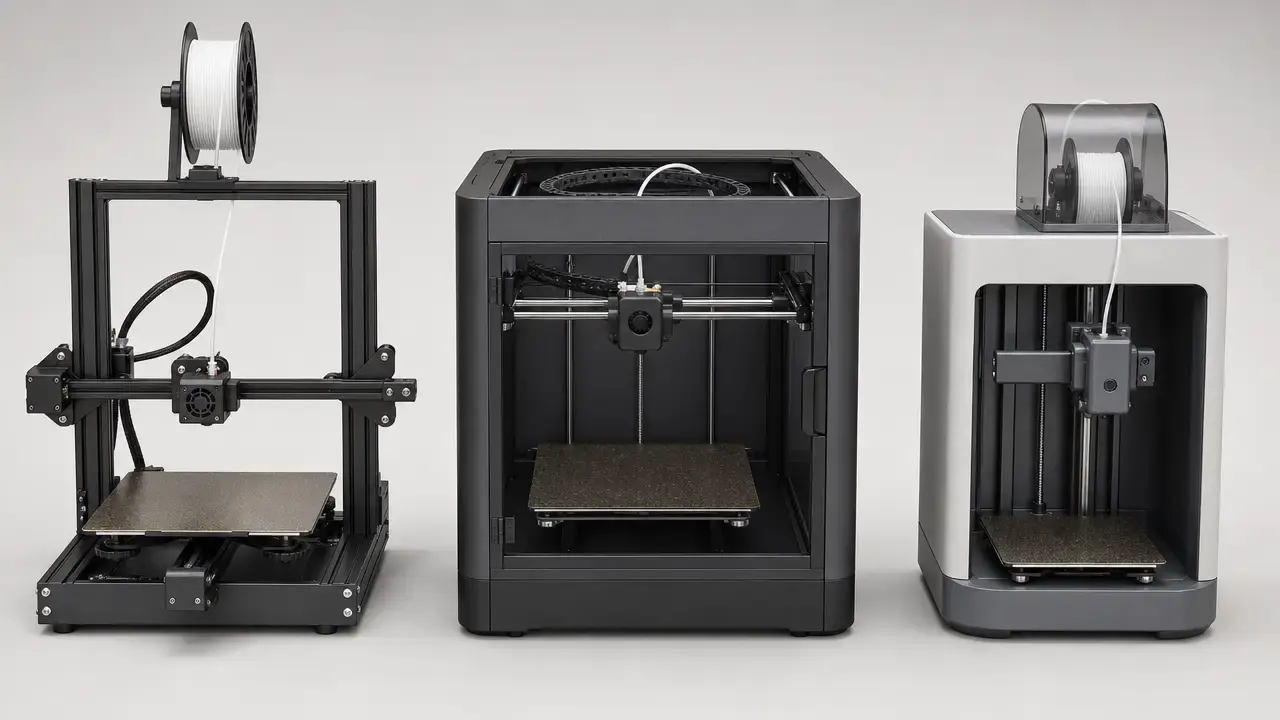
Open bed-slingers are still the easiest category for most beginners to understand. The bed moves on one axis, the motion is visible, and the whole machine is usually easier to inspect during troubleshooting. That is where the A1 mini, A1, and Ender-3 V3 SE sit, with build volumes ranging from 180 × 180 × 180 mm³ to 256 × 256 × 256 mm³ depending on the model. [5] [6] [10]
Not every beginner-facing machine fits that pattern. The Flashforge Adventurer 5M is an open-shell machine whose product page describes a CoXY-style all-metal structure rather than a classic bed-slinger layout, while the Kobra S1 and Centauri Carbon are enclosed CoreXY-style options. [11] [12] [14] An enclosure changes the physical experience more than the slogan does: it helps with drafts, adds some separation from moving parts, and can make the machine feel tidier in a shared room. What it does not do by itself is prove emissions control.
Multicolor-capable systems are useful when a project truly needs color changes without manual swaps, but they add waste, loading steps, and more things to troubleshoot. The Kobra 3 Combo is the straightforward multicolor example here, while the SPARKX i7 becomes multicolor-capable through CFS Lite support with four filament slots. [13] [9]
| Type | Beginner advantage | Main drawback | Examples to consider |
|---|---|---|---|
| Open bed-slinger | Easy to understand, usually lower cost, and easier to inspect during troubleshooting. | More exposed to drafts and bed motion on taller prints. | A1 mini, A1, Ender-3 V3 SE. [5] [6] [10] |
| Open-shell/CoreXY-style | Faster-moving modern layout without a full enclosure. | More machine complexity than a basic starter frame. | Adventurer 5M. [11] |
| Enclosed CoreXY | Better draft resistance and more physical separation from moving parts. | Usually more cost and more system complexity. | Kobra S1, Centauri Carbon. [12] [14] |
| Multicolor-capable | Color changes without manual swapping. | More purge waste, more loading complexity, and more troubleshooting. | Kobra 3 Combo, SPARKX i7 with CFS Lite. [13] [9] |
Top Picks by Use Case
If you want the easiest 3d printer to use, start with the model that best matches your space, budget, and the size of your first projects. The shortlist below keeps the default answer simple, then separates the larger easy option, the cheaper serious starter, the enclosed value option, and the support-first niche. Independent 2026 roundup coverage supports this pool of beginner contenders. [17]
| Pick | Best for | Why it fits beginners | Main caveat |
|---|---|---|---|
| A1 mini | Default overall pick | Low-friction setup and strong beginner automation in a compact 180 × 180 × 180 mm³ class. [5] | Size ceiling for larger projects. [5] |
| A1 | Larger easy alternative | Similar easy path, but with 256 × 256 × 256 mm³ of build volume. [6] | Recall history matters, though Bambu says units sold after 2024-01-30 were not from the recalled batch. [7] |
| Ender-3 V3 SE | Budget starter | Current listed price target of $199.00 with CR Touch auto-leveling. [10] | More hands-on than the Bambu picks. |
| Centauri Carbon | Enclosed value pick | Enclosed CoreXY-style format with 256 × 256 × 256 mm space and a listing showing $309.00 USD alongside $419.99 USD. [14] | Enclosure adds value, not automatic simplicity or emissions control. |
| Prusa MINI+ | Support/STEM niche | Mature documentation culture in a compact 180 × 180 × 180 mm format. [15] | Smaller volume than many newer beginner alternatives. |
| Adventurer 5M | Comparison model | Quick-setup pitch, USB/Ethernet/Wi‑Fi connectivity, and useful nozzle options. [11] | Not the default winner, and the 600 mm/s number is still a headline claim. [11] |
| Kobra S1 | Comparison model | Enclosed CoreXY-style format with a clear 300 mm/s recommended speed versus 600 mm/s maximum. [12] | More machine than many first buyers need. |
| SPARKX i7 | Watchlist only | Interesting spec sheet with 260 × 260 × 255 mm build volume and CFS Lite support. [9] | Keep it on the watchlist until stronger post-launch reliability evidence is available. [17] |
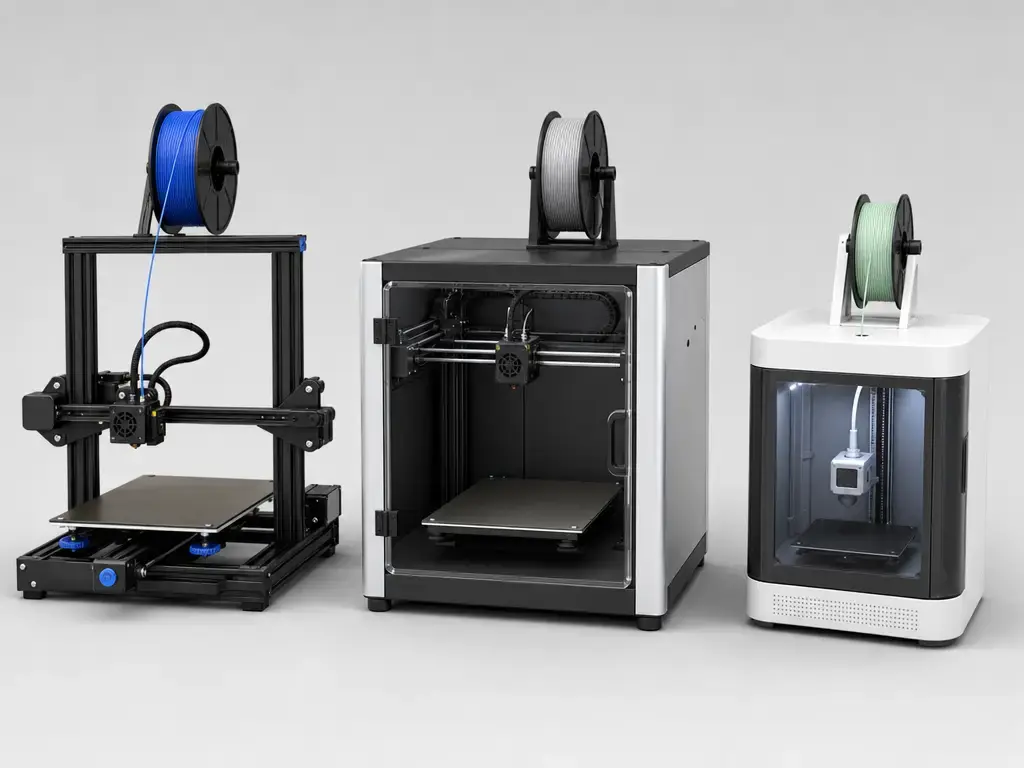
The sections below unpack the main picks and the comparison models so you can match the printer to your actual use case rather than to a single number on the product page.
Pick Detail: Bambu Lab A1 mini, Bambu Lab A1, and Creality Ender-3 V3 SE
The Bambu Lab A1 mini is the easiest default for most first-time buyers because its beginner advantage is not just automation, but the way that automation shortens the learning curve. Its listed build volume is 180 × 180 × 180 mm³, and the product page also lists a 500 mm/s maximum toolhead speed, 10,000 mm/s² maximum acceleration, and a 300 °C hotend. [5] Those are manufacturer maximums, not guaranteed everyday throughput, but they show that the printer is a serious small-format machine rather than a stripped-down toy. The reason it wins is simpler: the setup path is polished, the printer handles more of the calibration work than older entry-level machines, and it remains part of the current independent beginner roundup conversation. [17]
Its caveat is straightforward. A compact printer stays beginner-friendly partly because it is compact, but 180 mm on a side becomes a real limitation if you want helmets, larger cosplay sections, or big household organizers. [5] That is why the A1 mini is the default answer, not the universal answer.
The Bambu Lab A1 is the larger version of the same general idea. Its documentation lists a 256 × 256 × 256 mm³ build volume, the same 500 mm/s maximum toolhead speed, the same 10,000 mm/s² maximum acceleration, a 300 °C hotend, and a bed rated to 100 °C. [6] If you like the low-friction beginner logic of the A1 mini but do not want to outgrow the bed immediately, the A1 is the more flexible choice. Independent roundup coverage still places it in the current beginner discussion, which supports its relevance as a real option rather than a legacy recommendation. [17]
The recall context should be kept proportional. Bambu says A1 printers sold after January 30, 2024 are not from the recalled batch and already include the fixes for the heatbed cable issue. [7] That does not erase the history, but it does keep the model in bounds as a reasonable current recommendation.
The Creality Ender-3 V3 SE sits at the value end of the shortlist. The current product page lists 220 × 220 × 250 mm of build volume, 250 mm/s maximum printing speed, 2,500 mm/s² maximum acceleration, CR Touch auto-leveling, and a listed price of $199.00. [10] That makes it an appealing budget benchmark for buyers who want a real machine at the lowest price in this guide, but low price does not equal lowest friction. Compared with the Bambu options, the Ender-3 V3 SE asks for more patience and more tolerance for hands-on setup.
That tradeoff is why it belongs in the guide without taking the default crown. It is a cheap serious starter, not the easiest or most polished first printer. Current independent beginner coverage still includes it, which supports its role as the budget row rather than an outdated holdover. [17]
Pick Detail: Prusa MINI+ and Elegoo Centauri Carbon
The Original Prusa MINI+ makes the most sense as a support, documentation, and education choice rather than the mainstream default winner for every beginner. Its build volume is 180 × 180 × 180 mm, or 7 × 7 × 7 inches, which keeps it firmly in the compact class. [15] That is enough for many small household parts, classroom projects, test pieces, and learning prints, but not enough to compete on size with the larger beginner machines in this guide. What keeps it relevant is the ecosystem around it: Prusa’s documentation culture, slicer maturity, and long-running community support still matter for supervised teens, classrooms, and buyers who care more about guidance than spec-sheet drama. The fact that it still appears in current independent beginner coverage supports that niche role. [17]
If you specifically want an enclosed-value option, the Elegoo Centauri Carbon is the more relevant comparison. The US page shows $309.00 USD and $419.99 USD on the listing, and the spec block lists a 256 × 256 × 256 mm build volume, a speed ceiling of ≤500 mm/s, a recommended 250 mm/s, maximum acceleration of 20,000 mm/s², and operating sound of ≤55 dB. [14] That makes it attractive for buyers who want more physical separation, less draft sensitivity, and more room than the MINI+ offers without jumping straight into a much more expensive enclosure ecosystem. It also appears in the current beginner-roundup pool. [17]
The caveat is the same one that applies to every enclosed consumer printer here: enclosure is a thermal and practical feature first, not a substitute for verified emissions control. [14] Treat it as a value-oriented enclosed machine, not as an automatic indoor-fume solution.
Comparison Models and Watchlist: Flashforge Adventurer 5M, Anycubic Kobra S1, Anycubic Kobra 3 Combo, and Creality SPARKX i7
The Flashforge Adventurer 5M and Anycubic Kobra S1 are comparison models worth checking if your local pricing or bundle deal is unusually strong. The Adventurer 5M page shows $299.00 USD and $399.00 USD on the listing, a 220 × 220 × 220 mm build volume, a “10 Minutes or Less” setup claim, 600 mm/s headline maximum speed, 20,000 mm/s² maximum acceleration, quick-detach nozzle options from 0.25 to 0.8 mm, a 280 °C direct-drive nozzle, a 100 °C platform, and Wi‑Fi / Ethernet / USB connectivity in an open shell. [11] The Kobra S1 lists $349.00 for the base machine and $399.00 for the Combo, with a fully enclosed CoreXY-style frame, 250 × 250 × 250 mm build volume, up to 600 mm/s maximum speed, 300 mm/s recommended speed, 44 dB quiet mode, a 320 °C hotend, and a 0.05–0.28 mm layer-thickness range. [12] Both are credible on paper, but neither needs to outrank the main picks unless local value clearly shifts the picture.
The Anycubic Kobra 3 Combo is useful here as the multicolor example. Its page lists 250 × 250 × 260 mm, 16.25 L maximum printing volume, a recommended 300 mm/s speed, a 600 mm/s maximum speed, and 20,000 mm/s² maximum acceleration. [13] Those are appealing specs, and the multicolor feature set is real, but multicolor does not automatically make a machine the better first printer. It adds purge waste, extra loading steps, and more failure points, which is why it remains a comparison model rather than a default recommendation.
The Creality SPARKX i7 stays on the watchlist. Its official page lists 260 × 260 × 255 mm build volume, ≤500 mm/s maximum print speed, ≤10,000 mm/s² acceleration, 0.05–0.3 mm layer height, a 720p AI camera with lighting, a nozzle rated to ≤300 ℃, and CFS Lite support with four filament slots. [9] It has also surfaced in current independent beginner coverage. [17] Even so, the right editorial position is still caution: it looks interesting on paper, but it stays a watchlist machine unless stronger independent post-launch reliability evidence appears.
Performance Metrics That Actually Matter
Print speed is not one number. A manufacturer’s maximum speed is usually a motion ceiling, while recommended speed is often a better clue to normal use. The A1 mini and A1 both list 500 mm/s and 10,000 mm/s² as maximum toolhead figures, the Ender-3 V3 SE lists 250 mm/s and 2,500 mm/s², the Adventurer 5M headlines 600 mm/s and 20,000 mm/s², the Kobra S1 explicitly separates 300 mm/s recommended from 600 mm/s maximum, and the Centauri Carbon does the same with 250 mm/s recommended versus ≤500 mm/s maximum. [5] [6] [10] [11] [12] [14] Real throughput also depends on volumetric flow: if the hotend cannot melt and push enough plastic, the machine will not hold the headline pace on thick layers, wide extrusion widths, or large nozzles.
Acceleration matters because it determines how quickly the printer can reach that speed on short moves and small features. A fast headline number helps less on a real print if the printer never has enough room to sustain it. That is why the Adventurer 5M’s 600 mm/s and 20,000 mm/s² should be read as capability ceilings, not as a promise about every model you slice. [11] The same caution applies whenever a sales page uses one dramatic number to summarize an entire machine.
Layer height is also easy to misread. A 0.05–0.3 mm range, like the one listed for the SPARKX i7, describes a setting window, not a complete statement of print quality or resolution. [9] Surface finish also depends on nozzle size, cooling, speed, extrusion consistency, and model geometry. Likewise, consumer accuracy language is not the same thing as engineering tolerance data. If a consumer page uses “accuracy” loosely, treat it as a general fit-and-finish signal unless the brand publishes actual measurement methodology.
Build volume, noise, temperature, and extruder style also need context. A bigger build volume gives you more room, but not every part fits cleanly just because one dimension is large enough. A 300 °C or 320 °C hotend does not guarantee painless advanced-material printing if the bed, enclosure behavior, and filament path are not equally suitable. Direct drive usually makes TPU easier than a Bowden setup, but it does not override basic calibration. And quiet-mode claims, like 44 dB on the Kobra S1 or ≤55 dB on the Centauri Carbon, are placement clues rather than the whole noise story. [12] [14]
- Compare recommended speed, not just maximum speed. [12] [14]
- Read acceleration as part of real print speed, not as a separate bragging right. [10] [11]
- Treat layer height as one quality variable, not a standalone resolution claim. [9]
- Treat build volume as usable room, not a guarantee that every large part will be convenient to print. [5] [6]
Setup Workflow: From Unboxing to First PLA Print
A good first-day setup should feel boring in the best sense. Open the box, assemble only what is necessary, use the printer’s own guided calibration, and print a small PLA test object before chasing speed or material experiments. That logic works whether you start with a lower-friction machine like the A1 family or a more budget-oriented model like the Ender-3 V3 SE. [5] [6] [10] ISO/ASTM 52900:2021 is the right terminology anchor here because you are dealing with a material-extrusion workflow, not every type of 3D printing at once. [1]
Most beginner failures are simple. The usual problems are a dirty plate, the wrong Z-offset, wet filament, changing too many slicer settings at once, starting with a huge print, or ignoring temperature guidance. Even printers that market themselves as fast or easy still benefit from conservative first-print habits. The Adventurer 5M pushes quick setup, the Kobra S1 gives a recommended 300 mm/s rather than just a maximum claim, and the Centauri Carbon also separates recommended from headline speed. [11] [12] [14]
- Place the printer on a stable surface.
- Install any removable parts.
- Remove transport screws or locks.
- Run self-test and calibration.
- Load PLA.
- Clean the build plate.
- Slice a small test model.
- Watch the first layer.
- Let the print cool before removal.
- Save a working profile.
Keep the first model small, resist the urge to edit every slicer setting, and use that first successful profile as your baseline. You can tune later; the point on day one is to get a clean, understandable print.
Materials for Beginners: PLA First, PETG Later, ABS/ASA With Caution
Start with PLA. It is still the most forgiving beginner filament in ordinary home use because it generally prints at friendlier settings, gives fewer adhesion surprises on a well-prepared machine, and makes troubleshooting easier than tougher materials. PLA is beginner-friendly, not emission-free: one study reported lactide around 4–5 μg/min and ultrafine-particle emission estimates roughly from 10^8 to 10^11 min⁻¹ across tested printer and material combinations. [3] That is one reason sensible ventilation belongs in a beginner guide rather than only in an advanced-material guide.
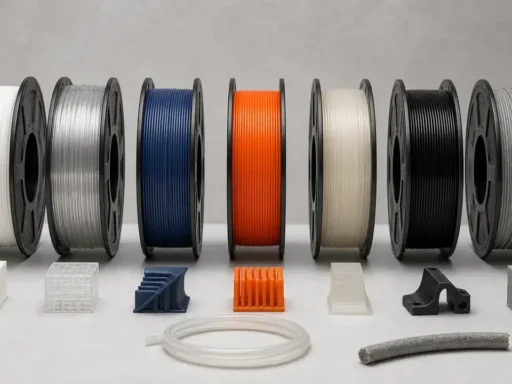
PETG is the usual next step when you want more heat resistance and toughness than PLA without jumping straight into harder engineering materials. It is still beginner-accessible, but it often asks for better control of stringing, first-layer behavior, and cooling. TPU belongs slightly later unless flexible parts are a near-term priority. A direct-drive extruder usually makes TPU easier to feed consistently than a Bowden layout, but machine setup and profile still matter more than the label alone.
ABS and ASA are better treated as later materials, not first-week defaults. Earlier emissions work reported about 2.0 × 10^10 particles/min for PLA and 1.9 × 10^11 particles/min for ABS in one tested case, which helps explain why ventilation and process control remain relevant even when a machine has an enclosure. [4] Printers like the A1 mini and A1 have hotends rated to 300 °C, and the Kobra S1 reaches 320 °C, so temperature capability is not the only question. [5] [6] [12] An enclosed machine like the Centauri Carbon can help with drafts and temperature stability, but it should still be treated as a practical printing feature first, not a fume-control device. [14]
What a Beginner Can Realistically Print
In the first month, a 3d printer for beginners is best used for parts that teach sizing, first-layer control, support settings, and slicer basics. That usually means small household or hobby objects rather than giant cosplay shells. The A1 mini and Prusa MINI+ both sit in the 180 × 180 × 180 mm class, which is enough for many starter prints but not every idea. [5] [15] If you are unsure about size, moving up to something like the A1 or Centauri Carbon at 256 × 256 × 256 mm gives you more room before you have to split parts. [6] [14]
Avoid load-bearing or safety-critical parts as early projects. A beginner printer can make many useful objects, but structural components, protective gear parts, and anything that could fail dangerously need more design review, material judgment, and testing than a first-month setup usually provides.
- drawer organizers
- cable clips
- tabletop terrain
- replacement knobs
- brackets
- plant labels
- cosplay detail parts
- camera mounts
- educational models
- simple jigs
Safety, Ventilation, and Maintenance
A beginner FDM printer is still a machine with a hot nozzle, a heated bed, and moving axes. The basic safety rules are practical: keep the printer on a stable surface, leave space around it, keep hands clear during motion, and avoid long unsupervised runs when you are still learning the machine. Supervised teens and classroom users can learn on these printers, but an adult should still control setup, placement, and the first few sessions around hot hardware.
Ventilation deserves the same practical tone. UL 2904 Ed. 2-2023 exists precisely because emissions claims should be tied to tested printer and material combinations, not vague “safe indoors” language. [2] Published studies show wide variation: ultrafine-particle emission estimates ranged roughly from 10^8 to 10^11 min⁻¹ across tested desktop combinations, styrene from ABS or HIPS was reported around 10–110 μg/min, and lactide from PLA around 4–5 μg/min. [3] Earlier work also reported about 2.0 × 10^10 particles/min for PLA and 1.9 × 10^11 particles/min for ABS in one setup. [4] That is enough to justify sensible room ventilation without pretending every printer and filament behaves the same way. An enclosure can help with drafts and physical separation, but it should not be treated as a fume-control device on its own.
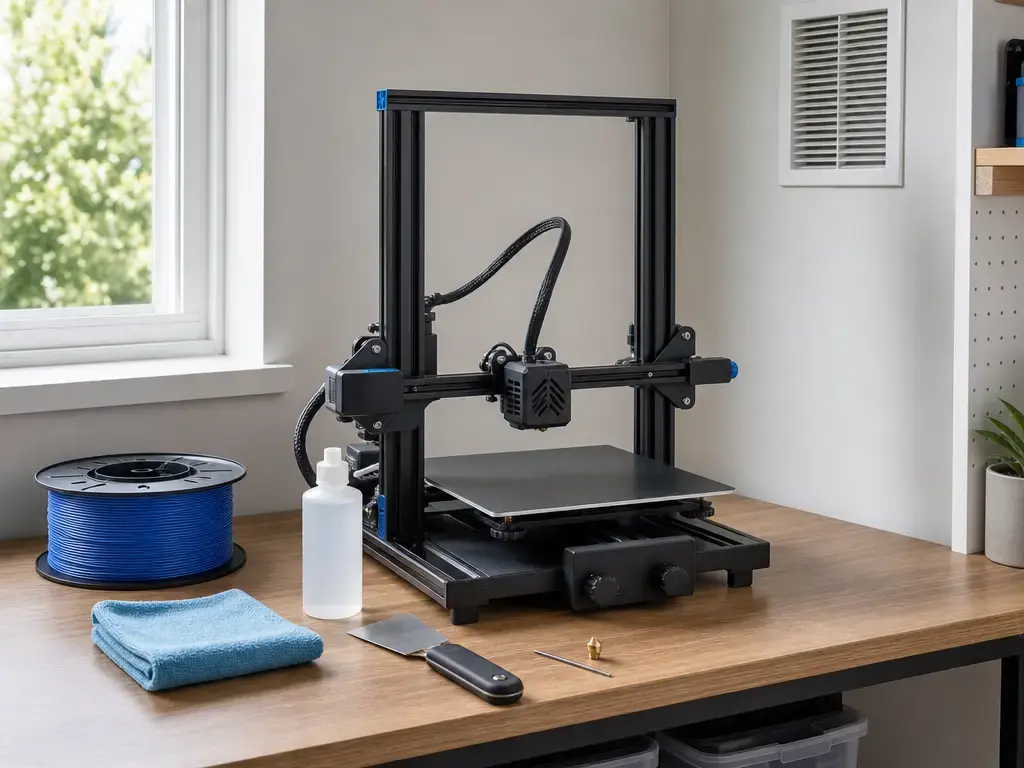
Maintenance is what keeps a beginner machine beginner-friendly after the first week. Clean the plate, watch for nozzle clogs, check belt tension, keep the printer in a room that is not overly dusty or humid, and update firmware when the manufacturer provides a stable release. A printer that starts easily can still become frustrating if the plate is dirty, the nozzle is partially clogged, or basic mechanical checks are ignored. Beginner-friendly does not mean maintenance-free.
Regional Price and Availability Note: US, UK, and Australia
If you are comparing the best 3d printer for beginners in the US, UK, or Australia, verify local price, stock, shipping, plug type, support terms, and warranty on publication day. Current 2026 roundups are useful for identifying the active beginner field, but they are not a substitute for checking the actual local listing where you plan to buy. [17] [18]
Do not invent regional numbers. If a current UK or Australia figure is not available from a reliable source at publication time, say no reliable figure found. That is better than copying an old US price into another region or assuming the same bundle, tax, and support conditions apply everywhere.
Final Buying Checklist: Choosing the Best 3D Printer for Beginners
If you want the best 3d printer for beginners, use the shortlist only after answering the process question first: for most people, start with a material-extrusion machine rather than a resin machine, start with PLA, and treat workflow as more important than the biggest speed headline. ISO/ASTM 52900:2021 is the terminology anchor for that FDM/FFF decision, and UL 2904 Ed. 2-2023 is the reminder that easy printing still deserves sensible ventilation language. [1] [2] The compact default benchmark remains the A1 mini at 180 × 180 × 180 mm³, while the A1 is the larger easy benchmark at 256 × 256 × 256 mm³. [5] [6]
Use the checklist as a filter, not a scoring contest. A printer does not fail automatically because it misses one item, but you should understand the tradeoff before buying it. If you want the low-price benchmark, the Ender-3 V3 SE is still the budget line here; if you want the enclosed-value benchmark, that role belongs to the Centauri Carbon; if you want the support-first compact niche, that is where the Prusa MINI+ still sits. [10] [14] [15] Independent 2026 roundup coverage supports this shortlist framework. [17]
- choose FDM/FFF unless you specifically need resin detail. [1]
- start with PLA. [3]
- prefer auto bed leveling.
- pick at least 220 mm build volume if unsure.
- confirm spare parts.
- check slicer support.
- ignore max speed alone.
- verify current price in your country.
- budget for filament, nozzles, and plate-cleaning supplies.
FAQ
What is the best 3D printer for beginners?
For most first-time buyers, the Bambu Lab A1 mini is the best starting point because it combines strong beginner automation with a compact, manageable size. Its build volume is 180 × 180 × 180 mm³, which is enough for many real first projects but still small enough to keep the machine approachable. [5] If you know you need larger parts, the A1 is the bigger easy alternative at 256 × 256 × 256 mm³. [6] If price matters most, the Ender-3 V3 SE is the budget benchmark instead. [10]
Is an FDM 3D printer best for beginners?
Usually, yes. In standards language, the relevant process family is material extrusion, while shoppers usually call the common consumer machines FDM or FFF. [1] That filament-based workflow is normally easier for a first-time buyer than resin because it avoids the usual wash-and-cure routine and the same level of liquid-material handling. PLA is the most common starting material, but it is not emission-free, so easier does not mean ventilation is irrelevant. [3]
What should beginners look for in a 3D printer?
Prioritize automatic bed leveling, good PLA profiles, a removable PEI-style plate, clear slicer workflow, sensible parts support, and a build volume that fits the objects you actually want to print. If TPU is likely, direct drive is a practical advantage. If support and documentation matter more than raw size, the Prusa MINI+ stays relevant. [15] If price matters most, the Ender-3 V3 SE remains the cheaper serious starter at a listed $199.00. [10]
What is the easiest 3D printer to use?
The easiest 3D printer to use is usually the one that reduces setup and calibration work without boxing you into a tiny feature set. In this guide, that is the A1 mini for most people. [5] The A1 is the easier larger-bed alternative if you want more room without changing the overall beginner logic too much. [6] An enclosed machine like the Centauri Carbon can also feel more contained physically, but enclosure alone does not make it the simplest first path. [14]
How do auto bed leveling and Z-offset differ?
Auto bed leveling measures the bed surface and compensates for small irregularities across it. Z-offset is the nozzle’s final first-layer height relative to that measured surface. They work together, but they are not the same thing. A printer can probe the bed correctly and still give you a bad first layer if the Z-offset is too high or too low. That is why auto leveling is helpful but never the whole first-layer story. [1]
Does an enclosed printer make ABS or ASA safe indoors?
No. An enclosure helps with temperature stability, draft resistance, and physical separation from moving parts, but it is not the same thing as verified emissions control. UL 2904 Ed. 2-2023 is the relevant testing framework when emissions claims are being made. [2] Published studies also show that emissions vary a lot by printer and filament combination, with ABS-related styrene and particle output generally more concerning than PLA. [3] [4]
How can I tell whether a printer’s 500–600 mm/s speed claim matters?
Start by checking whether the page also gives a recommended speed. The Kobra S1 is a good example because it lists 300 mm/s recommended and 600 mm/s maximum, which is much more informative than the top-line number alone. [12] Then look at acceleration, cooling, nozzle size, and volumetric flow, because those determine whether the machine can hold pace on real models. Layer height matters too: a printer like the SPARKX i7 lists 0.05–0.3 mm, and that range changes the balance between print time and finish quality. [9]
Sources
- ISO/ASTM 52900:2021 — Additive manufacturing — General principles — Fundamentals and vocabulary.
https://www.iso.org/standard/74514.html - UL 2904 Ed. 2-2023 — Standard Method for Testing and Assessing Particle and Chemical Emissions from 3D Printers.
https://webstore.ansi.org/standards/ul/ul2904ed2023 - Azimi et al. (2016) — Emissions of Ultrafine Particles and Volatile Organic Compounds from Desktop 3D Printers.
https://pubs.acs.org/doi/10.1021/acs.est.5b04983 - EPA HERO record — Ultrafine particle emissions from desktop 3D printers.
https://hero.epa.gov/reference/2331814/ - Bambu Lab A1 mini official product page.
https://us.store.bambulab.com/products/a1-mini?skr=yes&variant=41416712716424 - Bambu Lab A1 quick start guide PDF.
https://cdn1.bambulab.com/documentation/quick-start-a75adcb1d5d5e/Quick%20Start%20Guide%20for%20A1.pdf - Bambu Lab A1 official store page.
https://us.store.bambulab.com/products/A1/ - Bambu Lab A1 Recall Update blog post.
https://blog.bambulab.com/a1-recall-update/ - Creality SPARKX i7 official product page.
https://www.creality.com/products/sparkx-i7 - Creality Ender-3 V3 SE official product page.
https://www.creality.com/products/creality-ender-3-v3-se - Flashforge Adventurer 5M official product page.
https://www.flashforge.com/products/adventurer-5m-3d-printer?country=US - Anycubic Kobra S1 official product page.
https://us.anycubic3d.com/products/kobra-s1 - Anycubic Kobra 3 Combo official product page.
https://store.anycubic.com/products/kobra-3-combo - Elegoo Centauri Carbon official US product page.
https://us.elegoo.com/products/centauri-carbon - Original Prusa MINI+ official product page.
https://www.prusa3d.com/product/original-prusa-mini-3/ - Original Prusa CORE One official product page.
https://www.prusa3d.com/product/prusa-core-one/ - Tom’s Hardware — Best 3D Printers for Beginners 2026.
https://www.tomshardware.com/3d-printing/best-3d-printers-for-kids-and-teens - All3DP — Best 3D Printers 2026.
https://all3dp.com/1/best-3d-printer-reviews-top-3d-printers-home-3-d-printer-3d/