
Summary — what 3D printer layer shifting means (and what to check first)
3D printer layer shifting is a lost-position error in which one or more later layers are offset sideways in X or Y, so everything above the event prints displaced from what came before. In material extrusion, parts are built layer by layer, and this defect is usually treated as an XY motion problem rather than a material-formation problem. [2] [4] [10]
On desktop FFF/FDM machines, the usual cause is not a slicer glitch but a loss of motion-system integrity: a collision, loose pulley, belt slip, binding axis, cable snag, or missed step under load. The term is used mainly for material-extrusion printers; resin printers fail in other ways, which are outside the scope here. [4] [6] [10]
Check first, in order. [4] [6] [10]
- Obstruction or collision marks on the print, nozzle, or travel path.
- Belt and pulley security, especially any pulley set screw or grub screw.
- Smooth X/Y motion by hand with power off.
- Cable bundle or harness snag points.
- Then reduce motion stress with lower speed or acceleration.
- Only after that, re-slice the file or try different storage media.
Definition boundary — layer shift vs similar-looking print defects
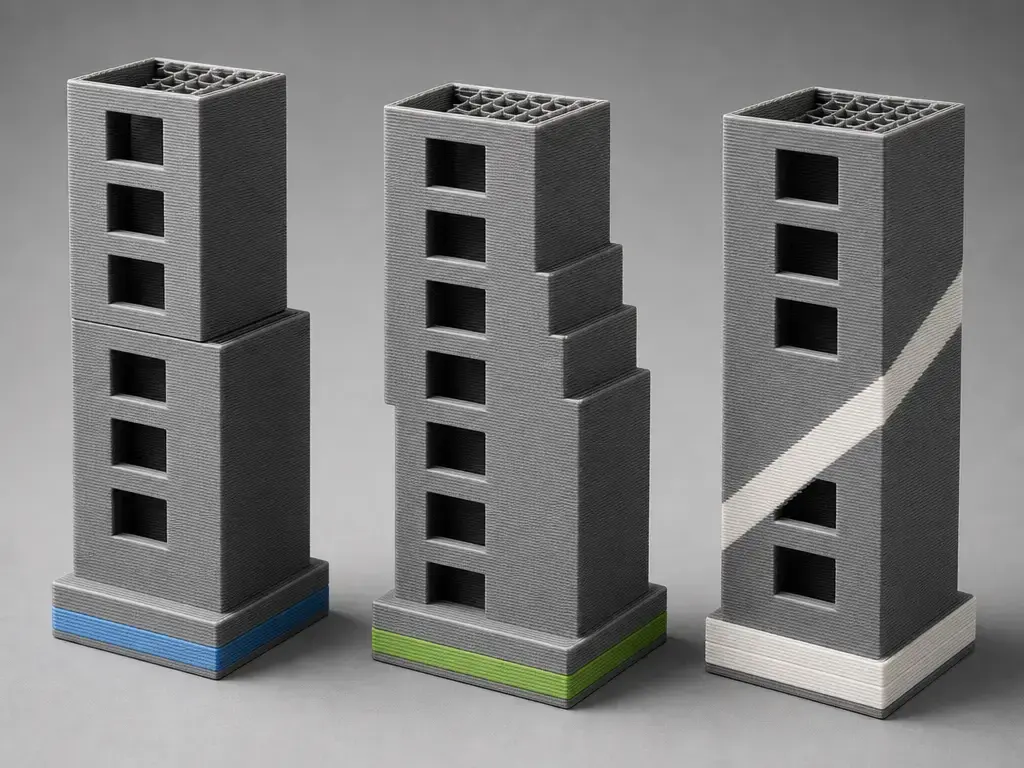
Layer shifting is a whole-axis displacement: the nozzle still deposits material, but later layers are no longer aligned with earlier ones. That makes it different from under-extrusion, which changes line volume; ringing or ghosting, which creates repeated ripples instead of a clean offset; and Z-banding, which shows periodic vertical variation rather than a sudden sideways jump. Warping matters here because it can raise part geometry into the nozzle path and trigger a collision, but warping itself is not the same defect as a true layer shift. ISO/ASTM 52900:2021 is the relevant additive-manufacturing vocabulary standard for process terminology, while manufacturer and review sources here describe layer shift as an XY positioning failure in material extrusion. [1] [4] [10] [11]
| Defect | What you see | Main direction | First checks |
|---|---|---|---|
| Layer shifting | Sudden lateral step; upper layers displaced relative to lower layers | X or Y | Collision marks, belts, pulleys, binding |
| Warping | Corners or edges lift from the bed; may later cause a nozzle strike | Usually none at first | Adhesion, cooling, first layer, part geometry |
| Ringing / ghosting | Repeating ripples near sharp corners | Along the motion axis that excited vibration | Speed, acceleration, frame stiffness |
| Z-banding | Regular vertical stripes or banding | Z | Lead screws, guides, couplers |
| Delamination | Layers split apart | Z-plane adhesion failure | Temperature, cooling, material settings |
A useful clue is the shape of the fault. If the whole stack steps over at one height and then continues normally, that usually points to a momentary loss of position. If the offset repeats or grows in a pattern, suspect recurring drag, a repeated collision, or another repeatable load event rather than a one-time accident. [4] [10]
Diagnose the symptom — which axis shifted, and did it happen once or repeatedly?
First identify whether the visible shift is on X, Y, or both. An X-axis layer shift typically pushes later layers left or right relative to the part below, while a Y-axis shift moves them forward or backward relative to the bed. On conventional Cartesian machines, that often narrows the search to one motion path, one motor, one belt loop, and one set of idlers or guides. [4] [6] [10]
Next, decide whether the shift happened once or recurred. A single event often points to a brief nozzle strike, snagged cable, loose pulley, belt tooth jump, or missed step from a short load spike. Repeated shifts at a similar height are more suggestive of a repeatable obstruction, cable snag, or geometry-related event. If it repeats at the same height, suspect a repeatable mechanical cause before assuming firmware. [4] [6] [10]
- Single shift at one height.
- Repeated staircase offsets.
- X-axis layer shift.
- Y-axis layer shift.
- Diagonal-looking shift on CoreXY.
Kinematics note — don’t assume every printer has one X belt and one Y belt
A bedslinger or other conventional Cartesian printer is usually easier to reason about axis by axis because the bed and toolhead move on different axes. CoreXY is different: both motors and both belts contribute to XY motion, the belt path is longer and more complex, and an apparent X or Y problem can involve either side of the coupled system. Klipper’s kinematics documentation reflects the same distinction between Cartesian, CoreXY, and Delta motion translation. [12] [13] [14]
What actually failed — distinct mechanisms that all look like ‘misaligned layers’
Several different failures can produce the same visible symptom. Missed steps mean the machine was commanded to move but could not complete that motion because torque margin was exceeded. Belt slip means the belt lost proper engagement or tracking. Pulley slip means the motor shaft turned but the pulley did not stay locked to it. Binding or friction means resistance rose high enough to overload the motion system. Driver thermal or current-related problems reduce effective drive after heat or electrical limits are reached. [4] [6] [10]
| Mechanism | What it looks like | What to inspect first | Notes |
|---|---|---|---|
| Missed steps | Sudden offset after a load spike | Collisions, acceleration, binding, driver heat | Commanded motion was not completed because torque margin was exceeded. [6] [10] |
| Pulley slip | Staircase or variable offset | Set screw on shaft flat, pulley alignment | The pulley rotates on the shaft instead of fully driving the belt. [4] [6] |
| Belt slip / jump | Sudden offset, often during fast moves | Belt engagement, idlers, routing, tension | Tooth jump or poor tracking loses position. [6] |
| Binding / friction | Progressive or intermittent shifts, often with noise | Rails, rollers, rods, debris, cable drag | Extra resistance raises load until motion fails. [4] [10] |
| Driver thermal / current limiting | Shift appears after time or repeated load | Cooling, wiring, controller documentation | Overheat or insufficient current can make motors stop tracking position. [6] |
These mechanisms are not interchangeable, and one failed print can involve more than one. A collision can cause missed steps, a loose pulley can imitate belt trouble, and a binding axis can make an electrical problem look mechanical. Use the symptom to narrow the search, not to declare the cause before inspection. [4] [6] [10]
Common causes (prioritized) — why the printer lost XY position
The most productive troubleshooting order is usually obstruction first, then belts and pulleys, then binding, then motion settings, then electrical or thermal issues, and only after that rare file or profile faults. That matches how manufacturer troubleshooting guides and defect reviews describe real-world layer shifting in material extrusion. [4] [6] [10]
-
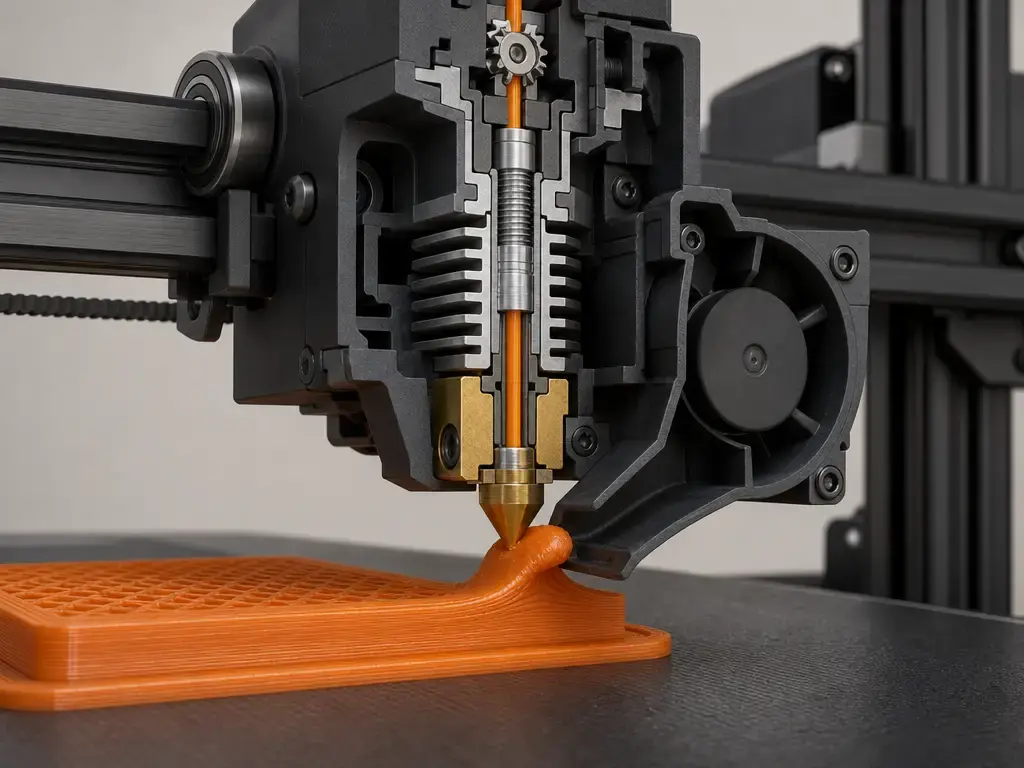
Collision or obstruction. A curled overhang, raised corner, blob, or knocked support can put material directly in the nozzle path. Both Prusa and the Erokhin review explicitly describe raised geometry as a collision pathway that can lead to a shift or stop the print. [4] [10]
-
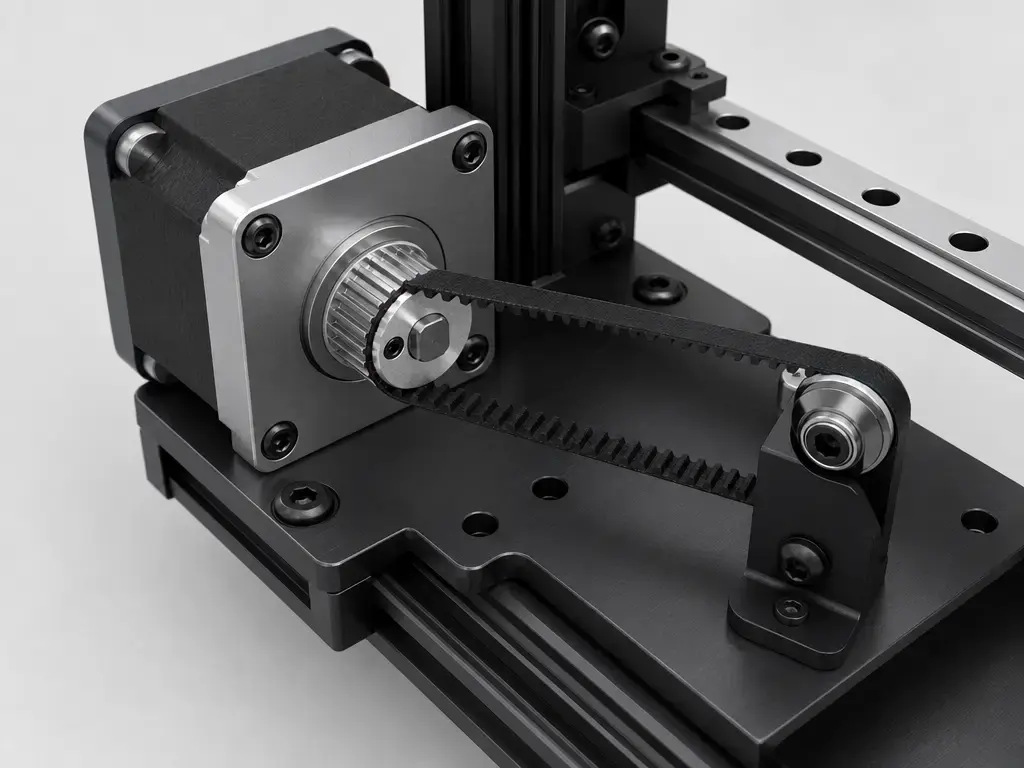
Belt tension too loose or too tight. A loose belt can slip or jump teeth during fast reversals. An overly tight belt can raise friction and bearing load. The useful test is not a universal number, but whether the belt tracks cleanly, stays engaged, and lets the axis reverse repeatedly without loss of position. [6]
-
Loose pulley or set screw not on the shaft flat. If the pulley is not locked to the motor shaft, the motor can turn while axis motion lags behind. Prusa notes that one grub screw should bear on the flat part of the shaft where applicable, and that loose pulleys are a common cause of staircase shifts. [4] [5]
-
Binding or friction in the motion path. Scratched rods, dry bearings, failing wheels, debris, bowed rails, or a snagging cable bundle can add enough resistance to cause missed steps. If the shift happens only in one area of the build volume, binding becomes more likely. [4] [10]
-
Motion settings that are too aggressive for the machine. Acceleration and cornering demand can exceed what a given moving mass can follow. Marlin’s
M201is a clear example of why acceleration matters: it sets maximum acceleration for the axes, so top speed is only part of the load picture. [9] -
Electrical or thermal drive issues. If the motor is not getting enough current, or the driver electronics overheat, the axis can lose position after running for a while or during repeated stress. Simplify3D lists insufficient motor current and driver overheating as plausible causes. [6]
-
Cable drag or snag. A bed cable, toolhead harness, zip tie, or connector can catch at one position in travel and reproduce the same fault. Prusa’s troubleshooting notes cable-bundle placement and obstructions in the motion path as things to inspect. [4]
-
Rare file or profile issues. Corrupt G-code, a bad export, the wrong machine profile, or faulty storage media can confuse diagnosis, but they are late checks, not first checks. Creality’s troubleshooting blog mentions corrupt G-code and slicer-export problems as possible causes, which is why they belong at the end of the list. [17]
Layer shift fix 3D printer workflow (step-by-step)
A practical layer shift fix 3D printer workflow starts with the failed part, not the settings menu. Photograph the print, note the height where the offset begins, and decide whether the shift is on X, Y, or both. On CoreXY machines, the visible direction does not always isolate one belt or one motor. Power off before hands-on inspection unless the manufacturer procedure explicitly says otherwise. [4] [12] [13]
- Stop the print and photograph the failure.
- Identify the direction of the shift and note whether the printer uses coupled CoreXY motion.
- Power down and move the axes by hand to feel for bind or hard spots.
- Check for debris or wrapped filament around pulleys and verify belt tracking.
- Check pulleys and set screws, with one biting the shaft flat where applicable. [4] [5]
- Look for collision evidence, such as scar lines, knocked supports, blobs, or curled overhangs.
- Run a reduced-stress test print after the mechanical checks. A safe diagnostic test is to reduce print speed by 50% relative to the current profile and see whether the symptom disappears. [6]
- Re-slice and try different storage media only after the checks above. If you eventually adjust motor current, use the printer or control-board documentation rather than a generic Vref recipe. [6] [17]
If the machine stops losing position when the load is reduced, the problem is more likely mechanical, collision-related, or motion-setting related than random file corruption. If it still shifts under gentler conditions, return to the axis hardware, wiring, and cooling path. [4] [6] [10]
Motion settings without mythology — speed, acceleration, and ‘jerk’ terminology
Reduce relative to your current profile first. Acceleration is often the real load driver, because a printer may tolerate a given top speed but still miss steps when it has to reverse direction hard or accelerate a heavier axis too abruptly. Marlin’s M201 is a concrete example: it sets maximum acceleration for X, Y, Z, and E, which is why acceleration can matter as much as nominal print speed when diagnosing missed steps. Klipper’s kinematics documentation makes the same broad point from a different firmware perspective by emphasizing controlled acceleration and motor limits in motion planning. [9] [14]
“Jerk” is firmware-dependent terminology and should not be treated as a universal menu name or tuning model. Marlin’s M205 documents both Classic Jerk and Junction Deviation parameters, and Marlin’s configuration reference states that Junction Deviation is now the default mode while enabling Classic Jerk overrides it. Other firmware stacks may use different cornering models or different names altogether. If you want one conservative example, a Creality troubleshooting blog suggests 40–50 mm/s print speed, 500–1000 mm/s² acceleration, and 5–10 mm/s jerk as a starting reduction test, but that is one brand’s example, not a standard. [7] [8] [14] [17]
Belts, pulleys, and the ‘GT2’ reality check (model-dependent)
Belt problems are qualitative first. If a belt is too loose, it can slip on the drive pulley or track poorly during reversals. If it is too tight, it can add friction that makes the axis harder to move. Simplify3D’s troubleshooting guidance reflects both failure modes, which is why tighter is not always better. [6]
Pulley slip is different from belt slip. With pulley slip, the motor shaft turns but the pulley does not stay synchronized because the set screw is loose or not positioned correctly on the shaft flat. That can create staircase-like or variable offsets because the amount of lost motion changes from event to event. As for belt type, GT2 timing belts are common on many desktop printers, but they are not universal. Bambu Lab lists GT2 for its XY belt product, and Voron’s mechanical documentation references GT2/2GT belts in a widely used open-source printer ecosystem. Belt profile alone does not solve a layer-shift problem; alignment, idlers, pulley security, and tracking still determine whether motion remains accurate. [4] [15] [16]
Prevention — how to prevent layer shifting in 3D printing
If you want to know how to prevent layer shifting in 3D printing, turn the diagnostic logic into routine maintenance. Periodically inspect belts, pulleys, idlers, wheels, bearings, rails, and cable routing. Clean and lubricate motion components as appropriate for the model, and recheck fasteners after shipping, transport, or major maintenance. A printer that is bumped, vibrates on an unstable surface, or runs with growing friction is more likely to lose position. [4] [6]
Reduce collision opportunities in the sliced job. Difficult overhangs, poor cooling, knocked supports, and curled edges can all turn into nozzle strikes later in the print. Geometry-aware choices such as better support use, better overhang management, and travel behavior that avoids unnecessary perimeter crossing can help reduce those opportunities, even though they do not guarantee success by themselves. [4] [10] [18]
Use motion settings that match the machine’s stiffness and moving mass, especially for tall prints or machines with heavier moving beds. Conservative acceleration, adequate electronics cooling, and one-change-at-a-time tuning reduce the chance of turning a marginal system into a skipped-step system. Watch for warning signs such as odd noises, belt dust, hot drivers, or a carriage that no longer feels smooth by hand. [6] [9] [12]
Salvage, risk, and recovery features (what a fix can’t guarantee)
A layer-shifted part is sometimes cosmetically salvageable, but the geometry is no longer what the toolpath intended. The Erokhin review notes that larger shifts can leave layers so far displaced that they no longer touch the previously printed part, and it describes deterioration of strength properties and loss of structural integrity as possible outcomes. For functional or load-bearing parts, treat a true shift as a reason to reprint unless the application clearly tolerates the error. [10]
Recovery features are model-specific and limited. In Prusa’s MK3-family crash-detection documentation, crash detection works only in Normal mode, not Stealth mode, and the Belt Status values should not be under 240 or above 300 on the relevant models, while also not representing a physical quantity. That is a useful example of why vendor diagnostics should not be generalized into universal belt-tension numbers. [5]
Current research (brief) — monitoring can detect failures, not magically fix root causes
Recent studies on in-process monitoring for material extrusion show that camera and deep-learning systems can flag abnormal deposition or failure states during printing, which may help stop a bad job earlier. But those studies do not change the root-cause logic for consumer layer shifting: a loose pulley, blocked axis, or overloaded motion system still has to be found and corrected mechanically or through machine-specific tuning. [19] [20]
FAQ
Why is my 3D printer layer shifting?
Usually because the printer lost XY position from a collision, belt or pulley slip, binding, or missed steps under load. Start with the motion path and visible obstruction signs before blaming the slicer. [4] [6] [10]
What is the fastest layer shift fix 3D printer owners should try first?
Stop the print, inspect for nozzle strikes or curled overhangs, then check belt and pulley security. After the mechanical checks, a useful diagnostic test is to cut print speed by 50% and see whether the fault disappears. [4] [6]
What causes an X-axis layer shift vs a Y-axis layer shift?
The visible direction tells you which motion path lost position. On many Cartesian machines, X points to the carriage path and Y points to the bed path, but the label is less direct on CoreXY because the motion is coupled. [4] [12] [13]
Is layer shifting a slicer problem, or a mechanical problem?
Most often it is mechanical or motion-control related. Slicer choices can raise load or collision risk, but a true shift means the machine did not faithfully execute the commanded path. [4] [6] [10]
Expert: How does CoreXY change layer-shift diagnosis compared with a bed-slinger?
On CoreXY, both motors and both belts contribute to XY motion, so an apparent X or Y fault can originate anywhere in the coupled belt path. A bed-slinger or other conventional Cartesian design is usually easier to isolate axis by axis. [12] [13] [14]
Expert: What’s the difference between acceleration limits and “jerk”/junction deviation, and how can they contribute to missed steps?
Acceleration limits control how hard the printer speeds up or slows down, which directly affects torque demand. In Marlin, M201 sets maximum acceleration, while M205 documents Classic Jerk and Junction Deviation. Marlin also states that Junction Deviation is the default mode unless Classic Jerk is enabled to override it. Higher cornering demand can push a marginal axis into missed steps even when nominal print speed looks reasonable. [7] [8] [9]
Sources
- ISO/ASTM 52900:2021 — Additive manufacturing vocabulary (record page) — https://www.iso.org/standard/74514.html
- NIST — Additive Manufacturing Technologies (Material Extrusion section) — https://www.nist.gov/additive-manufacturing/research-areas/technologies
- ASTM Store — Additive Manufacturing Standards listing (context only) — https://store.astm.org/products-services/standards-and-publications/standards/additive-manufacturing-standards.html
- Prusa Knowledge Base — Layer shifting — https://help.prusa3d.com/article/layer-shifting_2020?product=mk3-5s
- Prusa Knowledge Base — Crash detection (MK3 family context) — https://help.prusa3d.com/article/crash-detection_2100
- Simplify3D — Print Quality Troubleshooting: Layer Shifting — https://www.simplify3d.com/resources/print-quality-troubleshooting/layer-shifting/
- Marlin Firmware — Configuring Marlin — https://marlinfw.org/docs/configuration/configuration.html
- Marlin Firmware — G-code M205 — https://marlinfw.org/docs/gcode/M205.html
- Marlin Firmware — G-code M201 — https://marlinfw.org/docs/gcode/M201.html
- Erokhin, Naumov, Ananikov — Defects in material extrusion (Russ. Chem. Rev.) — https://www.russchemrev.org/RCR5103pdf
- Loh et al. — Overview of Material Extrusion Troubleshooting (Appl. Sci., PDF) — https://bura.brunel.ac.uk/bitstream/2438/21182/3/FullText.pdf
- Prusa Knowledge Base — Types of printers and their differences (CoreXY note) — https://help.prusa3d.com/article/types-of-printers-and-their-differences_112464?product=mk3s
- CoreXY.com — Theory / Principle of Operation (original CoreXY explanation) — https://www.corexy.com/theory.html
- Klipper documentation — Kinematics (Cartesian/CoreXY) — https://www.klipper3d.org/Kinematics.html
- Bambu Lab Store — XY Belt (GT2 spec) — https://us.store.bambulab.com/en/products/xy-belt
- Voron Documentation — Mechanical Assembly (GT2/2GT belt references) — https://docs.vorondesign.com/build/mechanical/
- Creality — Blog: layer shift causes/fixes (example motion values; dated) — https://www.creality.com/blog/3d-print-layer-shift
- Prusa Knowledge Base — Layers and perimeters (layer height rule; avoid crossing perimeters) — https://help.prusa3d.com/article/layers-and-perimeters_1748?product=cw1
- Zhang, Fidan, Allen — Deep learning in-process failure detection (MDPI) — https://www.mdpi.com/2411-5134/5/3/25?type=check_update&version=2
- Kim et al. — CNN image-based failure detection for material extrusion (Elsevier Pure listing) — https://snu.elsevierpure.com/en/publications/image-based-failure-detection-for-material-extrusion-process-usin/