
Summary: What Vase Mode 3D Printing Means
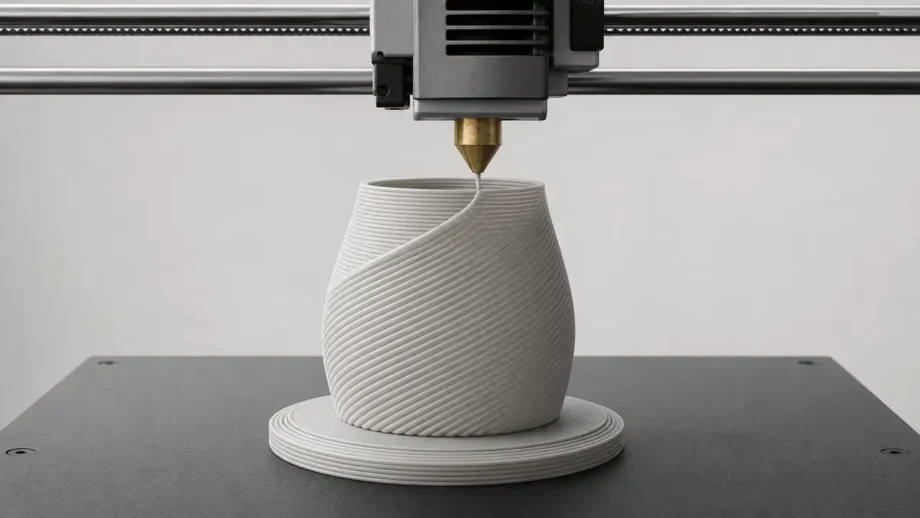
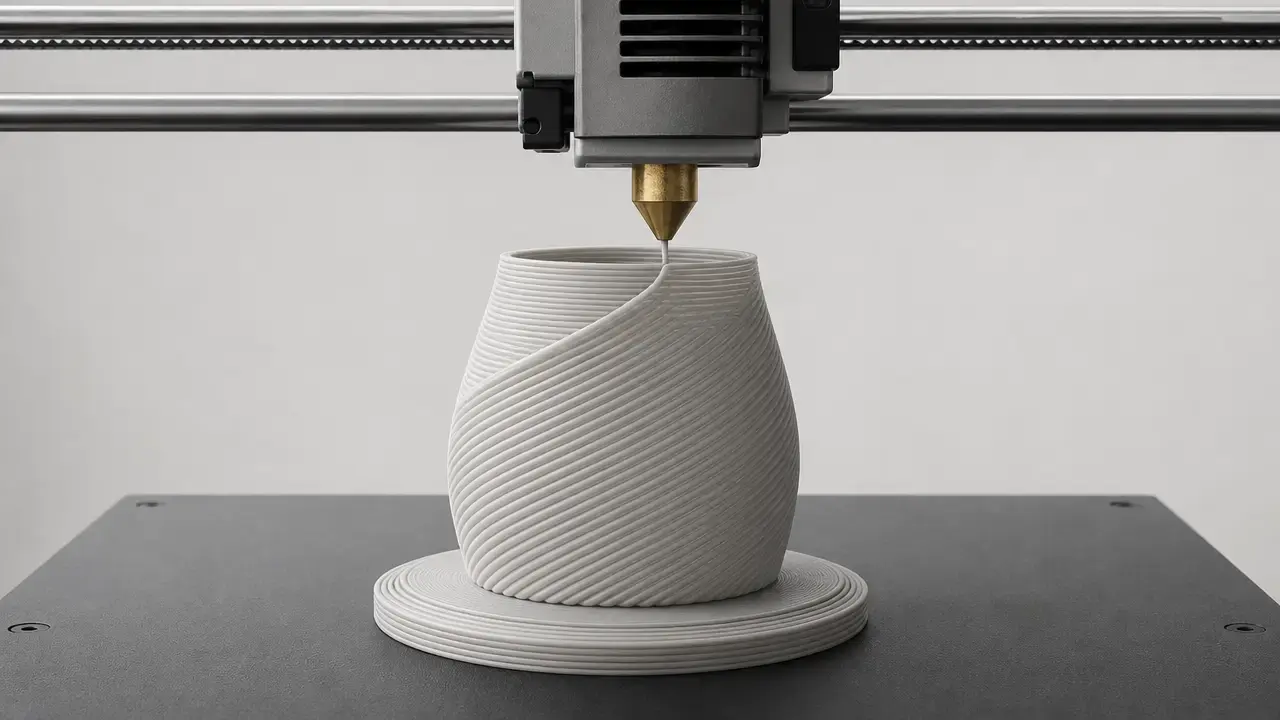
Vase mode 3d printing is a slicer toolpath strategy for material-extrusion printers, commonly called FFF or FDM, that prints a solid base and then continues upward as one spiralized outer wall instead of stopping and restarting at every layer on the main shell. [S04] [S08]
It is best suited to open containers, lampshade-like shells, and visual prototypes where low material use and a cleaner outer wall matter more than stiffness, internal structure, or complex features. The tradeoff is straightforward: you typically get one wall, no infill, and no printed top, so closed roofs, deep overhangs, internal islands, and support-dependent details are poor fits. [S04] [S08] [S09]
There is no universal “best settings” recipe for every printer, filament, nozzle, and model. NIST’s recent FFF parameter-discovery work reinforces the broader point that process tuning is configuration-dependent, so toolpath preview comes before any preset. [S03]
Names in Slicers: “Vase Mode” vs “Spiralize Outer Contour”
In community language, “vase mode” is the generic term. In Cura, the version-pinned name is “Spiralize Outer Contour,” and Cura 5.13.0 describes it as a feature that creates a steady Z increase, turns a solid model into a single-walled print with a solid bottom, and should only be enabled when each layer contains a single part. PrusaSlicer calls the mode “Spiral vase,” while other slicers use similar labels such as Spiral Vase or Spiralize outer contour. [S08] [S04] [S09] [S10] [S11] [S12]
Smoothing options are related but not identical across slicers. In Cura 5.13.0, Smooth Spiralized Contours is enabled by Spiralize Outer Contour, defaults to true, and warns that smoothing can blur fine surface details. OrcaSlicer documents Smooth Spiral and a Max XY Smoothing control, while Bambu Studio release notes show that its spiral-vase behavior was rewritten and that Smooth Vase is not suitable for models with obvious edges. Because names and locations move across releases, it is safer to use the settings search than to rely on memory of a menu path. [S08] [S10] [S12] [S09] [S11]
| Slicer | Setting name | What it enforces | Biggest caveat |
|---|---|---|---|
| Cura | Spiralize Outer Contour. [S08] | Steady Z increase; solid-bottom single wall; single part per layer. [S08] | Smooth Spiralized Contours can blur fine detail. [S08] |
| PrusaSlicer | Spiral vase. [S04] | One perimeter, 0% infill, top layers off, supports off. [S04] | Multiple objects need a workaround such as sequential printing. [S04] [S07] |
| OrcaSlicer | Spiral vase (spiral_mode). [S10] |
Single-walled print with solid bottom layers; optional Smooth Spiral. [S10] | Max XY smoothing can distort the model slightly and is calculated relative to nozzle diameter when expressed as a percentage. [S10] |
| Bambu Studio | Spiral Vase. [S11] [S12] | Versioned release notes show per-plate support in one release and a later rewrite of the mode. [S11] [S12] | UI and behavior changed across releases; Smooth Vase is not for obvious edges. [S12] |
| Creality Print | Spiralize outer contour. [S09] | Single-wall print with a solid base; only when each layer contains one part. [S09] | No top surface and poor fit for overhangs. [S09] |
The One Rule for Geometry Eligibility
If any sliced layer after the base shows more than one perimeter path, separate islands, bridges, or support needs, the model is not truly vase-mode-friendly. That is the practical meaning of Cura’s “single part per layer” constraint and PrusaSlicer’s “continuous single outline container” description. In practice, true vase mode is decided by the preview, not by the model’s filename, wall count setting, or whether the shape merely looks vase-like from the outside. [S04] [S08] [S09]
What to confirm in the slicer preview before you print
- One continuous outer wall path above the base. [S04] [S08]
- No inner wall after the base. [S04]
- No separate islands or competing contours. [S08] [S09]
- No top skin generated at the opening. [S04] [S09]
- Base printed as conventional bottom layers before the spiral begins. [S04] [S08]
- Minimal travel moves or retractions on the main wall, because interruptions usually mean the geometry is not truly spiral-friendly. [S04] [S08]
Pre-hollowed models often break this rule because the slicer sees both inner and outer surfaces, creating multiple contours instead of one outer spiral. PrusaSlicer’s documentation is explicit that the model should be defined as a solid; otherwise the slicer tries to create both inside and outside surfaces. For vase mode, a simple solid outer shape usually slices more cleanly than a manually shelled CAD model. [S04]
Vase Mode vs Ordinary Single-Wall vs Cura Surface Mode
True vase mode is not the same as setting one wall, 0% infill, and 0 top layers by hand. PrusaSlicer states that simply changing those settings without enabling the mode is not the same as true vase mode because the object will not be printed continuously. That continuity matters because Cura’s Spiralize Outer Contour creates a steady Z increase, while normal layer-by-layer single-wall printing still has discrete loop starts and ends. [S04] [S08] [S06]
Cura Surface Mode is also different. In Cura 5.13.0, Surface Mode can print a single wall tracing the mesh surface with no infill and no top or bottom skin, but that description does not claim a continuous spiral Z toolpath. Surface Mode is about how the mesh is treated; vase mode is about generating one continuous spiral outer contour on geometry that can support it. [S08]
| Mode | Continuous spiral Z? | Seams on wall? | Typical use case |
|---|---|---|---|
| Vase mode / Spiralize Outer Contour | Yes. [S04] [S08] | Greatly reduced on the spiral wall; the base can still show layer-change marks. [S04] | Open containers and shell-like decorative prints. |
| 1 wall + 0% infill + 0 top layers | No. [S04] [S06] | Yes, because each perimeter loop still starts and ends somewhere. [S06] | Manual single-wall experiments that do not require a spiral toolpath. |
| Cura Surface Mode | No continuous spiral claim. [S08] | Not inherently removed. [S08] | Printing open surfaces or special meshes rather than a true spiral vase. |
How Vase Mode Works
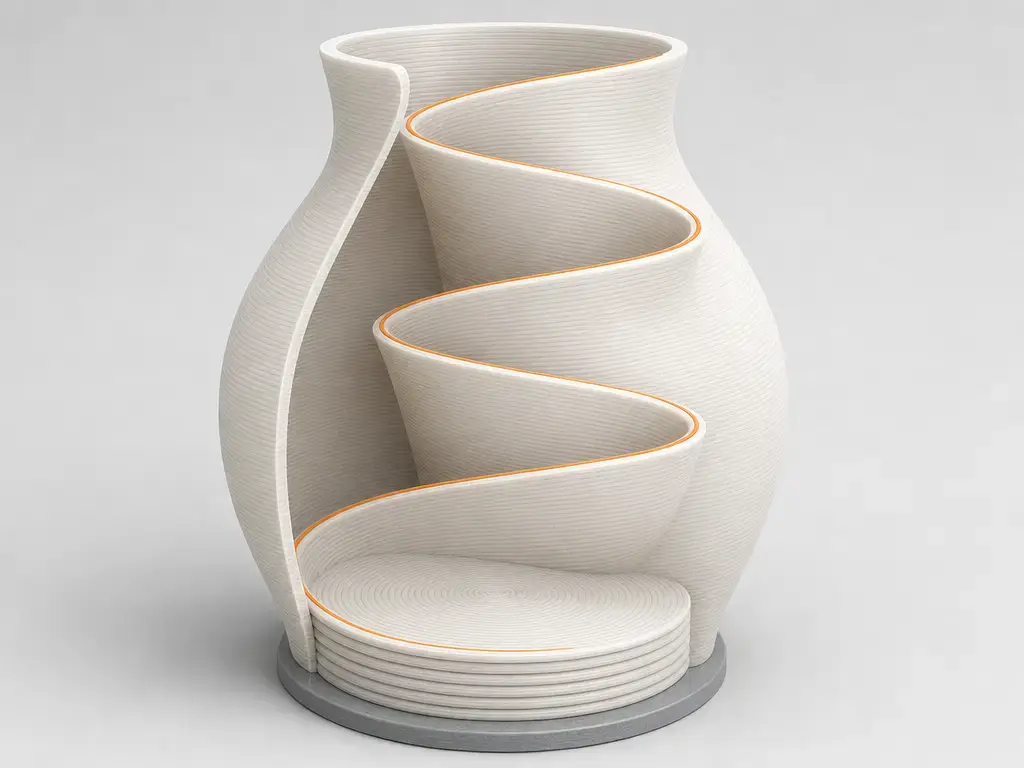
The slicer first prints the bottom solid layers in the usual layer-by-layer way, then transitions into a single outer contour whose Z height rises gradually or steadily as the nozzle moves around the part. PrusaSlicer describes Spiral vase as a continuous single outline container with gradually increasing Z, and Cura 5.13.0 describes Spiralize Outer Contour as a steady Z increase across the print. [S04] [S08]
That is why the usual vertical seam is reduced on the main wall but not erased from the entire part. Prusa’s seam guidance explains that, outside Spiral vase mode, each perimeter loop has to start and end somewhere, creating a visible seam. In spiralized printing, the wall avoids those repeated stop-start points after the base, but normal layer texture still remains because filament is still deposited in stacked paths rather than as a molded surface. [S04] [S06]
Core toolpath changes in vase mode
- One outer contour above the base. [S04] [S08]
- Gradual or steady Z increase during the wall path. [S04] [S08]
- No infill in the spiralized wall section. [S04] [S08]
- Top layers disabled. [S04]
- Reduced seam on the main wall after the base transition. [S04] [S06]
- Wall thickness governed by deposited-bead behavior and extrusion settings rather than by stacking extra perimeters. [S04]
Settings That Matter
The most useful mindset shift is that line width is a target, not a guarantee of finished wall thickness. PrusaSlicer’s thin-wall guidance shows that ideal wall thickness is not just “line width times perimeter count,” because extrusion paths overlap and depend on bead geometry. In practice, the final wall is an outcome shaped by deposition behavior, so nozzle diameter, line width, and measured wall thickness should not be treated as interchangeable terms. [S04] [S03]
Wider extrusion and faster motion both increase material-throughput demand. If width, speed, or temperature is pushed too far for a given hotend and filament, the result can be weak fusion, wall waviness, or softened detail instead of a better vase. That is why conservative testing is more useful than copying a recipe from another machine. [S03]
Bottom layers matter because they create the base that the spiral wall grows from, and they are also the one region where conventional layer changes still occur. If the base is too thin or poorly bonded to the wall transition, you can see marks or leakage risk near that boundary even when the rest of the wall previews correctly. [S04] [S13]
Flow, often labeled extrusion multiplier, deserves extra caution. In one PLOS ONE study of FFF walls, measured air flow through porous walls fell from 24.0 to 10.0 ml/s when k changed from 0.85 to 0.90, then reached 0.0 ml/s at k = 0.96 and 0.98 in that setup. The same paper states that a 5% change in k can reduce flow by more than two times, while also noting that exact effective ranges depend on printer design and material. Use that as evidence of sensitivity, not as a universal target. [S13] [S03]
Workflow: How to Do Single-Wall 3D Printing in Vase Mode
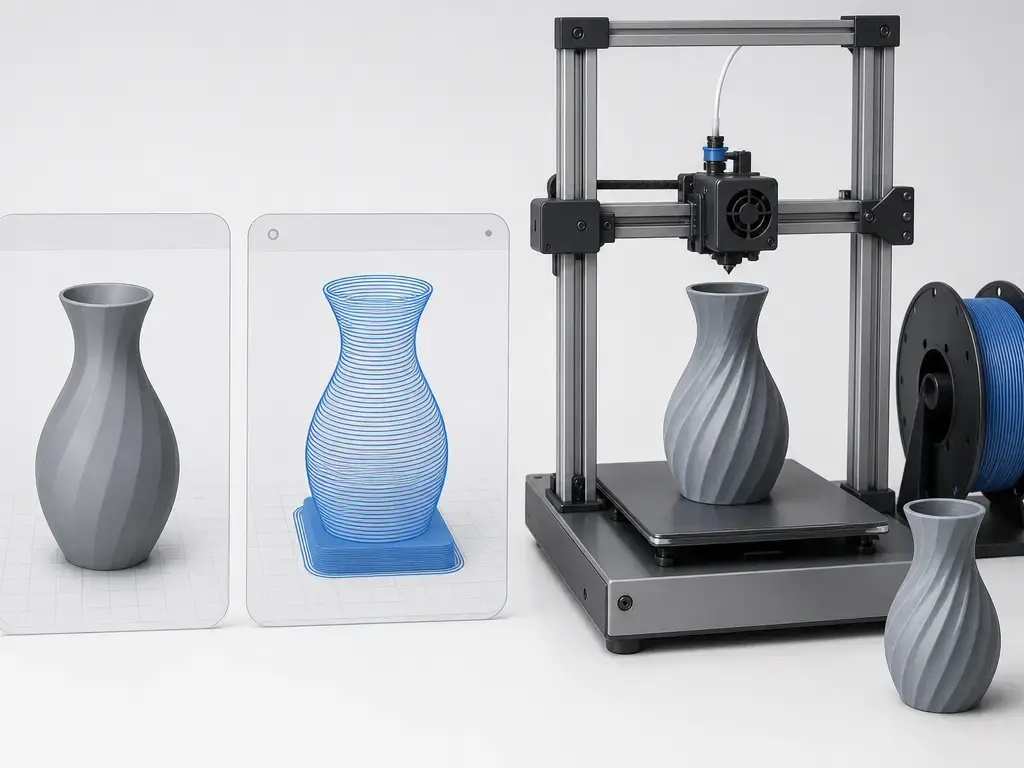
The practical workflow is simple: choose geometry that can truly spiralize, enable the feature, verify the preview, and only then tune settings. Preview comes before optimization because the wrong model cannot be fixed by better flow or cooling alone. [S04] [S08]
- Load a suitable solid model rather than a pre-hollowed one whenever possible. [S04]
- Enable vase mode, Spiral vase, or Spiralize Outer Contour in your slicer. [S04] [S08] [S09]
- Use preview to confirm one continuous perimeter after the base. [S04] [S08]
- Set bottom layers for base strength and base sealing needs. [S04]
- Tune line width and flow conservatively instead of jumping to extreme values. [S03] [S13]
- Adjust speed and cooling carefully to avoid overheating or distortion in the thin wall. [S03]
- Print a small test before committing to a tall or material-intensive part. [S03]
Use the settings search rather than memorized menu locations. That matters especially for Bambu Studio, where versioned release notes show a per-plate Spiral Vase addition in v01.09.00.60 and a later rewrite in v01.09.00.70. [S08] [S09] [S10] [S11] [S12]
Why Vase Mode Fails, Splits, or Leaks
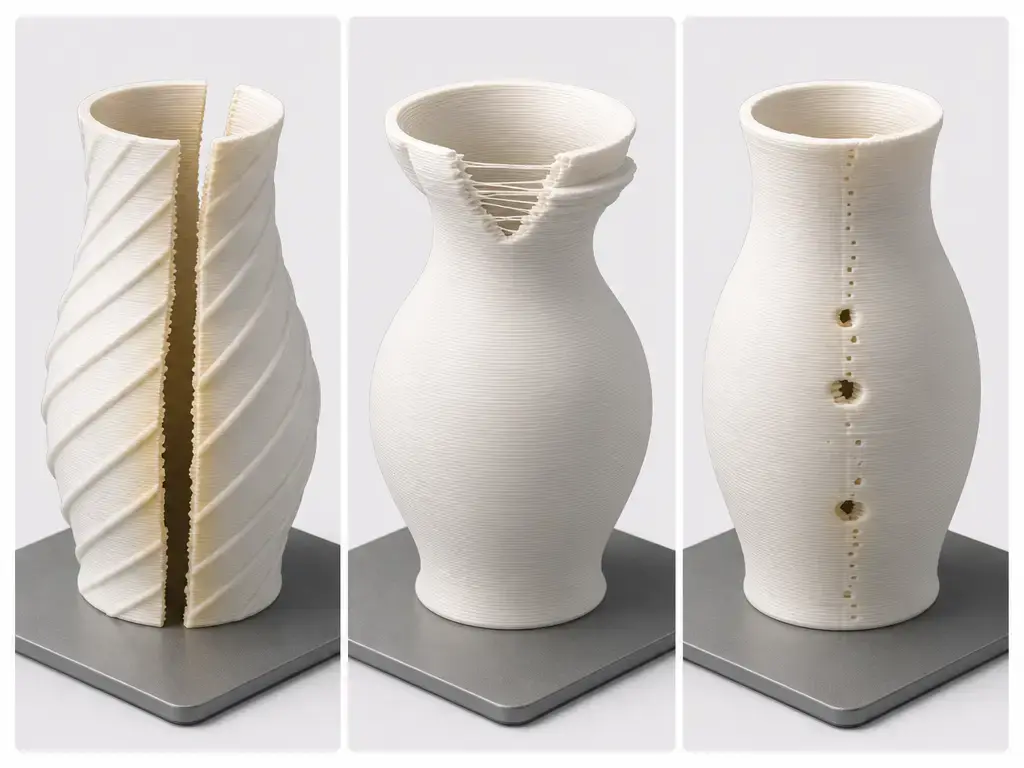
Many failures are geometric before they are mechanical. If the model contains separate islands, embossed text that becomes its own contour, a handle, a lid, bridges, or a top closure, the preview will stop looking like one uninterrupted outer path. Creality’s documentation also warns that spiralized outer contour does not handle overhangs and does not print the top surface. When preview shows more than one printable contour after the base, the problem is usually the model choice, not the flow setting. [S04] [S08] [S09]
Process failures are different. Research shows that porosity in FFF walls is highly sensitive to extrusion multiplier, and the PLOS ONE paper links thin-wall sealing problems to voids and seam coincidence. The same paper says a wall thickness of about 0.5 mm can be especially poor for sealing if discontinuous sites coincide, and that around 0.8 mm the slicer may introduce internal fill segments yet still form voids if seam alignment and empty space coincide. Beyond that published evidence, common vase-mode failures such as softening, wobble, or tall-wall splits are best understood as process-informed problems involving thin one-wall geometry, heat buildup, and limited support from the part itself. [S13] [S03] [S09]
Use the preview to separate topological failures from physical ones. If the preview is already wrong, the print is almost certain to fail for geometric reasons. If the preview is clean but the print still splits or leaks, investigate flow, heat management, and the base-to-wall transition first. [S04] [S08] [S13]
| Symptom | Most likely cause | What the preview usually shows | First thing to change/check |
|---|---|---|---|
| Visible vertical line on the “vase” wall | Not in true spiral mode, or the wall contains more than one contour. [S04] [S06] [S08] | Start-stop points or multiple wall paths above the base. [S06] [S08] | Recheck the mode and confirm one continuous perimeter after the base. [S04] [S08] |
| Gaps or leaks at the wall or base | Flow too low for the setup, poor fusion, or seam/void coincidence near the transition. [S13] | Sparse bead contact, interruptions, or a weak base-to-wall handoff. [S04] [S13] | Test a small flow adjustment and inspect the base transition first. [S13] |
| Wall splits or cracks, especially tall and thin | Single-wall geometry is too slender, or heat management is poor. [S09] | Preview often looks valid; the failure is physical rather than topological. [S09] | Slow down, improve cooling, and test a shorter print. [S03] [S09] |
| Missing features or parts “printed in air” | Overhangs, bridges, top closures, or extra islands break the one-path rule. [S08] [S09] | Separate contours, unsupported spans, or top surfaces above the wall. [S08] [S09] | Simplify the model or stop using vase mode for that part. [S04] [S09] |
| Blurred decorative details | Spiral smoothing modifies path geometry. [S08] [S10] [S12] | Preview may still look clean, but edges become softened in the print. [S08] [S12] | Disable smoothing or reduce it, then reprint a small section. [S08] [S10] |
“Watertight” should be treated as a test result, not a promise. Even when the geometry is favorable and tuning is good, published results show that sealing depends strongly on wall structure and process conditions, so vase mode should never be described as universally waterproof or pressure-safe. [S13]
Applications and When Not to Use Vase Mode
Vase mode works best when the outer shell is the object. If the print can succeed as a single continuous wall rising from a solid base, the mode can save material and reduce obvious wall seams. [S04] [S08]
Good candidates
- Decorative vases and planters with open tops. [S04] [S08]
- Lampshade-like shells or covers with continuous outer profiles. [S08]
- Sculptural display pieces with no support-dependent features. [S08] [S09]
- Visual prototypes where low mass matters more than strength. [S03]
Do not use vase mode for load-bearing parts, parts that need closed tops, support-heavy geometry, or applications that demand verified airtightness or liquid tightness. Creality’s documentation specifically warns about overhangs and missing top surfaces, which is enough on its own to rule out many otherwise attractive models. [S09] [S13]
Standards and Research Context
ISO/ASTM 52900:2021, Edition 2, is a vocabulary standard for additive manufacturing, not a document that defines “vase mode.” The standards-neutral way to frame this topic is as a slicer strategy within material extrusion; FFF is the neutral umbrella, while FDM remains the common user term. [S01] [S02]
That distinction matters because practical advice about vase mode comes from slicer documentation and process research, not from an ISO definition. NIST’s material-extrusion overview and its 2024 FFF parameter-discovery publication help explain why this article avoids “best settings” claims: process tuning varies with machine, material, and configuration, even when the high-level vase-mode idea stays the same. [S01] [S02] [S03]
Practical Takeaways for Vase Mode 3D Printing
Vase mode 3d printing is best understood as a preview-dependent spiral toolpath, not as a generic synonym for “thin wall.” Use it when the model can become one continuous outer wall after the base, when no top surface is required, and when reduced seam visibility matters more than strength or feature complexity. Avoid it when the preview shows multiple contours, islands, bridges, or support-dependent details, because those are signs the geometry does not meet the mode’s basic rule. [S04] [S08] [S09]
If preview shows more than one wall path or unexpected travel on the main shell, stop and fix the model or settings before printing. [S04] [S08]
FAQ
What is vase mode 3d printing?
Vase mode 3d printing is a slicer strategy for material-extrusion printers that prints a solid base and then transitions into one continuously rising outer wall. It usually removes infill and top layers, which lowers material use and reduces the repeated start-stop seam on the main wall. The tradeoff is that the part becomes much more limited in strength, geometry, and feature support than a normal multi-wall print. [S04] [S08] [S09]
Why is Cura vase mode called Spiralize Outer Contour?
Because Cura describes the feature by the toolpath it generates rather than by the community nickname. In Cura 5.13.0, the official label is “Spiralize Outer Contour,” and the description says it smooths the Z move of the outer edge, creates a steady Z increase, and turns a solid model into a single-walled print with a solid bottom. “Vase mode” is simply the broader user term for that behavior. [S08]
How do I enable Spiralize Outer Contour in Cura for vase mode 3d printing?
Use Cura’s settings search and look for “Spiralize Outer Contour.” After enabling it, do not assume the job is ready just because the toggle is on. Check preview and make sure that every layer after the base becomes one continuous outer path with no inner walls, islands, or top surfaces. If preview fails that test, the model is not a good candidate for true vase mode no matter what the checkbox says. [S08] [S04]
Is vase mode 3D printing the same as single-wall 3d printing?
No. Manual single-wall 3d printing can mean one wall, 0% infill, and no top layers, but PrusaSlicer explicitly says that this is not the same as true vase mode because the object will not be printed continuously. True vase mode uses a spiralized outer path with gradual or steady Z rise, while ordinary single-wall printing still has discrete loop starts and ends that can create a seam. [S04] [S06] [S08]
Why does vase mode 3D printing fail or split?
The first reason is usually geometry: multiple contours, islands, overhangs, bridges, handles, or top closures break the single-path rule. If preview is clean, the next suspects are process issues such as poor fusion, thin-wall instability, or heat buildup in a tall one-wall shell. Research also shows that porosity and sealing are sensitive to extrusion multiplier, so a print can look superficially correct but still leak or weaken if the deposited wall is not bonding as intended. [S04] [S08] [S09] [S03] [S13]
Can vase mode 3D printing make a watertight vase?
Sometimes, but it should never be promised. The published evidence here is cautionary: sealing in FFF walls depends strongly on wall structure and extrusion conditions, and thin-walled seam coincidence can create perforating pores. A vase-mode print may hold water well enough for some users after careful tuning, but “watertight” is something you verify on your own part, not something guaranteed by the mode itself. [S13]
Expert: How do extrusion multiplier changes affect porosity and impermeability in thin walls?
The PLOS ONE study used k as the extrusion multiplier and found strong sensitivity in porous-wall airflow measurements: 24.0, 10.0, 1.0, 1.5, 0.0, and 0.0 ml/s at k = 0.85, 0.90, 0.92, 0.94, 0.96, and 0.98, respectively, in that setup. The authors state that a 5% change in k can cut flow by more than two times, and they also show how thin walls can fail when seam locations coincide with voids. The practical takeaway is not to copy those values blindly, but to recognize that small flow changes can materially alter porosity while exact effective ranges remain printer- and material-dependent. [S13] [S03]
Sources
- S01 — ISO/ASTM 52900:2021 Additive manufacturing — General principles — Fundamentals and vocabulary. Standard listing page. Edition 2; publication date 2021-11; 28 pages; reviewed and confirmed in 2025. Accessed 2026-07-12.
- S02 — NIST: Material Extrusion. Government documentation. Created 2024-11-15; updated 2025-05-15. Accessed 2026-07-12.
- S03 — NIST publication record: Online Measurement for Parameter Discovery in Fused Filament Fabrication. Government publication record. Published 2024-04-03 in Integrating Materials and Manufacturing Innovation, Volume 13, Issue 2; DOI 10.1007/s40192-024-00350-w; updated 2025-03-19. Accessed 2026-07-12.
- S04 — Prusa Knowledge Base: Layers and perimeters. Official slicer documentation. Used for Spiral vase definition, automatic setting changes, bottom-layer transition behavior, and solid-model guidance. Accessed 2026-07-12.
- S06 — Prusa Knowledge Base: Seam position. Official slicer documentation. Used for seam fundamentals and why ordinary perimeter loops create a visible start/end line. Accessed 2026-07-12.
- S07 — Prusa Knowledge Base: Sequential printing. Official slicer documentation. Used for the Multi-Object Vase Mode sequential-printing workaround. Accessed 2026-07-12.
- S08 — Ultimaker Cura 5.13.0
fdmprinter.def.json. Official version-pinned Cura definition file. Used for Spiralize Outer Contour, Smooth Spiralized Contours, and Surface Mode behavior claims. Cura tag 5.13.0. Accessed 2026-07-12. - S09 — Creality Wiki: Parameter Description: Special Modes. Manufacturer software documentation. Used for Spiralize outer contour constraints, overhang limitations, and no-top-surface behavior. Accessed 2026-07-12.
- S10 — OrcaSlicer Wiki:
others_settings_special_mode. Project wiki documentation. Used forspiral_mode,spiral_mode_smooth, and Max XY Smoothing behavior; mutable page edited 2026-05-04. Accessed 2026-07-12. - S11 — Bambu Studio release notes v01.09.00.60. Manufacturer release notes. Used for the per-plate Spiral Vase addition under Plate Settings in that version. Accessed 2026-07-12.
- S12 — Bambu Studio release notes v01.09.00.70. Manufacturer release notes. Used for the spiral-vase rewrite and Smooth Vase caveat about obvious edges. Accessed 2026-07-12.
- S13 — PLOS ONE: Improvement of quality of 3D printed objects by elimination of microscopic structural defects in fused deposition modeling. Peer-reviewed journal article. Published 2018-06-07. Used for porosity, extrusion-multiplier sensitivity, airflow measurements, and thin-wall perforating-pore evidence. Accessed 2026-07-12.