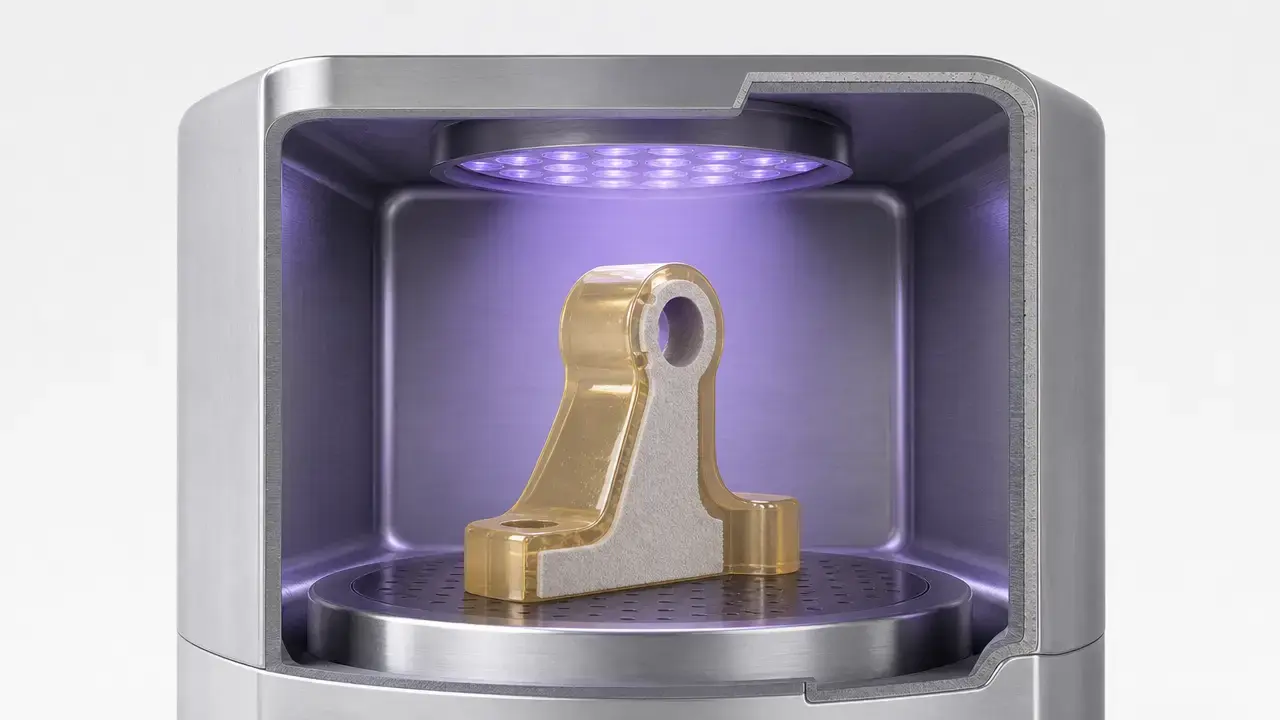

Summary: Resin curing at a glance
In vat photopolymerization, resin curing is the UV-initiated polymerization that turns liquid photopolymer into a solid during printing, followed by post-curing that can continue conversion and develop target properties after washing and drying. A freshly printed part may still be in a green state, so “printed” does not automatically mean finished, strong, or ready for end use. [S2] [S4] [S12]
What “resin curing” means in vat photopolymerization
The useful umbrella term here is vat photopolymerization (VPP). ISO/ASTM 52900:2021 is the vocabulary anchor for additive manufacturing, and NIST defines VPP as forming structures by curing liquid photopolymer resin with ultraviolet light. That keeps the discussion focused on one process family instead of mixing printer marketing terms, materials, and post-processing language. [S1] [S2]
Within that umbrella, SLA, DLP, and MSLA/LCD are different ways of delivering light to the resin vat, not different curing chemistries. The resin still cures by photopolymerization; what changes is how each layer is exposed, how much light reaches the part, and how tightly the workflow is validated around a given printer, resin, wash process, and post-cure setup. [S1] [S2] [S10]
Historically, 3D Systems describes SLA as the first commercialized 3D printing technology, associated with Chuck Hull in the 1980s, and its basic workflow still includes cleaning the printed part and then curing it in a UV oven. [S3]
Resin curing vs exposure time: printing stage vs post-curing
Much of the confusion comes from the fact that curing happens in two stages with different goals. During printing, the machine exposes each layer so the part can form, bond to the previous layer, and survive peel forces. After printing, post-curing continues conversion and develops properties after the part has been washed and dried. A green-state print can look complete while still lacking its intended strength, stiffness, or temperature resistance. [S4] [S10] [S12]
| Stage | Primary variables | Common failure modes |
|---|---|---|
| Print exposure | Layer exposure, lift/peel behavior, adhesion between layers, resin/printer compatibility. [S10] | Delamination, failed supports, missing features, overexposed detail, undercured layers. [S10] |
| Post-cure | Wash quality, complete drying, wavelength/band, irradiance at the part, time, dose, and temperature. [S4] [S12] | Tacky surfaces, soft zones, yellowing, brittleness, warp, or dimensional drift after curing. [S9] [S12] [S20] |
Printer wavelength compatibility does not automatically tell you the correct post-cure recipe. Prusa notes that the SL1 is calibrated for 405 nm resins, yet also warns that exposure settings can be wildly incompatible, using an example of 30 seconds for a resin that solidifies in 6 seconds. That is a printing-stage warning, but the same lesson carries into post-processing: matching “405 nm” alone does not guarantee the right irradiance, time, coverage, or temperature after washing. [S10]
If the part never formed properly, start with print exposure and resin compatibility. If it formed but feels green, tacky, soft, warped, or cosmetically degraded after washing, start with the post-cure workflow instead. [S4] [S10] [S12]
How photopolymer curing works (without overclaiming)
At a simple level, the resin contains light-sensitive chemistry that reacts when it absorbs suitable UV light. That light activates photoinitiators, which generate reactive species that start polymerization and build a crosslinked solid network. The part is not “dried” in the ordinary sense; it is chemically transformed from liquid resin into a solid polymer network by light-driven reactions. [S2] [S21] [S22]
The more useful way to think about “how cured” a part is is degree of conversion, not a binary cured/uncured switch. More conversion usually means a more developed network, but the result still depends on the resin, geometry, temperature, and post-cure conditions. In one hot-lithography study, Mixture A showed degree-of-conversion values of 36.01%, 36.45%, and 56.78% at process temperatures of 25, 40, and 55 °C, and 72.95% after a separate post-cure at 80 °C for 180 minutes. That is a useful reminder that temperature can materially change the outcome. [S16]
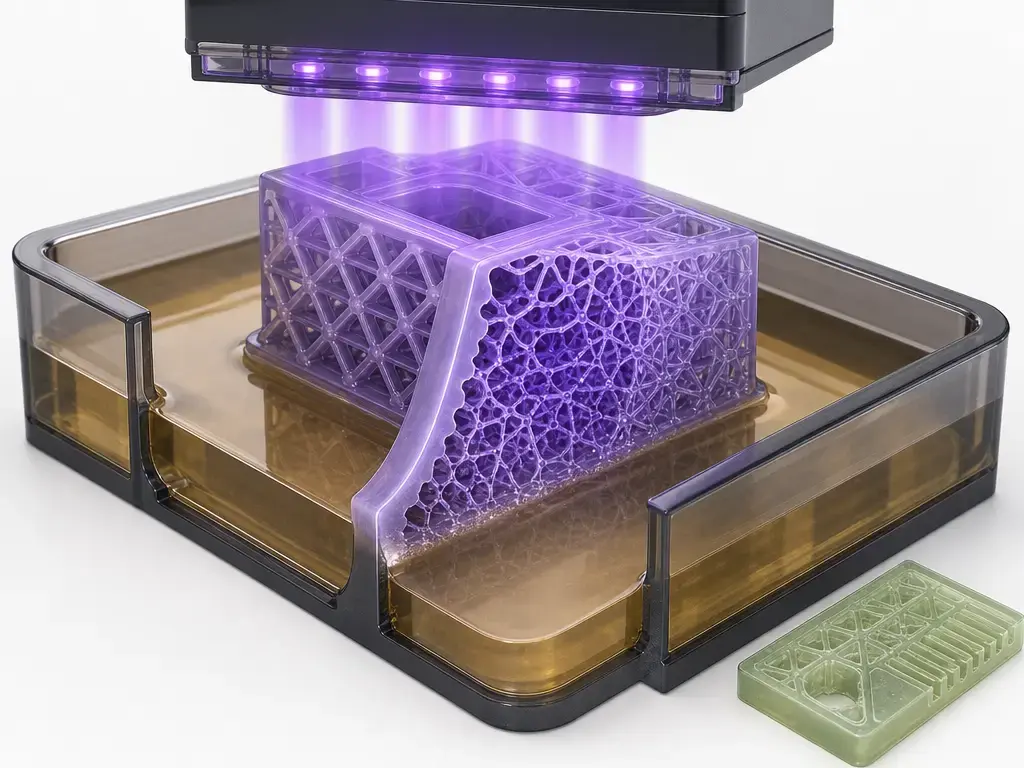
“Green state” is common manufacturer and literature language for a printed part that is formed but not yet at its final processed state. Formlabs uses the term for SLA prints, 3D Systems uses it in Figure 4 post-processing guidance, and older SLA literature also refers to the “green-state prototype” when discussing later shrinkage and distortion. It is useful wording, but it is not the ISO vocabulary term to build the whole taxonomy around. [S4] [S12] [S19]
That also matters for safety. A surface that feels less tacky is not the same as a part that is properly washed, dried, and post-cured for its intended use. 3D Systems explicitly treats green parts as not finished or safe to touch until they are cleaned, dried, and fully processed, and dental IFUs go further by tying post-curing to polymer conversion and residual monomer reduction. Use gloves, eye protection, and the resin’s SDS or IFU rather than judging safety by touch alone. [S8] [S12] [S18]
Curing variables that actually control time and results
Time matters, but time alone is not the control variable. A short cycle under the right wavelength, irradiance, coverage, and temperature can outperform a much longer cycle under the wrong conditions, which is why universal timer charts are misleading. The practical way to think about post-curing is as a hierarchy of variables, not one magic number. [S5] [S8] [S12]
- Wavelength/band. The resin has to respond to the light that reaches it; examples in the sources range from 365–405 nm resin compatibility, to 405 nm post-cure specs, to broader 350–430 nm oven guidance, and dental workflows using UVA 315–400 nm plus blue 400–550 nm. [S8] [S12] [S18]
- Irradiance at the part surface. This is the light intensity actually reaching the print, often given in mW/cm² or µW/cm². Form Cure V2 lists uniform irradiance of 14.5 mW/cm², 3D Systems specifies at least 4 mW/cm², and Anycubic gives 25,000–30,000 µW/cm² for one resin example. [S5] [S8] [S12]
- Time. Seconds and minutes only make sense in combination with the light actually delivered. [S5] [S8] [S12]
- Dose. Conceptually, dose combines irradiance and time; identical times do not mean identical cure conditions if light level, distance, or coverage changes. [S5] [S22]
- Temperature. You have to specify whether you mean ambient temperature, chamber temperature, part-core temperature, or resin temperature, because they are not interchangeable. [S5] [S8] [S12]
- Geometry, opacity, and color. Thick sections, dark pigments, translucent materials, hollows, and trapped resin all change how the part responds to light and heat. Vendors therefore validate by material and version, not by “all resins.” [S6] [S7] [S9]
- Validated preset or IFU. The safest endpoint is still the resin-specific preset, TDS, manufacturing guide, or IFU for the exact material version. [S6] [S7] [S18]
Wavelength comes first because the resin must actually absorb the light being supplied. A common hobby shorthand is “405 nm resin,” but that is incomplete. Anycubic lists one water-washable resin at 365–405 nm for the resin itself, then gives a 405 nm post-cure example. 3D Systems specifies a broader 350–430 nm range for one industrial UV-oven workflow, and NextDent’s IFU uses both UVA and blue light bands. [S8] [S12] [S18]
Irradiance is the next big filter, and it is where many buying mistakes happen. Lamp wattage is not the same as irradiance at the part. Form Cure V2 is a good example: the product page lists 150 W LED power, but the more relevant post-cure specification is 48 LEDs delivering a uniform 14.5 mW/cm² at 405 nm. Those numbers describe different things, and only one tells you how much light reaches the surface of the print. [S5]
Time and dose come after that. If two cure boxes both say “405 nm” but one delivers far less irradiance at the part surface, then five minutes in each box is not the same post-cure event. The same comparison problem appears when one resin page gives intensity in µW/cm², another machine page gives mW/cm², and a third only gives total electrical power. If you cannot identify wavelength, irradiance, and coverage, the timer reading alone is not very informative. [S5] [S8] [S12]
Temperature is the other variable people often oversimplify. Form Cure V2 can reach 60 °C in 150 seconds and 80 °C in 360 seconds on the 230 V version, with a maximum chamber temperature of 100 °C, while 3D Systems specifies a part-core temperature target of 60–90 °C for one workflow. Those are not the same as room temperature or bottle temperature. Meanwhile, Anycubic gives a cure temperature example of 18–30 °C for one resin and recommends using that resin above 20 °C, while also noting that high temperatures can accelerate pigment settling. [S5] [S8] [S12]
Finally, geometry and validated presets matter because the part is not an infinitely thin flat coupon. Thick sections heat more slowly, hollows can trap resin, dark materials absorb light differently, and translucent materials may yellow if pushed too far. Formlabs explicitly says thick, bulky parts may need more time to reach the proper temperature, and its downloadable settings show that even resin version changes can move a cure from heated multi-minute cycles to a 1-minute no-heat cycle. [S6] [S7] [S9]
Workflow: curing resin prints after printing
A reliable post-cure starts before the UV light turns on. Remove the print, let excess resin drain, and wash it using the resin’s recommended process rather than guessing. Anycubic’s Water-Wash Resin 2.0 page is a useful reminder that washing time and curing time are separate variables: it lists an IPA wash duration of at least 3 minutes for one path and a water-wash duration of medium at least 5 minutes for another, while the post-cure example is a different step entirely. [S8]
Use this basic sequence every time. [S8] [S12]
- Remove and drain the print. [S12]
- Wash using the resin/device recommendation. [S8] [S18]
- Dry completely before UV exposure, or follow the validated resin/device guidance. [S12]
- Post-cure using the resin-specific wavelength, time, and temperature, if applicable. [S6] [S8] [S18]
- Inspect for tackiness, soft zones, discoloration, trapped resin, or warping. [S8] [S9] [S12] [S20]
Drying is not optional housekeeping; it affects the cure result. 3D Systems quantifies several drying routes before UV post-cure: ambient or air dry for more than 1 hour, compressed air followed by 30 minutes of air drying, or oven drying at 50 °C for 10 minutes. If you cure a part while solvent or wash water is still clinging to the surface or pooled in cavities, you create a new variable that can show up later as tackiness, haze, or uneven properties. [S12]
Support removal timing is a practical choice, not a universal law. Thin or delicate geometry may need extra care in the green state, while some systems even offer preheating to make support removal easier; Prusa’s CW1/S, for example, allows preheating up to 40 °C before drying or curing. The safest rule is to follow the workflow for the exact resin and part type instead of assuming supports should always come off before or after UV exposure. [S11] [S12]
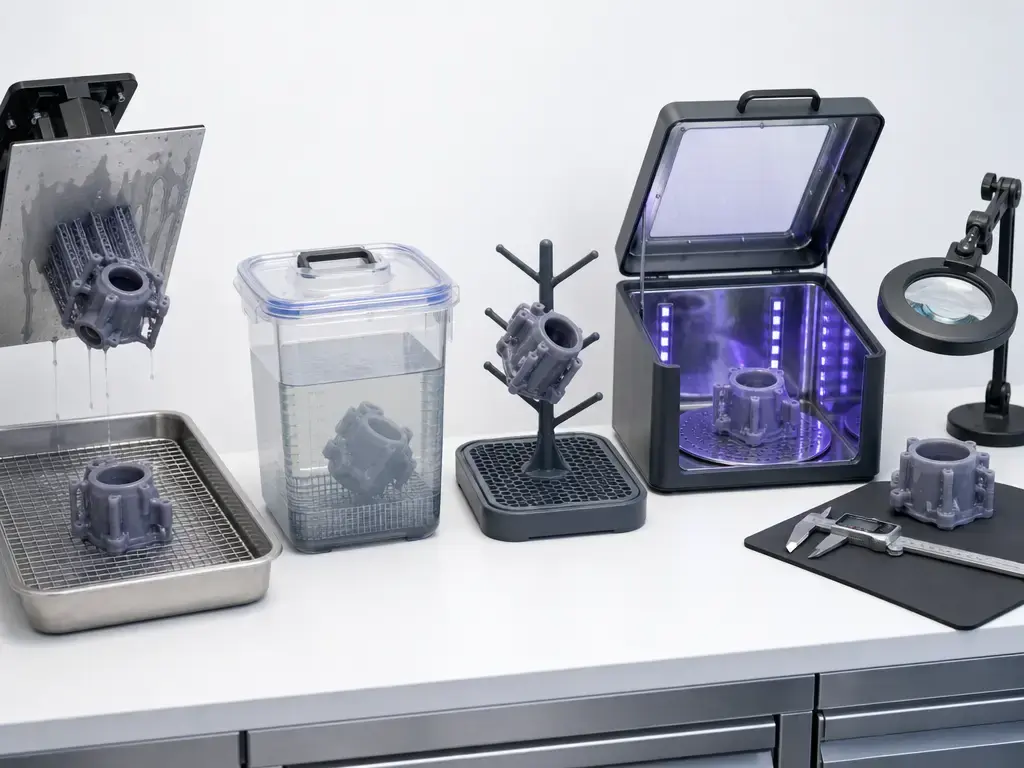
After curing, inspect the print like a process check, not just a cosmetic pass. Feel for local soft spots, check translucent parts for yellowing, look for trapped resin in hollows, and compare flat or thin features against the intended shape. A part can be mostly fine and still reveal a workflow problem in one corner, one thick section, or one enclosed cavity. [S8] [S9] [S12] [S20]
Curing methods and equipment
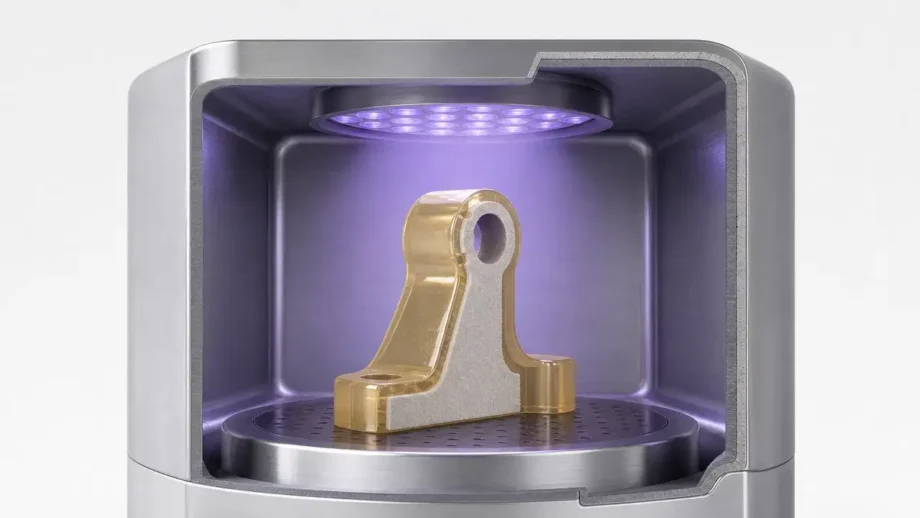
Printing light sources and post-cure equipment should not be treated as the same tool doing the same job. The printer’s job is to build layers accurately enough for the part to exist; the cure station’s job is to deliver a controlled post-processing environment after washing and drying. That is why dedicated units add features like rotation, enclosure, shielding, and heat control that are irrelevant or secondary during layer formation. [S5] [S10] [S11]
| System | How light is delivered | Main stage | What matters most |
|---|---|---|---|
| SLA | A laser scans and cures the resin selectively. [S2] [S3] | Printing. [S2] | Layer exposure and print formation, followed by separate post-cure if required. [S3] [S4] |
| DLP | A projected light pattern cures a whole layer at once. | Printing. | Layer exposure and resin compatibility. |
| MSLA/LCD | A UV source cures through an LCD mask; hobby systems commonly target 405 nm compatibility. [S10] | Printing. [S10] | Layer exposure, screen/light uniformity, and resin compatibility. [S10] |
| Cure station | An enclosed chamber cures washed, dried parts with UV, often plus rotation and heat. [S5] [S11] | Post-processing. [S5] [S11] | Wavelength, irradiance at the part, coverage, distance, temperature control, and shielding. [S5] [S11] [S12] |
What matters in a cure station is not just “brightness.” Look for a stated wavelength or band, an irradiance spec at the part, even coverage or rotation, controlled heat if the resin requires it, a sensible part-to-light distance, and shielding that keeps UV inside the unit. Prusa describes the CW1/S as using fans, UV LEDs, and a rotational platform, while Form Cure V2 adds quantified irradiance and chamber-temperature specifications. [S5] [S11]
| Resin/system (example) | Light spec | Temperature spec | Time spec |
|---|---|---|---|
| Water-washable hobby resin example | 405 nm; 25,000–30,000 µW/cm². [S8] | 18–30 °C. [S8] | 3 min. [S8] |
| Translucent hobby resin example | 390–405 nm. [S9] | Not stated on the page. [S9] | 60–120 s. [S9] |
| Industrial Figure 4 example | Broad spectrum 350–430 nm; at least 4 mW/cm². [S12] | Part-core 60–90 °C. [S12] | TOUGH-GRY 10: 60 min; ELAST-BLK 10: 45 min; TOUGH-GRY 15: 90 min. [S12] |
| Dental IFU example | 5 mW/cm²; UVA 315–400 nm plus blue 400–550 nm. [S18] | Preheat 15 min; cure at at least 60 °C. [S18] | Cure 45 min after preheat. [S18] |
These rows are examples, not a universal cure-time chart. No reliable figure found for a universal value — consult the resin’s TDS/IFU. The spread is the point: one ecosystem advertises general-purpose cycles as short as 60 seconds and engineering or biocompatible cycles around 3–15 minutes, while another industrial guide lists examples at 45, 60, and 90 minutes. [S5] [S12]
Resin version can matter as much as resin family. Formlabs’ downloadable Form Cure V2 settings show Black Resin V4/V4.1 at 10 minutes and 60 °C, but Black Resin V5 at 1 minute with no heat; Clear Resin V4 at 5 minutes and 60 °C, but Clear Resin V5 at 1 minute with no heat. The same PDF also shows more heat-demanding examples such as High Temp Resin V2 at 15 minutes and 80 °C, and Rigid 10K Resin V1/V1.1 with 3 minutes of preheat plus 7 minutes at 80 °C. Treat those as ecosystem-specific examples for those exact materials and versions, not transferable rules. [S7]
What post-curing changes (properties + trade-offs)
Post-curing changes chemistry first, then performance. A higher degree of conversion means more of the reactive network has formed, which can reduce surface tack and improve downstream properties. In dental workflows, the wording becomes stricter: NextDent says post-curing is needed to ensure optimal polymer conversion and to reduce residual monomer to the minimum necessary for a biocompatible end product. [S16] [S18] [S21]
Mechanical and thermal properties often improve with post-cure, but property claims only make sense when tied to a test method. Formlabs says additional light and heat improve strength, stiffness, and temperature resistance, while newer research shows that stiffness and tensile strength can increase after UV post-curing in some rigid resins. If a datasheet gives tensile numbers, read them in ASTM D638 or ISO 527 context; if it gives flexural numbers, read them in ASTM D790 context; and if it says a material has a certain HDT, remember that HDT is a deflection-under-load measure, not the same as glass-transition temperature. [S4] [S20] [S23] [S24] [S26]
The trade-offs matter as much as the benefits. Formlabs describes post-curing shrinkage as minor rather than giving a universal percentage, and recent work shows that UV post-curing can improve stiffness and tensile strength while also increasing secondary shrinkage and dimensional deviation, depending on the resin. Older SLA literature also links post-cure to shrinkage and distortion. Visually, some translucent resins can yellow if over-cured or exposed to uncontrolled sunlight for too long. [S4] [S9] [S19] [S20]
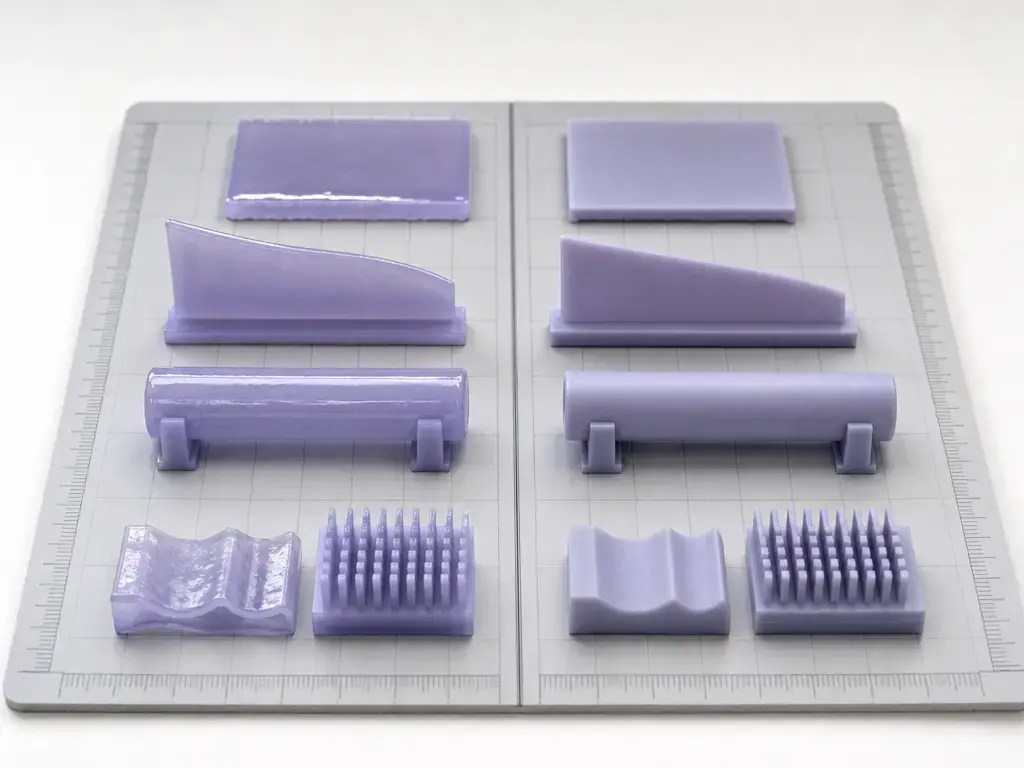
When comparing resin claims or workflows, it helps to group the changes instead of looking for one “best cured” label. [S16] [S18] [S20]
- Chemical/process: degree of conversion, residual monomer where the IFU discusses it, and surface tack. [S16] [S18] [S21]
- Mechanical: tensile strength or modulus, flexural strength or modulus, and the toughness-versus-brittleness balance. Read the test method before comparing numbers. [S20] [S23] [S24]
- Thermal: heat resistance and HDT, where HDT means the temperature at which a standard bar deflects a specified amount under load. [S4] [S26]
- Dimensional: shrinkage, dimensional deviation, and warp risk. Do not assume a universal percentage. [S4] [S19] [S20]
- Visual/surface: tackiness, gloss changes, haze, and yellowing in sensitive materials. If hardness is reported numerically, it should include the Shore scale and a method context such as ASTM D2240. [S9] [S21] [S25]
Troubleshooting: “Why isn’t my resin curing?”
When a print seems under-cured, the worst first move is often to blindly add more time. A symptom like tackiness, softness, yellowing, or warp can come from different variables in the hierarchy above, and changing only the timer can hide the real cause or push the part into a new failure mode. Start with the symptom, then trace backward through wash quality, drying, light specification, temperature, and geometry. [S8] [S12] [S20]
A tacky surface is the classic example. Oxygen can interfere with free-radical UV curing, and RadTech identifies a tacky or sticky finish as a sign of oxygen inhibition. PLOS One likewise ties inhibited polymerization behavior to oxygen concentration and UV dose. In hobby practice, though, tackiness is not only an oxygen story; it can also mean resin residue was left on the part, the solvent was dirty, or the print went into UV before it was actually dry. [S12] [S21] [S22]
Soft parts and soft cores need a different mindset. If the outside looks acceptable but the part stays rubbery in one region, think about thickness, cavities, trapped liquid resin, or a geometry that heats or illuminates unevenly. Industrial guidance already distinguishes surface light conditions from part-core temperature, and both old and new literature tie post-cure improvement to possible shrinkage and distortion rather than a simple “more UV fixes everything” rule. [S12] [S19] [S20]
Yellowing, brittleness, and dimensional drift usually point in the opposite direction: too much exposure for that resin, uncontrolled sunlight, too much heat for that geometry, or a resin family that trades dimensional stability for higher stiffness. Elegoo explicitly warns that too much curing time can yellow translucent resin, and recent research shows that property gains can come with increased deviation or secondary shrinkage in some photopolymers. [S9] [S20]
| Symptom | Most likely causes | What to check / do next |
|---|---|---|
| Tacky or sticky surface after cure | Oxygen inhibition, resin residue from poor washing, dirty solvent, or incomplete drying before UV. [S12] [S21] [S22] | Rewash if needed, use fresh solvent or a clean water workflow as specified, dry fully, then confirm post-cure wavelength and irradiance at the part. [S8] [S12] |
| Soft part or rubbery areas | Under-post-cure, wrong light conditions, low temperature, or resin-specific requirements not met. [S8] [S12] | Verify the exact resin preset, band, intensity, and cure temperature range before extending time. [S6] [S8] |
| Soft core in thick or hollow parts; trapped resin | Thick geometry, enclosed cavities, trapped liquid resin, or uneven heating through the section. [S12] [S20] | Check drains and hollows, inspect for trapped resin, and remember that part-core temperature can matter separately from chamber air temperature. [S12] |
| White residue or haze | Solvent or water residue, incomplete drying, or contamination left on the surface before UV. [S8] [S12] | Improve rinsing, use cleaner wash media, and fully dry before post-cure. [S8] [S12] |
| Yellowing | Overexposure, uncontrolled sunlight, or resin sensitivity to longer curing. [S9] | Reduce exposure within validated limits and avoid using sunlight as a precision cure method. [S9] |
| Warping or dimensional drift after curing | Post-cure shrinkage, heat, constrained geometry, or resin-dependent property trade-offs. [S4] [S19] [S20] | Review support strategy, geometry, and heat profile; do not assume more cure is always better. [S6] [S20] |
| Brittle part | Resin family limits, over-post-cure for the application, or chasing stiffness at the expense of toughness. [S20] | Recheck the intended material choice and validated cure profile rather than only shortening print exposure. [S7] [S20] |
Use this diagnostic order before changing the recipe. [S8] [S10] [S12]
- Confirm resin and printer wavelength compatibility for the printing stage. [S10]
- Confirm the post-cure wavelength or band and the irradiance at the part, not just lamp wattage. [S5] [S12]
- Re-check wash quality, solvent freshness, and dry time. [S8] [S12]
- Check temperature ranges, including ambient, resin, chamber, and part-core where relevant. [S5] [S8] [S12]
- Check geometry, especially thickness, opacity, cavities, and hollow drainage. [S12] [S20]
- Only then increase time or adjust heat, and only within validated resin limits. [S6] [S7] [S18]
Special cases and safety boundaries
Resin post-processing is a chemical workflow, not just a cosmetic finishing step. Treat uncured or partly processed resin as a skin and eye exposure hazard, use nitrile gloves and eye protection, and avoid deciding “safe enough” by feel. Manufacturer guidance for both hobby and industrial systems assumes washing, drying, and controlled post-processing before the part is treated as finished. [S8] [S12] [S18]
Dental/medical/biocompatible resins: follow IFU. Do not infer wash or cure settings from hobby resins. NextDent Base, for example, specifies cleaning for 3 minutes plus 2 minutes in more than 90% ethanol or IPA, with total cleaning time no more than 5 minutes, then a 10-minute rest, 15-minute preheat, and 45-minute curing at at least 60 °C with 5 mW/cm² using UVA 315–400 nm plus blue 400–550 nm. Formlabs likewise says that even if over-curing is acceptable for many materials unless otherwise stated, biocompatible applications must follow the relevant IFU or application guide. [S6] [S18]
Water-washable does not mean drain-safe. Anycubic explicitly says not to drain wastewater into sewers, and instead to let the waste settle, cure the resin in the wastewater under sunlight, and then dispose of the cured residue as solid plastic waste. The convenience is about cleaning method, not permission to pour contaminated wash water down the sink. [S8]
Key takeaways on resin curing
Resin curing is not one timer setting. The result depends on resin chemistry and version, wavelength or band, irradiance at the part, time, temperature, geometry, and whether you are following a validated preset or IFU. Better mechanical properties can come with dimensional trade-offs, so the right target is a controlled, resin-specific post-cure, not simply “more UV.” [S5] [S20]
FAQ
What is resin curing in 3D printing?
In vat photopolymerization, resin curing is the light-driven polymerization that solidifies liquid photopolymer during printing, followed by post-curing that can continue network formation and improve target properties after washing and drying. A print can be formed yet still be in a green state, so printing and post-curing are related stages, not the same stage. [S2] [S4] [S12]
Why isn’t my resin curing (or why is it still tacky)?
Start by separating three common causes: wrong post-cure light conditions, poor wash-and-dry workflow, and oxygen inhibition at the surface. A tacky finish is a known sign of oxygen inhibition, but it can also happen when uncured resin or wash residue remains on the part before UV exposure. Check the resin’s required wavelength or band, confirm irradiance at the part, re-check solvent freshness or water-wash quality, and make sure the part was fully dry before curing. [S8] [S12] [S21] [S22]
Does heat speed up resin curing?
Sometimes, yes, but only in a resin-specific way. Temperature can materially affect conversion, as shown by the hot-lithography study where conversion changed across 25, 40, and 55 °C process temperatures and then rose further after post-curing at 80 °C for 180 minutes. You still have to ask which temperature you mean: room temperature, resin temperature, chamber temperature, or part-core temperature. More heat is not a universal shortcut. [S5] [S12] [S16]
How long does resin curing take?
There is no universal time. No reliable figure found for a universal value — consult the resin’s TDS/IFU. Sourced examples range from 60–120 seconds for one translucent resin recommendation, to 3 minutes for one Anycubic water-washable example at 405 nm and 25,000–30,000 µW/cm², to general-purpose Form Cure cycles as short as 60 seconds, to industrial examples at 45, 60, or 90 minutes, and a dental IFU at 45 minutes after preheat. Those numbers do not transfer cleanly between resins. [S5] [S8] [S9] [S12] [S18]
What kind of 3D printer UV resin curing light do I need?
Look for the right wavelength or band, a stated irradiance at the part, reasonably even coverage, and heat control if the resin requires heated post-cure. Do not shop by wattage alone. One system may quote 150 W LED power but also specify 14.5 mW/cm² at 405 nm, while another resin page gives 25,000–30,000 µW/cm² at 405 nm, and an industrial or dental workflow may use broader bands instead of a single number. [S5] [S8] [S12] [S18]
Can I cure resin prints in sunlight?
You can, but it is an uncontrolled method and usually a poor choice for precision parts. Elegoo explicitly warns that sunlight can yellow translucent resin, and Anycubic’s use of sunlight appears in a waste-disposal context for curing contaminated wastewater, not as a precision recommendation for achieving repeatable part properties. For actual parts, a controlled cure box or validated station is the safer path. [S8] [S9]
Expert: What is oxygen inhibition and why can the surface stay tacky even when the part feels hard?
In free-radical UV curing, oxygen can consume or quench the reactive species needed for polymerization near the surface, which slows or can even stop surface crosslinking while the bulk underneath still hardens more successfully. That is why a part can feel structurally “there” but still have a sticky skin. More time can help only if the rest of the workflow is correct; wash residue, poor drying, weak irradiance, and incomplete coverage can produce a very similar symptom. [S12] [S21] [S22]
Sources
- S1. ISO/ASTM 52900:2021 Additive manufacturing — General principles — Fundamentals and vocabulary. ISO. https://www.iso.org/standard/74514.html
- S2. NIST — Vat Photopolymerization. https://www.nist.gov/additive-manufacturing/research-areas/technologies/vat-photopolymerization
- S3. 3D Systems — Stereolithography (SLA). https://www.3dsystems.com/stereolithography
- S4. Formlabs Support — Introduction to Post-Curing Prints. https://formlabs.com/support/Introduction-to-Post-Curing-Prints/
- S5. Formlabs — Form Cure (2nd Generation) product page. https://formlabs.com/global/products/form-cure/
- S6. Formlabs Support — Form Cure (2nd Generation) time and temperature settings. https://formlabs.com/global/support/Form-Cure-2nd-Generation-time-and-temperature-settings/
- S7. Form Cure (2nd Generation) time and temperature settings PDF. https://s3.amazonaws.com/servicecloudassets.formlabs.com/media/Form%20Cure%20%282nd%20Generation%29/Form%20Cure%20%282nd%20Generation%29%20time%20and%20temperature%20settings/PDF%20Form%20Cure%20%282nd%20Generation%29%20time%20and%20temperature%20settings.pdf
- S8. Anycubic Water-Wash Resin 2.0 product page. https://store.anycubic.com/collections/materials/products/water-wash-resin
- S9. Elegoo Blog — Translucent resin is easily turning yellow. https://www.elegoo.com/blogs/3d-printer-user-guide/translucent-resin-is-easily-turning-yellow
- S10. Prusa Help — Resins. https://help.prusa3d.com/article/resins_1977?product=sl1s-speed
- S11. Prusa Help — CW1/S basic use and LCD menu. https://help.prusa3d.com/article/cw1-s-basic-use-and-lcd-menu_112305?product=cw1
- S12. 3D Systems Figure 4 Modular Post-Processing Guide. https://printer-docs-public.s3.amazonaws.com/sites/default/files/printers/pdf-translations/Figure%204%20Modular/post%20processing/Post-Processing.pdf
- S16. Sameni et al. — Hot lithography temperature and degree of conversion study. https://www.mdpi.com/2073-4360/14/15/2988
- S18. NextDent Base IFU. https://nextdent.com/downloads/IFU_NextDent_Base_US_24_07_2023.pdf
- S19. Classic SLA shrinkage paper abstract. https://www.sciencedirect.com/science/article/abs/pii/S0261306997000083
- S20. 2026 study on UV post-curing trade-offs and dimensional effects. https://link.springer.com/article/10.1007/s00170-026-18359-0
- S21. RadTech proceedings — UV curing in an inerted atmosphere update. https://www.radtech.org/2014proceedings/papers/technical-conference/Oxygen%20Inhibition/Borsuk%20-%20UV%20Curing%20in%20an%20Inerted%20Atmosphere%20Update.pdf
- S22. PLOS One — Oxygen inhibition and UV polymerization. https://journals.plos.org/plosone/article?id=10.1371%2Fjournal.pone.0119658
- S23. ASTM D638 standard catalog page. https://store.astm.org/standards/d638
- S24. ASTM D790 standard catalog page. https://store.astm.org/standards/d790
- S25. ASTM D2240 standard catalog page. https://store.astm.org/d2240-15r21.html
- S26. Intertek Testlopedia — Heat Deflection Temperature (ASTM D648). https://www.intertek.com/polymers-plastics/testlopedia/heat-deflection-temperature-astm-d648/