Summary
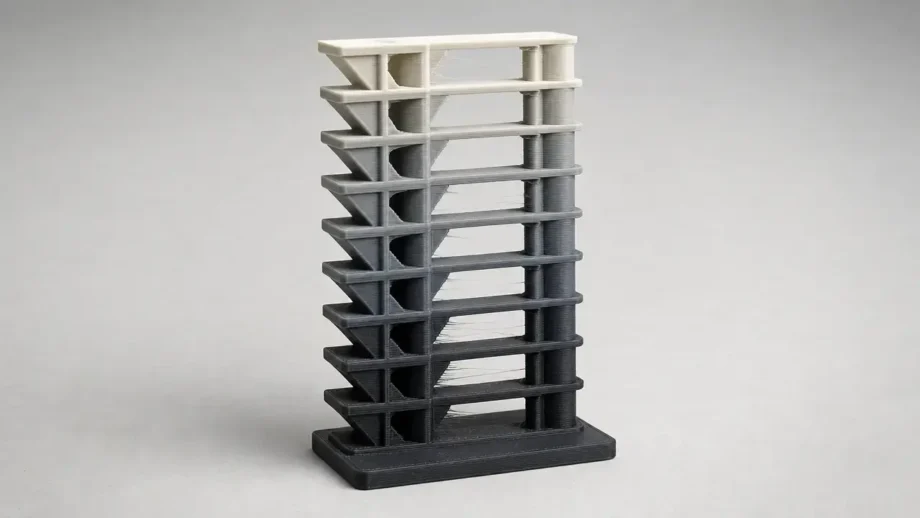
A temperature tower is a filament temperature calibration print: a vertical tower with multiple sections printed at different nozzle temperatures so you can compare the results side by side. [2] This article stays within desktop FDM/FFF use under the formal additive-manufacturing process family called material extrusion. [1] The goal is practical: start from a manufacturer range, generate temperature changes in slicer logic or G-code, and read the finished tower without mistaking the cleanest-looking section for the mechanically safest choice. [2] [13] [14]
What a Temperature Tower Is
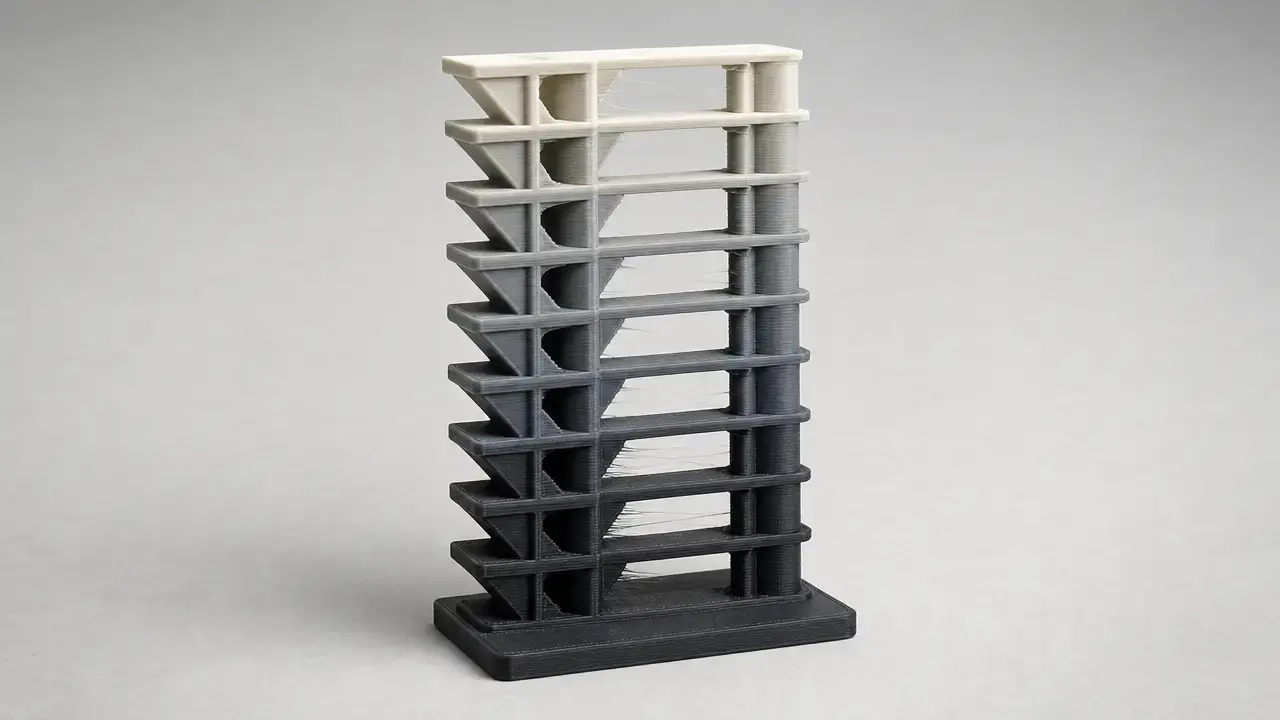
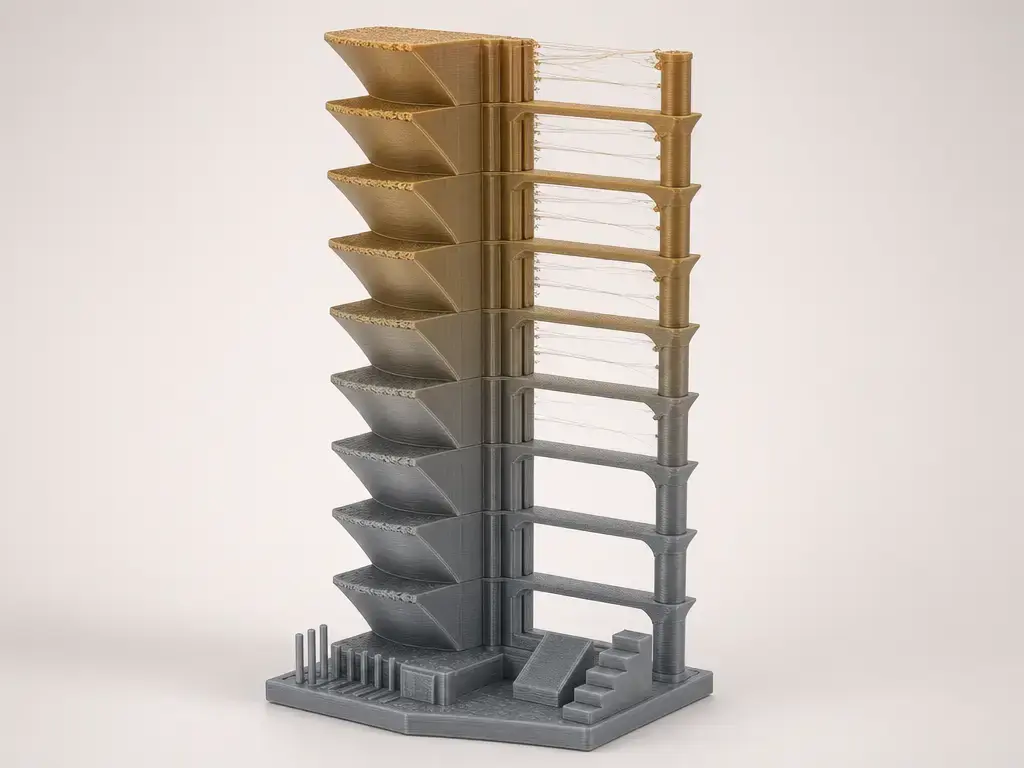
A temperature tower is a practical calibration print for filament-based 3D printing: a vertical model divided into sections that are printed at different nozzle temperatures. [2]
The term is a community and slicer term, not a named ISO/ASTM additive-manufacturing test. In standards language, the formal process family here is material extrusion, while temperature tower describes a common calibration workflow used in slicers and in hobbyist or prosumer printing practice. [1] [2] [6] After the first print, the tower helps narrow a practical nozzle setting for a specific filament, printer, nozzle, and speed regime rather than declare a universal “best” temperature. [2] [6] [13]
Where the Term Fits: Material Extrusion, FDM, and FFF
In ISO/ASTM 52900:2021, the formal process family for this article is material extrusion, defined as an additive-manufacturing process in which material is selectively dispensed through a nozzle or orifice. [1] That standards context keeps the discussion grounded in the correct process class instead of treating every calibration habit as a formal test method. [1]
For most desktop users, FDM and FFF are the familiar labels for thermoplastic filament printing. This article uses those labels as practical shorthand, but the scope stays narrow: desktop thermoplastic extrusion with a heated nozzle, not resin printing and not other additive-manufacturing processes. That is also the context assumed by slicer temperature-calibration workflows. [1] [2]
Why Nozzle Temperature Calibration Matters
The nozzle temperature on the spool or datasheet is a starting range, not a final answer. Different brands, colors, moisture conditions, printers, nozzles, and print speeds can shift the practical setting even when the filament category is still called PLA, PETG, or ABS. [6] [10] [11] Manufacturer guidance is still the first place to start, but the same nominal setpoint does not behave identically on every machine. [2] [13]
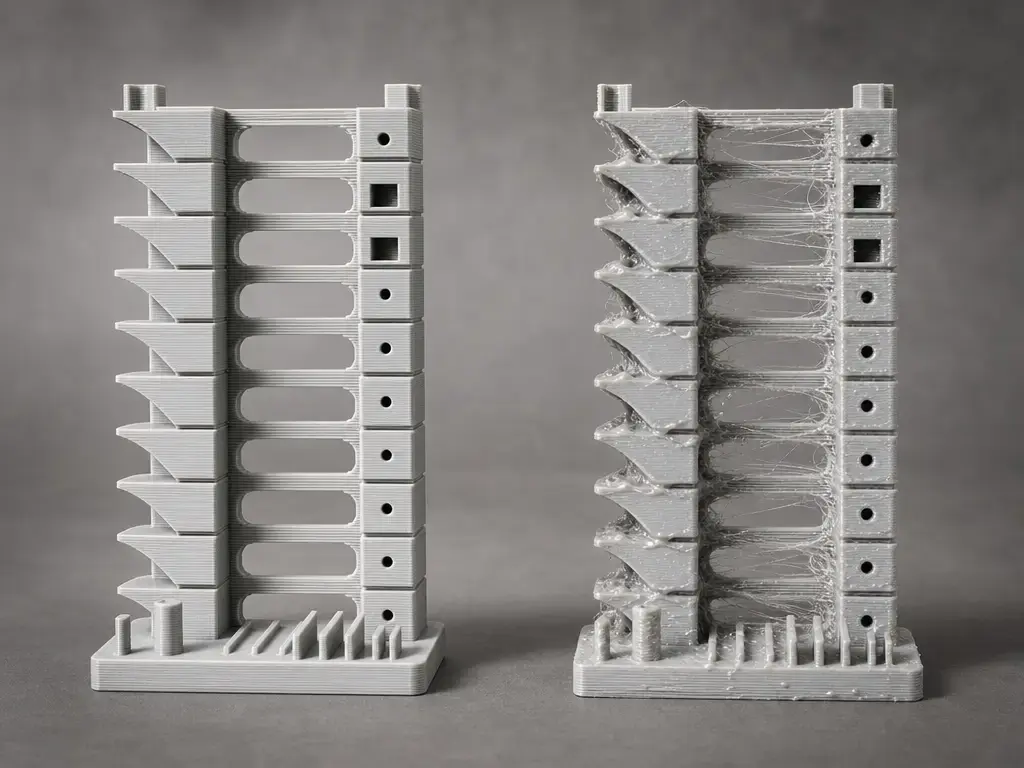
At the nozzle, temperature affects melt viscosity and flow, which in turn affects extrusion behavior and bonding to previous layers. Lower temperatures can improve crisp edges and reduce sag, but they also raise the risk of under-extrusion and weaker layer bonding. Higher temperatures can improve flow and interlayer bonding, but they also increase the chance of ooze, stringing, loss of edge definition, and, at the wrong extreme, thermal degradation or clogging. [2] Measured melt temperature is also not identical to the slicer setpoint: NIST reports that it depends on volumetric flow rate, the chosen setpoint, and nozzle diameter. [13] That is one reason a number that works on one machine may transfer poorly to another. [13]
Typical features to inspect include the following. [2] [6]
- Stringing pillars
- Bridge spans
- 45°/55° overhangs
- Small text or number labels
- Thin walls or corners
- Layer-adhesion break points
A tower is comparative, not a certification test. Research on weld formation in material extrusion shows that interlayer performance depends on thermal history and polymer-welding behavior, so the cleanest-looking section is not automatically the strongest one. [14] If the final part must carry load, treat the tower as a narrowing tool and confirm the chosen setting on a real part or with an optional informal break test. [2] [14]
Temperature Tower vs. Other Calibration Prints
A temperature tower has a narrow purpose: compare how one filament behaves as nozzle temperature changes across the height of the print. OrcaSlicer frames the result in terms of stringing, layer adhesion or strength, overhangs and bridging, and surface finish. [2] That makes it different from a retraction tower, which isolates travel-related ooze control; flow calibration, which isolates extrusion quantity; pressure advance or linear advance tuning, which isolates pressure compensation during motion; and PID tuning, which targets temperature-control behavior rather than printed geometry.
That boundary matters because changing the command mechanism does not change the identity of the test. A slicer or printer can alter temperature through layer-change logic, and firmware commands such as M104 and M109 differ in waiting behavior rather than in whether the print becomes some other calibration print. [3] [4] [5] What makes it a temperature tower is the stepped nozzle temperature across sections and the comparison of those sections afterward. [2]
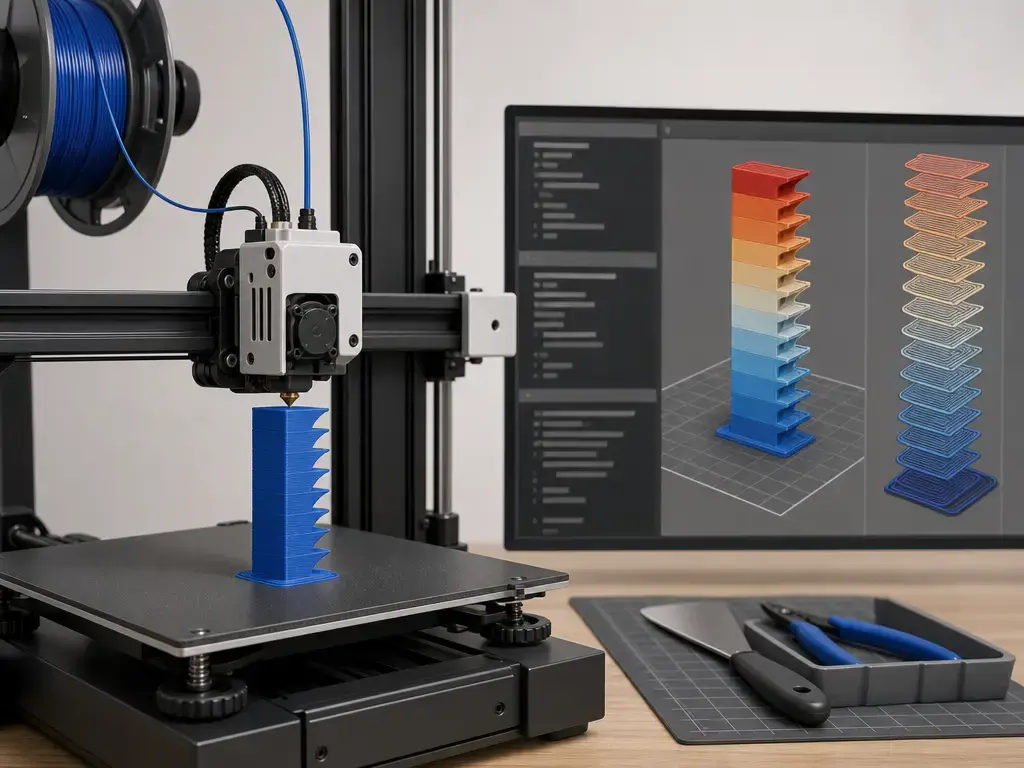
How a G-Code Temperature Tower Is Generated
There are three common ways to make a G-code temperature tower. You can use a slicer’s built-in calibration tool, import a model or project that already includes temperature changes, or edit the G-code so the hotend target shifts at chosen layer heights. PrusaSlicer-style macro support is one practical example, because before-layer-change custom G-code can be used to step hotend temperature through the tower without redesigning the model itself. [3]
The command choice is mostly about timing. M104 sets a new hotend target and continues without waiting, while M109 sets a new target and waits according to its parameters. In Marlin, M109 S... waits only while heating, while M109 R... waits while heating or cooling. [4] [5] Short examples include M104 S225, M104 S220, and M109 S225. [4] [5] A non-blocking change can keep the print moving but may blur the transition zone, while a waiting command can give a cleaner temperature step at the cost of extra dwell time and possible artifacts on some geometries. Firmware implementation details vary, so it is better to treat M104 and M109 as tradeoffs, not defaults. [4] [5]
What Temperature Range Should You Start With?
Start with the filament manufacturer’s datasheet or the spool range. If the exact spool or datasheet does not publish a nozzle range, write no reliable figure found rather than inventing a universal one. [6] [7] [8] [9] [10] [11] [12]
Common practice is to use 5 °C or 10 °C steps, but that is a convention, not a rule. [6] For a named filament, manufacturer data should override generic literature context. Published papers are useful as background, but broad literature ranges do not overrule the exact product page for the spool in your hand. [7] [8] [9] [10] [11] [12] [15]
Start here: manufacturer examples, not universal rules
| Material example | Manufacturer range example | Tower planning note | Source priority |
|---|---|---|---|
| PLA | Use the exact spool or datasheet. Examples include Prusament PLA at 210 ± 10 °C and Bambu PLA Basic at 190–230 °C. [7] [10] | Start near the middle of the stated range, then step outward in 5 °C or 10 °C increments. [6] | Manufacturer first, literature second. [15] |
| PETG | Use the exact spool or datasheet. Examples include Prusament PETG at 250 ± 10 °C and Bambu PETG Basic at 230–260 °C. [8] [11] | PETG often needs a careful midrange check because ooze and layer bonding can both change quickly with temperature. [8] [11] | Manufacturer first, literature second. [15] |
| ABS/ASA | Use the exact spool or datasheet. A current manufacturer example is Bambu’s ABS guidance at 240–280 °C. [12] | Keep bed and enclosure conditions stable before comparing sections, especially for warping-prone materials. [12] | Manufacturer first, literature second. [15] |
| PC / PC blend / PC-ABS | Use the exact brand datasheet. Examples include Prusament PC Blend at 275 ± 10 °C and Bambu PC at 260–290 °C, but no reliable figure found applies universally to PC-ABS or to all PC blends. [9] [12] | Plan a hotter starting window than PLA or PETG, and do not reuse a PLA-style range by habit. [9] [12] | Exact manufacturer data first. [9] [12] |
As a background check, published literature reports broad ranges such as PLA at 180–230 °C, ABS at 210–250 °C, and PETG at 210–240 °C. [15] Those figures are context, not instructions. For a first pass, bracket the manufacturer recommendation, use steady 5 °C or 10 °C steps, and then tighten the range if the first tower shows a promising zone. [6] If you change speed, nozzle size, or hotend hardware later, expect to retest. [6] [13]
When a Temperature Tower Is Worth Printing
A temperature tower 3d print is worth doing when you switch to a new filament brand or color, install a different nozzle, change the hotend, move to a faster flow regime, or start seeing unexplained stringing, weak layers, or surface defects. [6] It is especially useful for PETG, ABS, ASA, PC, and PC-blends because current manufacturer guidance for those materials sits in noticeably different ranges from common PLA guidance. [10] [11] [12] A quick tower is often the fastest way to tell whether the material wants a cooler, middle, or warmer practical setting on your machine. [6]
How to Read the Result and Choose the Setting
Before interpreting the print, confirm that the temperature actually changed at the planned layer heights. Check the slicer preview, the layer-change commands, or the printer console first, because a tower that never stepped temperature can still look superficially believable. [3] [4] [5] Once that is verified, inspect the print in a consistent order: stringing, bridges, overhangs, surface finish, corners, and overall extrusion consistency. OrcaSlicer’s own result categories are stringing, layer adhesion or strength, overhangs or bridging, and surface finish, which is a good reminder that the tower gives you a comparative judgment rather than a numeric score. [2]
The right choice depends on the part’s job. Decorative parts can justify the lower edge of the acceptable zone if it produces cleaner surfaces and less ooze. Functional parts can justify a slightly warmer acceptable zone if it improves bonding and extrusion stability, even when the surface looks a little less crisp. That tradeoff exists because actual melt behavior depends on more than the displayed setpoint, and interlayer weld quality is not identical to visual neatness. [13] [14]
If you care most about…
| Priority | What to favor | Likely temperature bias |
|---|---|---|
| Visual detail | Clean surfaces, low stringing, and sharp corners | Slightly cooler |
| Mixed use | Balanced bridges, overhangs, and acceptable adhesion | Midrange |
| Functional part | Stable extrusion and stronger layer behavior with acceptable appearance | Slightly warmer |
If several adjacent sections look acceptable, the middle of that band is a reasonable general-purpose choice. If the part is strength-oriented, the middle or slightly warmer end can be sensible, but verify it on a real part or with an optional informal break test rather than assuming the tower measured strength directly. [2] [14]
Material-Specific Notes: PETG, ABS, ASA, PC, and PC-Blends
A PETG tower deserves one extra check before you trust it: make sure the filament is dry if moisture is even a plausible problem. Wet PETG can exaggerate stringing and ooze, which makes temperature alone look worse than it really is. Bambu PETG Basic lists drying at 65 °C for 8 h and keeping humidity below 20% RH, while Prusament PETG lists a nozzle temperature of 250 ± 10 °C, a bed temperature of 80 ± 10 °C, and 50% fan speed as its own named-filament guidance. [11] [8]
For ABS, ASA, PC, and PC-blends, keep bed and enclosure or chamber conditions steady while you compare nozzle temperature. These materials are more sensitive to the surrounding thermal environment, so a nozzle-only comparison is not fair if the enclosure warms up, the door opens, or the bed condition changes halfway through the job. Manufacturer examples also show why a PLA-style assumption is risky: Bambu lists ABS at 240–280 °C and PC at 260–290 °C, while Prusament PC Blend lists 275 ± 10 °C at the nozzle, 110 ± 10 °C on the bed, and 20% fan speed. [9] [12] Treat PC-ABS as its own brand-datasheet case rather than folding it into generic PC or ABS advice; if the exact spool does not publish a range, no reliable figure found is the honest answer. [12]
Troubleshooting and Validity Checks
A tower is only useful if the comparison is fair. Wet filament, a partial clog, misconfigured layer-change G-code, excessive cooling, or changed print speed can all invalidate the result. [3] [4] [5] [10] [11] A non-blocking M104 transition may change the target without fully settling before the next section, while a blocking M109 transition can add dwell time that changes how a geometry prints. [4] [5]
A second limitation is scale. A small tower does not necessarily reproduce the same thermal conditions as a large part or a faster print. NIST’s measurements show that melt temperature behavior varies with volumetric flow rate, setpoint, and nozzle diameter, so success on a small calibration print does not guarantee identical behavior on a higher-flow job. [13]
Do not change these during the same test unless you are deliberately testing them. [6] [13]
- Retraction distance/speed
- Cooling fan profile
- Flow ratio / extrusion multiplier
- Print speed
- Pressure advance / linear advance
- Filament drying state
- Nozzle diameter
For moisture-sensitive materials, drying guidance is part of validity, not a side note: Bambu PLA Basic lists 50 °C for 8 h and humidity below 20% RH, while Bambu PETG Basic lists 65 °C for 8 h and humidity below 20% RH. [10] [11] Before you judge the tower, do one quick sanity check: confirm the target changes in the preview, the layer-change commands, or the printer console. [3] [4] [5]
Current Research Context
The temperature shown in a slicer is a command target, not a direct measurement of the melt state inside the nozzle. NIST’s work on steady melting in material extrusion reports that measured temperature and temperature variance depend on volumetric flow rate, temperature setpoint, and nozzle diameter. [13] That means two printers can behave differently at the same nominal hotend setting, and the difference can grow when you change nozzle size or push more material through the hotend. [13]
Research on weld formation in material extrusion makes the same broader point from a different angle: interlayer behavior depends on thermal history and polymer-welding processes, not just the number printed in the slicer. [14] Published literature also reports broad material ranges rather than a single answer, which reinforces the idea that calibration remains material-, machine-, and use-case-specific. [15] Modern slicers can automate much of the workflow, but ready-made profiles do not eliminate the need to tune third-party filaments, unusual geometries, new nozzles, or different speed regimes. [2] [13]
Conclusion
A temperature tower is a fast comparative tool for choosing a practical nozzle temperature, not a universal standard test. [2] The sound workflow is simple: start with the manufacturer’s range, test it in visible steps, keep the filament dry and the rest of the settings stable, and then confirm the result on a real part. [6] [10] [11] That last step matters because the slicer setpoint is only a target; actual hotend behavior depends on flow, nozzle diameter, and the printer’s thermal behavior during the print. [13]
FAQ
What is a temperature tower in 3D printing?
A temperature tower is a calibration print for filament-based material extrusion. In practice, it is a vertical model printed in stepped nozzle temperatures so you can compare stringing, bridging, overhangs, surface finish, and layer behavior from one section to the next. [1] [2]
How do I use a temperature tower for filament temperature calibration?
Start with the spool or datasheet range, print the tower in planned steps, and compare the sections after confirming that the temperature actually changed at the intended layers. If several sections look acceptable, choose the one that best matches the part’s purpose rather than only the prettiest section. [2] [6]
How do I generate a G-code temperature tower?
You can use a slicer calibration tool, import a project that already contains temperature changes, or add layer-based commands manually. In Marlin-style G-code, M104 changes the target without waiting, while M109 waits according to its parameters; before-layer-change custom G-code is one practical way to schedule those changes. [3] [4] [5]
What temperature range should I use for a temperature tower?
Use the exact manufacturer range first, then test around it in 5 °C or 10 °C steps. For example, Bambu PLA Basic lists 190–230 °C and Bambu PETG Basic lists 230–260 °C, while Prusament PLA and PETG list 210 ± 10 °C and 250 ± 10 °C, respectively. [6] [7] [8] [10] [11]
Why does a temperature tower sometimes not change temperature correctly?
The usual causes are misconfigured layer-change logic, using a waiting or non-waiting command in a way you did not intend, or simply not verifying the preview or printer console before printing. Thermal behavior also shifts with flow rate, setpoint, and nozzle diameter, so the commanded value and the melt behavior are not identical. [3] [4] [5] [13]
Why is the best-looking section not always the strongest?
Because visual quality and interlayer performance are related but not identical. Research on weld formation in material extrusion shows that interlayer behavior depends on thermal history and polymer-welding processes, so the crispest-looking section can differ from the section that gives better bonding for a functional part. [14]
How should I handle ABS, ASA, PC, or PC-ABS towers in an enclosure?
Keep the enclosure, bed, airflow, and cooling conditions as stable as possible while the print runs. These materials are more sensitive to the surrounding thermal environment, and manufacturer examples already sit in hotter bands than PLA or PETG, such as Bambu’s ABS at 240–280 °C and PC at 260–290 °C. For PC-ABS, use the exact brand datasheet rather than a generic shortcut. [12]
Sources
- ISO/ASTM 52900:2021 additive manufacturing terminology
- OrcaSlicer Wiki, Temp Calibration
- Prusa Knowledge Base, Macros
- Marlin Firmware, M104 – Set Hotend Temperature
- Marlin Firmware, M109 – Wait for Hotend Temperature
- All3DP, Why You Should Print a Temperature Tower & How-To in Bambu Studio, Prusa Slicer & OrcaSlicer
- Prusament PLA
- Prusament PETG
- Prusament PC Blend
- Bambu Lab PLA Basic
- Bambu Lab PETG Basic
- Bambu Lab Filament Guide PDF
- NIST, Steady Melting in Material Extrusion Additive Manufacturing
- NIST, Weld formation during material extrusion additive manufacturing
- Establishing a Framework for Fused Filament Fabrication Process Optimization: A Case Study with PLA Filaments