
Summary
In precise terminology, “resin printing” usually means vat photopolymerization, while “filament printing” usually means material extrusion. [1] [2] For resin printing vs filament printing, the practical verdict is simple: resin usually favors finer visible detail and smoother surfaces, while filament usually favors easier ownership, larger parts, and lower workflow friction. [10] [16] [19] A single universal winner on cost, accuracy, or speed is not defensible from the sources reviewed here, because published cost studies are scope-limited, AM measurement remains context-dependent, and vendor time claims use unlike metrics such as seconds per layer, mm/h, or total job time. [2] [7] [8] [9] [11] [13] [15] [19]
Quick Answer: Resin Printing vs Filament Printing
For resin printing vs filament printing, the reader-friendly terms are fine, but the technical family labels matter: most desktop resin printers fall under vat photopolymerization, while most desktop filament printers fall under material extrusion. These are separate additive-manufacturing families, not just two feedstocks for the same process. [1] [2]
In practice, resin is usually the better starting point for miniatures, jewelry patterns, dental-style models, and other small parts where fine features and smooth surfaces matter. Filament is usually the better starting point for brackets, fixtures, classroom projects, enclosures, and larger everyday parts where simple handling and part size matter more. Current desktop examples show the market pattern without making it universal: Formlabs lists the Form 4 at 20.0 × 12.5 × 21.0 cm, or 5.25 L, while the MakerBot Sketch Sprint manual lists 220 × 220 × 220 mm and a 0.4 mm nozzle. [10] [19]
| Use case | Likely better process | Why | Biggest caveat |
|---|---|---|---|
| Fine miniatures or display models | Resin / vat photopolymerization | Smoother surfaces and fine visible detail are usually easier to achieve | Washing, curing, handling, and cleanup add workflow steps |
| Large simple prototypes | Filament / material extrusion | Larger, lower-friction parts are usually easier to own and iterate | Layer lines and visible seams may need sanding or design changes |
| Functional shop fixtures | Filament / material extrusion | Material choices and part size often suit practical jigs, brackets, and holders | Strength depends heavily on orientation, settings, and design |
| Small precise-looking parts | Resin / vat photopolymerization | Small features and crisp edges are often more convincing | “Precise-looking” is not the same as guaranteed dimensional accuracy |
There is no universal cost, accuracy, or speed winner across the two families. Cost studies are scenario-specific, measurement language needs test context, and vendor speed numbers use different definitions of “fast.” [2] [7] [8] [9] [11] [13] [15] [19]
What “Resin Printing” and “Filament Printing” Actually Mean
A process family is the standards-level category for how a part is built. In that language, most desktop filament machines are material extrusion, and most desktop resin machines are vat photopolymerization. That vocabulary comes from ISO/ASTM terminology, and AM-specific documentation standards also exist beyond casual maker language. [1] [6]
Consumer language is looser. “Filament printing” may refer to many material-extrusion machines, and “resin printing” may refer to several vat-photopolymerization implementations. An implementation subtype is narrower and names the exposure or deposition method. FDM is common consumer wording, but the term belongs to Stratasys branding, so material extrusion is the standards-friendly family label and FFF is often used as a non-brand subtype label. On the resin side, a single machine page can mix labels: Formlabs lists the Form 4 with print technology “SLA” and technology “Masked Stereolithography (MSLA).” [4] [5] [10]
List 1:
- Material extrusion
- FDM
- FFF
- Vat photopolymerization
- SLA
- MSLA / LCD
- DLP / projector-based resin
Usage rule: use the consumer terms when the reader is choosing a workflow, but switch to the family and subtype labels when the exact mechanism matters. That is why this article uses “resin printing” and “filament printing” for readability after the standards framing is established. [1] [10]
How the Processes Build a Part
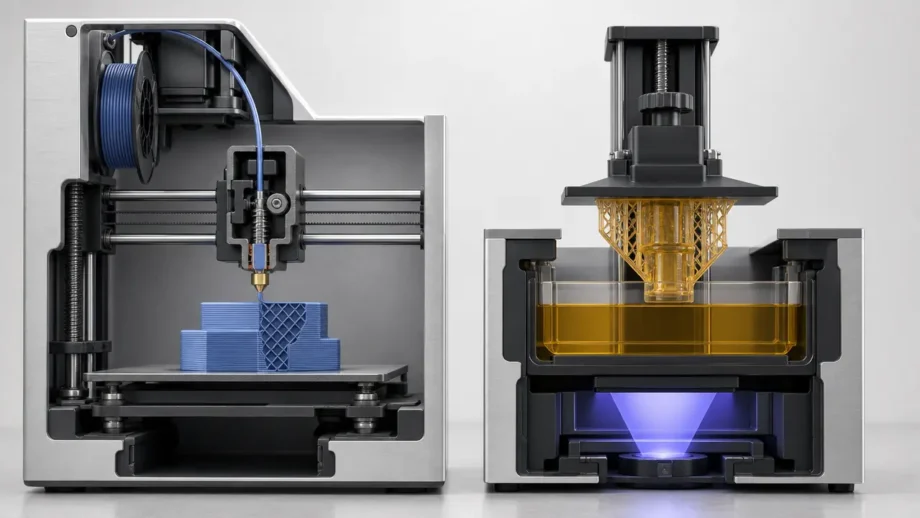
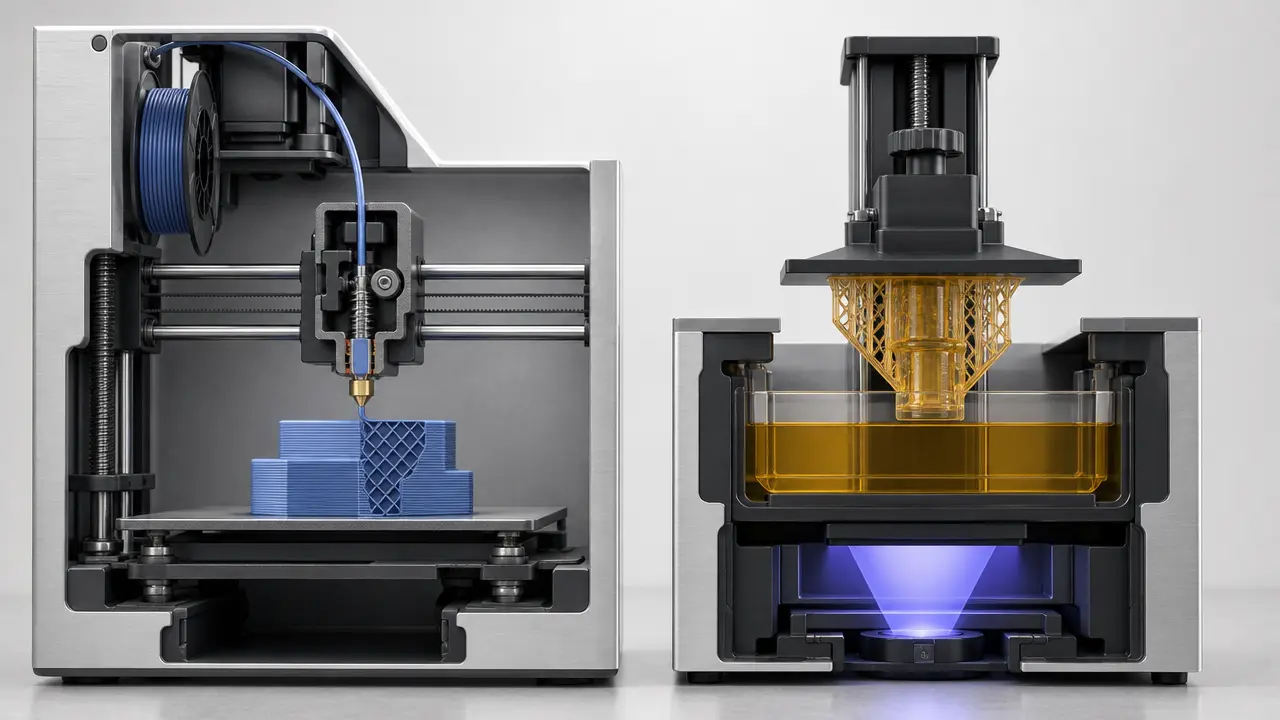
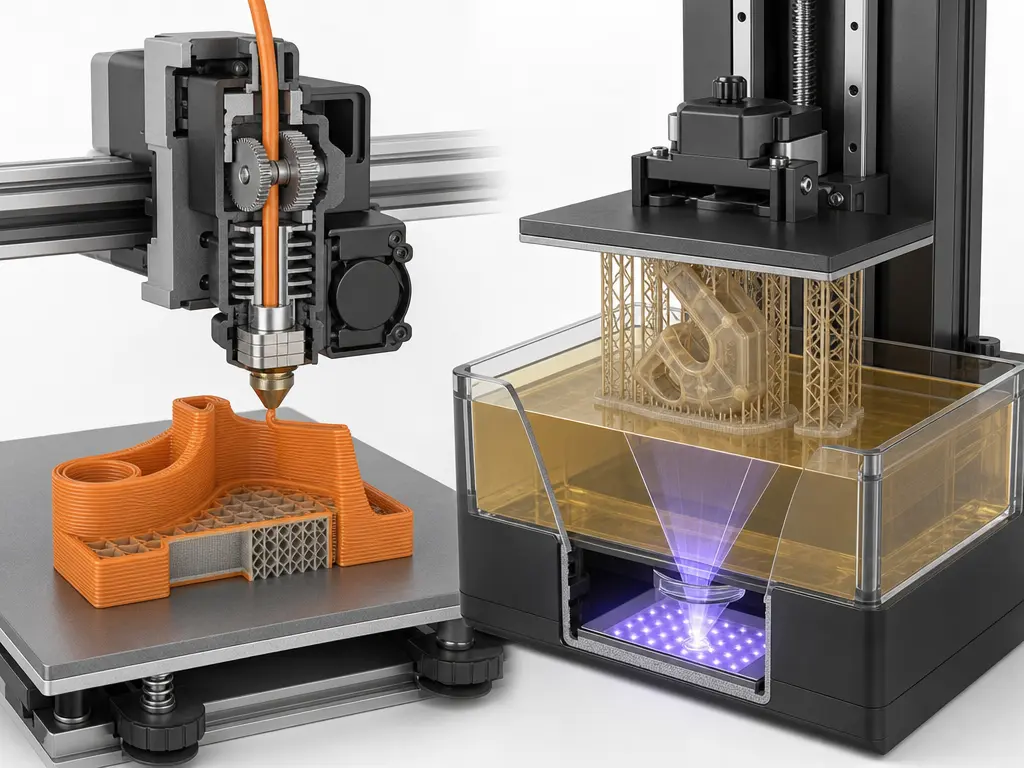
In material extrusion, the printer pushes material, typically thermoplastic filament, through a nozzle and lays it down layer by layer. The sliced file defines perimeters, infill, supports, travel moves, and layer changes, while nozzle size, temperature, flow, cooling, and layer height affect how each road is formed and bonded. NIST and ASTM both describe the family in essentially that way: material is pushed through a nozzle or deposited as a filament or bead from an extrusion head. [2] [4]
In vat photopolymerization, liquid photopolymer resin sits in a vat and is selectively cured by light. The family label is shared, but the light-delivery method is not. Classic stereolithography uses a scanning ultraviolet laser path; masked LCD systems expose each layer through a screen mask; projector-based systems expose patterned light from a projector. A scanning laser path is not the same mechanism as an LCD mask, and neither is the same as a projector array. Formlabs’ Form 4 is one current desktop example labeled as SLA and MSLA on the same product family, while Prusa’s SL1S documentation is a clear MSLA example with a 127 × 80 × 150 mm print area and 1.4–2.5 seconds of layer exposure time depending on material and layer height. SLA post-processing also follows from the mechanism: 3D Systems states that printed SLA parts are cleaned in solvent and then cured in a UV oven. [3] [10] [15] [16]
Print Quality, Resolution, Accuracy, and What the Specs Actually Mean
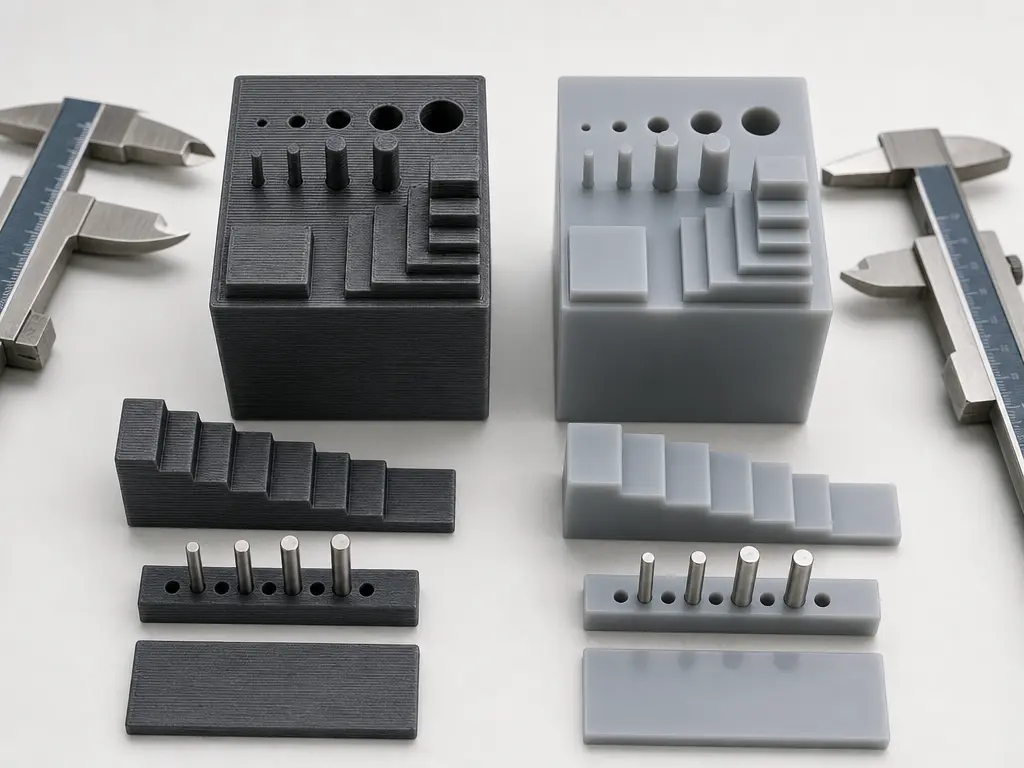
Surface finish, visible detail, and dimensional fit are related, but they are not the same thing. A filament part can show visible layer lines and still fit well in a real assembly, while a smooth resin part can still miss a hole size, peg diameter, or mating-face tolerance. NIST’s AM measurement program emphasizes high process variability, low part accuracy and surface quality as recurring challenges, and ongoing work on qualification methods. That is why “looks sharp” should not be mistaken for “measures right.” [8] [9]
Accuracy also needs careful language. NIST warns that accuracy is a qualitative concept and that “precision” should not be used as a synonym for accuracy; when numbers matter, uncertainty and test conditions matter. In practical printer discussions, resolution is better treated as the smallest addressable step or image element in the machine, while precision or repeatability describes how closely repeated results agree. [7]
| Spec | What it actually describes | What it does not guarantee |
|---|---|---|
| pixel size | The projected or masked image element size in an XY plane | It does not equal a minimum guaranteed feature size on the printed part |
| laser spot | The approximate cured trace or energy-delivery width for a scanning system | It does not equal a minimum guaranteed feature size on the printed part |
| nozzle diameter | The physical outlet size that shapes extruded roads | It does not equal a minimum guaranteed feature size on the printed part |
| layer height | The commanded vertical increment between layers | It does not equal a minimum guaranteed feature size on the printed part |
| dimensional tolerance | A stated allowable deviation under defined conditions | It does not equal a minimum guaranteed feature size on the printed part |
| repeatability | How consistently a system repeats a result | It does not equal a minimum guaranteed feature size on the printed part |
Vendor specs are useful, but they are device-specific manufacturer claims, not universal process truths. Formlabs lists the Form 4 at 50 µm pixel size, ±0.15% XY dimensional tolerances, and “most prints” in less than 2 hours. Prusa lists the SL1S with 1.4–2.5 seconds layer exposure time, supported layer heights of 0.025–0.1 mm, and a minimal layer height of 0.01 mm. MakerBot lists the Sketch Sprint with a 0.4 mm nozzle, layer-resolution capability of 100–400 microns, and a print mode tuned for 200 microns. None of those numbers alone guarantees a matching real-world feature size on a printed part. [11] [15] [19]
Industrial numbers should stay in industrial context. 3D Systems’ Figure 4 135 brochure lists 50 µm pixel size, 20/30/50 µm layer thicknesses, accuracy of 50 µm for features under 25 mm plus ±2 µm for every additional mm, maximum print speed up to 70 mm/h, and Cpk greater than 3 in benchmark studies. Its Figure 4 Production page lists part print speeds up to 65 mm/h, prototyping speeds up to 100 mm/h, and Six Sigma repeatability framed as Cpk > 2. These are not hobby-wide resin benchmarks; they are enterprise claims tied to specific systems, materials, and validation contexts. The safe conclusion is narrower: there is no reliable universal accuracy winner for resin over filament, or filament over resin, without naming the exact machine, material, geometry, settings, and measurement method. [17] [18] [7] [8] [9]
Workflow, Post-Processing, and Beginner Friction
The two processes usually feel most different in the workflow, not in the slicer. A filament part often becomes a usable object shortly after the print finishes and the part cools enough to remove. A resin part usually stays inside a controlled wet workflow until excess resin has drained and the part has been washed, dried, and post-cured. 3D Systems describes SLA parts as being cleaned in solvent and then cured in a UV oven, and Formlabs’ workflow guidance adds nitrile gloves, IPA cleanup where needed, and validated curing settings. [16] [21] [23]
List 2:
- Typical filament workflow
- Print completion: let the bed and part cool enough to remove without warping or damage.
- Cleanup: remove skirt, brim, purge line, or stray strings.
- Support removal: clip or peel supports if the model used them.
- Curing/finishing: no UV cure; sanding, drilling, or heat-set inserts are optional finishing steps.
- Operator hands-on time: often concentrated at setup, part removal, and any support cleanup.
- Typical resin workflow
- Print completion: let resin drain from the part and build platform.
- Cleanup: wash uncured resin from the surface, commonly using a solvent workflow.
- Support removal: remove supports before or after curing depending on material and geometry.
- Curing/finishing: UV post-cure as specified for the resin and application.
- Operator hands-on time: distributed across draining, washing, drying, support removal, curing, and waste handling.
Resin washing and UV post-curing are not equivalent to simply popping supports off an FDM print. Even “fast resin” examples still include post-processing: Formlabs’ Fast Model Resin page describes over 100 mm/h on Form 4, but the same workflow example still includes a 5-minute wash and a 5-minute room-temperature post-cure. Formlabs also notes that post-curing general-purpose resins is optional but recommended to reduce surface tack and improve mechanical properties. [13] [14]
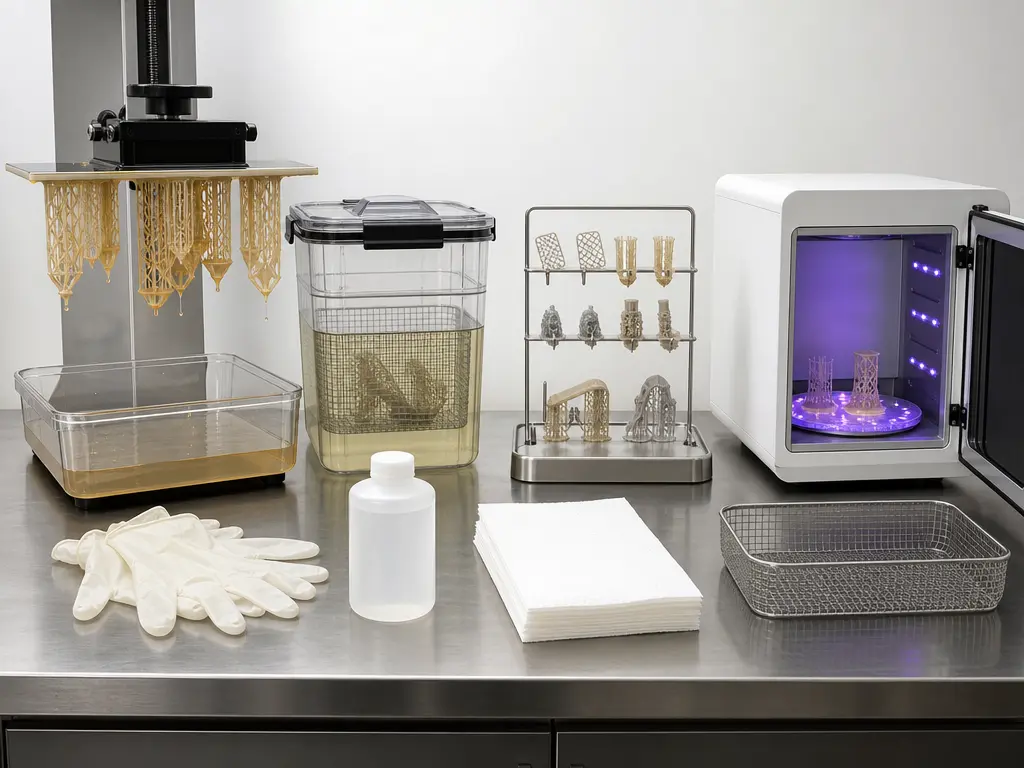
That procedural difference is why resin often feels less beginner-friendly even when the print engine itself is fast. The workflow also brings PPE, ventilation, and solvent handling into ordinary ownership. Formlabs’ resin SDS and application guidance support glove use, eye protection, and vapor-aware handling, while NIOSH treats IPA as a flammable solvent with exposure limits and a 53°F flash point. For fair comparisons, avoid stopwatch claims that count only machine motion; the sources do not provide a neutral benchmark that merges printing, cooling, washing, drying, curing, support work, and cleanup into one cross-process number. [21] [22] [23] [11] [13] [15] [19]
Materials and Mechanical Behavior
At the family level, filament printing usually works with thermoplastics that soften when heated and solidify again as they cool, while resin printing uses photopolymers that solidify through light-driven chemistry. That difference affects heat response, creep, impact behavior, aging, and finishing, but it does not create a single universal strength ranking. [2] [3]
Hobby discussion often calls resin “brittle,” and many standard resins do behave that way in thin or notched parts, but that is not universal across all formulations. Formlabs Precision Model Resin, for example, lists a minimum layer thickness of 50 micron, ultimate tensile strength of 50.0 MPa, and tensile modulus of 2200.0 MPa, while also stating that post-curing for general-purpose resins is optional but recommended. Those values describe that named resin under stated conditions, not “resin printing” as a whole. Directly comparing one resin tensile number to the entire universe of filament materials is not an apples-to-apples test unless the standard, specimen geometry, orientation, and conditioning state align. [14]
Material-extrusion parts need the same caution. Stratasys’ ABS-M30 data sheet says the values are measured as printed and that FDM parts are anisotropic. In the same sheet, tensile yield strength on an F900 is listed as 30.8 MPa in XZ orientation versus 27.5 MPa in ZX orientation. That difference is not just a material name; it reflects orientation, layer interfaces, and test method. For functional parts, wall count, raster direction, moisture, temperature, and loading mode can matter as much as the base polymer. [20]
Cost of Resin Printing vs FDM
Cost comparisons only make sense when the scenario is defined. A figurine, a classroom tag, a shop jig, and a dental-style model do not consume the same material volume, support volume, labor, or post-processing time. With those assumptions left open, no reliable universal figure was found. [2]
The practical method is to total cost buckets instead of forcing a fake average. Start with machine purchase price and any required accessories. Add print materials, then supports and waste, including failed supports, purge material, or contaminated consumables. Add failed prints, because tuning time and scrap are real costs. Add wash/cure equipment where resin requires it, plus PPE and cleaning supplies such as gloves, wipes, containers, and solvents. Finally, add labor or operator time for setup, monitoring, part removal, washing, curing, maintenance, and disposal steps. NIST’s cost review explicitly notes that AM cost studies are limited in scope and that the complexity of measuring costs is a major reason broad generalizations fail. [2]
Speed, Throughput, and Build Volume
Speed only means something if it carries a label. In practice, that usually means seconds per layer, mm/h build rate, total job time, or total workflow time. Mixing those without explanation is how bad resin-vs-filament comparisons happen. [11] [13] [15] [19]
Resin can look very fast in exposure or build-rate terms. Formlabs says the Form 4 optical system delivers 16 mW/cm² at the cure plane, its product page says “most prints” finish in less than 2 hours, and Fast Model Resin is advertised at over 100 mm/h on Form 4. Prusa’s SL1S page lists 1.4–2.5 seconds per layer depending on material and layer height. But those numbers do not settle the whole comparison, because removal, washing, drying, curing, and cleanup sit outside the raw layer or build-rate figure. Industrial pages from 3D Systems also show that high-throughput claims exist, but again only inside specific enterprise systems and validation methods. [11] [12] [13] [15] [18]
Build volume is separate from speed. Current desktop examples show a cautious buying pattern rather than a law of physics: at the desk-friendly end of the market, filament machines often offer larger envelopes, while resin machines often offer smaller envelopes with stronger fine-detail positioning. MakerBot lists the Sketch Sprint at 220 × 220 × 220 mm with a 0.4 mm nozzle and 100–400 micron layer-resolution capability, while Formlabs lists the Form 4 at 20.0 × 12.5 × 21.0 cm, or 5.25 L. For large single-piece objects, envelope often dominates the choice. For batches of small parts, packing density, layer time, and post-processing labor may dominate instead. [10] [19]
Best Uses: Miniatures, Prototypes, Functional Parts, and Large Visual Builds
The most useful comparison is scenario-led. Pick the process whose failure mode is easier to live with: extra cleanup and chemical handling, or visible layer structure and more finishing on the surface. [16] [19]
Current desktop examples support the broad pattern without making it universal. A Form 4-class resin machine gives a smaller build envelope than a Sketch Sprint-class filament machine, but the resin workflow is aimed at fine-feature parts and the filament workflow is aimed at simpler, larger ownership patterns. [10] [19]
List 3:
- Miniatures and display models — Resin is usually favored because small features, crisp edges, and smoother surfaces are easier to achieve. The biggest caveat is that the parts still need washing and UV post-curing after printing. [15] [16]
- Fit-check prototypes — Either process can work. Resin tends to show small details cleanly, while filament often makes larger iterative parts easier to print and handle. The biggest caveat is that fit still depends on calibration, material behavior, orientation, and geometry rather than process name alone. [7] [9]
- Jigs, fixtures, brackets, and enclosures — Filament is often the practical first choice because thermoplastic parts are easy to handle and desktop build envelopes are often larger. The biggest caveat is orientation-dependent strength. [19] [20]
- Cosplay, props, and larger visual parts — Filament usually makes more sense for large shells and segmented builds because the parts are easier to print at size. The biggest caveat is finishing work on seams and layer lines. [19]
- Classroom use or a first machine — Filament is often easier to supervise because the workflow is simpler and avoids routine wet post-processing. The biggest caveat is that resin may still be the better teaching tool when the learning goal is fine-detail photopolymer parts. [16] [19] [21]
Resin should not be reduced to “pretty but weak,” and filament should not be reduced to “rough but durable.” Formlabs’ Precision Model Resin numbers are material-specific, Prusa’s layer and exposure figures describe one MSLA platform, and Stratasys’ ABS-M30 sheet shows how strongly orientation can affect thermoplastic data. Choose by the job, not the stereotype. [14] [15] [20]
Safety and Handling Differences That Matter
Resin handling is a procedural difference, not just a messiness difference. A representative Formlabs resin SDS classifies uncured Model V3 Resin for skin irritation category 2, eye irritation category 2A, skin sensitization category 1, specific target organ toxicity — single exposure category 3 for respiratory tract irritation, and chronic aquatic hazard category 2. The same SDS says to avoid breathing vapors and to wear protective gloves, protective clothing, and eye protection. In ordinary use, that means keeping uncured resin off skin and out of eyes, storing bottles and vats closed when not in use, and treating the part as unfinished until washing and curing are complete. [21] [23]
The washing solvent deserves separate attention. NIOSH lists IPA with a 53°F flash point, a 2.0% lower explosive limit, and a Class IB flammable-liquid designation, with a recommended exposure limit of 400 ppm TWA and 500 ppm short-term exposure. That supports practical precautions: ventilation, closed containers, ignition-source control, splash control, and sensible storage. Filament printing has a different hazard profile; the ordinary concerns are more about heat, moving parts, and polymer-specific fumes than about uncured chemical contact and solvent washing. The point is not that one process is “safe” and the other “unsafe,” but that uncured-resin handling is not equivalent to ordinary PLA-style handling. [22] [19]
Research and Standards Context Behind the Caveats
These caveats are not padding. NIST’s AM measurement program explicitly calls out high process variability, low part accuracy and surface quality, inconsistent material properties, and qualification gaps as recurring problems. NISTIR 7858 makes the same point more practically: comparisons become easier when machines or processes are evaluated on the same standardized test artifact. That is why broad claims about cost, accuracy, or speed break down so quickly. [8] [9]
Documentation discipline matters for the same reason. ASME Y14.46-2022 exists because additive manufacturing has terms and product-definition features that need to be specified consistently. A brief history note helps explain why older labels persist: ASME’s stereolithography landmark page credits Charles Hull with developing stereolithography and notes that the SLA-1 was produced in 1987. But modern comparison still needs current standards and metrology language, not legacy names alone. [6] [24]
So, Is Resin Printing or Filament Printing Better?
For resin printing vs filament printing, resin is usually better for small, detailed, smooth-looking parts, while filament is usually better for larger prototypes, fixtures, classroom parts, enclosures, and big visual builds; neither process is a universal winner on cost, accuracy, or speed. [10] [14] [15] [16] [19] [20] [2] [7] [8] [9]
As a first machine, filament often makes more sense if low mess tolerance, simpler handling, and larger parts matter most. Resin often makes more sense if tiny detail matters more than cleanup tolerance and post-processing. That first-machine choice is usually easier than trying to force a single cross-process scorecard. [16] [19] [21] [23]
FAQ
1. Is resin printing or filament printing better for most beginners?
For most beginners, filament is usually easier because part removal and cleanup are simpler and the workflow ends closer to “print finished, part usable.” Resin can still be the right beginner choice when the main goal is small, highly detailed models and the user is comfortable with washing, curing, gloves, and chemical handling. [16] [21] [23]
2. What is 3D resin printing, exactly: SLA, MSLA, or something else?
“Resin printing” is a consumer umbrella term, not one single mechanism. It can mean laser-based SLA, masked LCD systems often called MSLA, or projector-based resin systems. The shared idea is vat photopolymerization: selectively curing a liquid photopolymer with light. [3] [10] [15] [16]
3. Does resin printing always produce more accurate parts than FDM?
No. Resin often produces smoother surfaces and finer-looking detail, but that is not the same as guaranteed dimensional accuracy. NIST’s guidance separates accuracy from precision and stresses the importance of uncertainty and test conditions, while NISTIR 7858 shows why fair comparison needs the same artifact and method. [7] [8] [9]
4. Does a 50 µm pixel size mean a printer can reliably produce 50 µm features?
No. A 50 µm pixel size is an optical addressing specification, not a guaranteed feature size on the finished part. Formlabs lists 50 µm pixel size for the Form 4, but finished feature fidelity still depends on resin behavior, anti-aliasing, orientation, support contact, cure conditions, and measurement method. [11] [7] [9]
5. Why can an FDM part with visible layer lines still fit dimensionally well?
Because visible layer lines describe surface texture, not a complete dimensional inspection. A material-extrusion part can still fit if the machine is calibrated, the model has sensible clearances, and the process is evaluated against the features that matter. That is why standardized AM artifacts are useful in research and qualification. [9] [19]
6. Are resin prints stronger than filament prints?
Not as a blanket rule. A named resin can show strong tensile data, but that result is material- and cure-specific. Filament parts also vary by polymer and by orientation. Formlabs’ Precision Model Resin data is one resin under one testing context, while Stratasys’ ABS-M30 sheet shows clear orientation dependence in printed thermoplastic results. [14] [20]
7. Do I need washing, curing, gloves, and ventilation for every resin-printing setup?
For typical liquid-resin workflows, yes—plan around controlled handling rather than bare-hand part removal. Representative source material calls for protective gloves and eye protection, and Formlabs’ workflow guidance includes nitrile gloves, IPA cleanup where needed, and validated post-cure settings. IPA also needs to be treated as a flammable solvent. [21] [22] [23]
Related on 3D Mag
- SLA vs FDM Quality: Which 3D Print Wins?
- PETG vs PLA: Which 3D Filament Is Better?
- PLA vs ABS: Which 3D Printing Filament Is Better?
Sources
- ISO/ASTM 52900:2021 Additive manufacturing — General principles — Fundamentals and vocabulary
- NIST SP 1176 Costs and Cost Effectiveness of Additive Manufacturing
- NIST Vat Photopolymerization technology page
- ASTM note on material extrusion additive manufacturing processes
- Stratasys Legal Information
- ASME Y14.46-2022 Product Definition for Additive Manufacturing
- NIST TN 1297 Appendix D.1 Clarification and Additional Guidance
- NIST Measurement Science for Additive Manufacturing Program
- NISTIR 7858 Review of Test Artifacts for Additive Manufacturing Process Qualification
- Form 4 Basic Package
- Form 4 product page
- Technology behind Form 4
- Fast Model Resin
- Precision Model Resin
- Original Prusa SL1 vs. SL1S Speed
- Stereolithography | 3D Systems
- Figure 4 135 brochure
- Figure 4 Production
- MakerBot Sketch Sprint User Manual
- Stratasys ABS-M30 Data Sheet
- Formlabs Model V3 Resin SDS
- NIOSH Pocket Guide entry for Isopropyl Alcohol
- Formlabs application guide with nitrile gloves, IPA, and post-cure workflow
- ASME engineering landmark on stereolithography