A few months a ago I wrote a feature post about How 3D Scanning was used to create the Visual Effects for the Gotham TV Series because I like both 3D scanning and am a big fan of everything Batman. There is, however, one other piece of fiction that I’m drawn to even more: Star Wars. So I was waiting for an opportunity to write a feature post about a combination of 3D scanning and the Galaxy far, far away.
And then, last week, I came across this post by the Swedish game developer DICE, responsible for games like the successful Battlefield series, Mirror’s Edge, and the latest iteration of Star Wars Battlefront.
One thing that sets this “next gen” (it’s available for Playstation 4 & XBOX One) iteration of Battlefront apart from its predecessors is the stunning visual quality—especially of the wide open worlds that are very recognizable for Star Wars fans. With very realistic representations of the planets Hoth, Tatooine, Endor and Sullust, this game is the best way to interactively immerse yourself in the Star Wars universe. Or as Wired puts it: “Star Wars Battlefront Plays Like You’re Watching the Movie.”
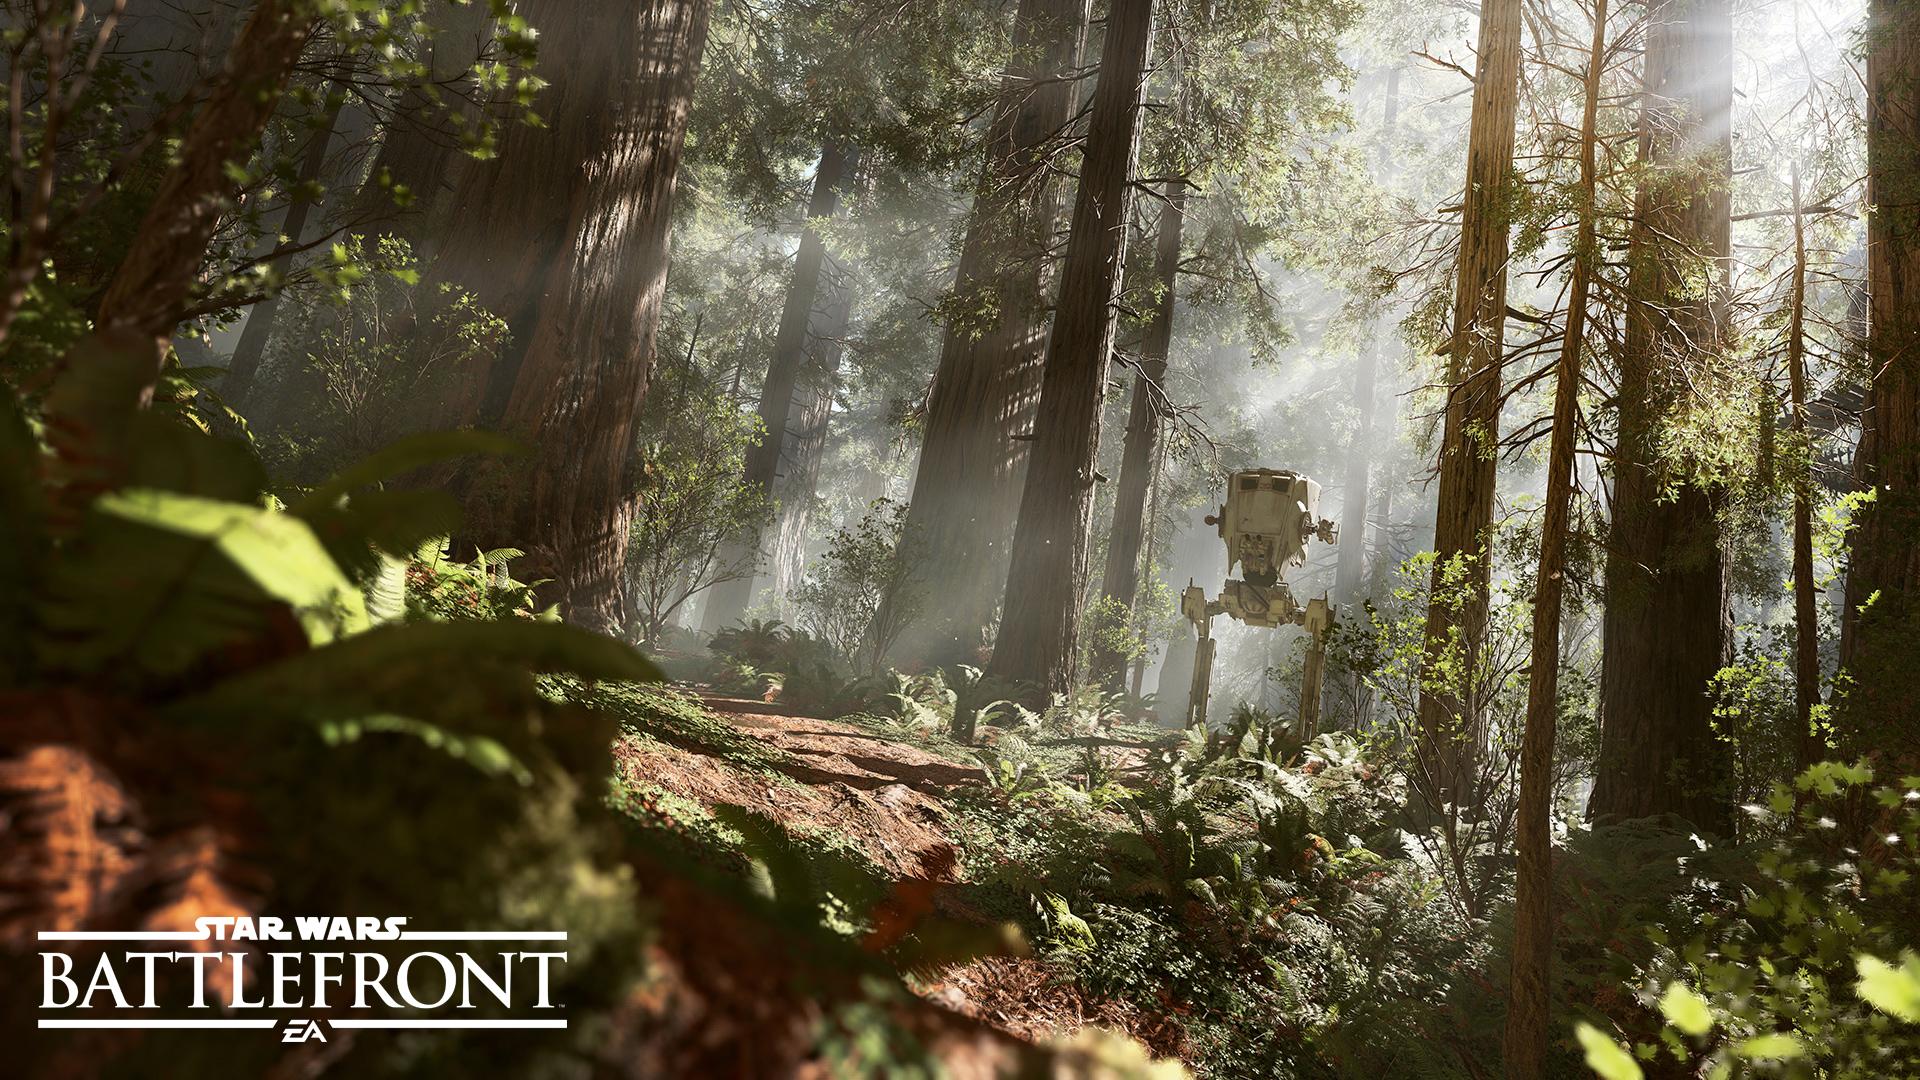
Let’s take a look at what this means through an in-game screenshot before I continue:
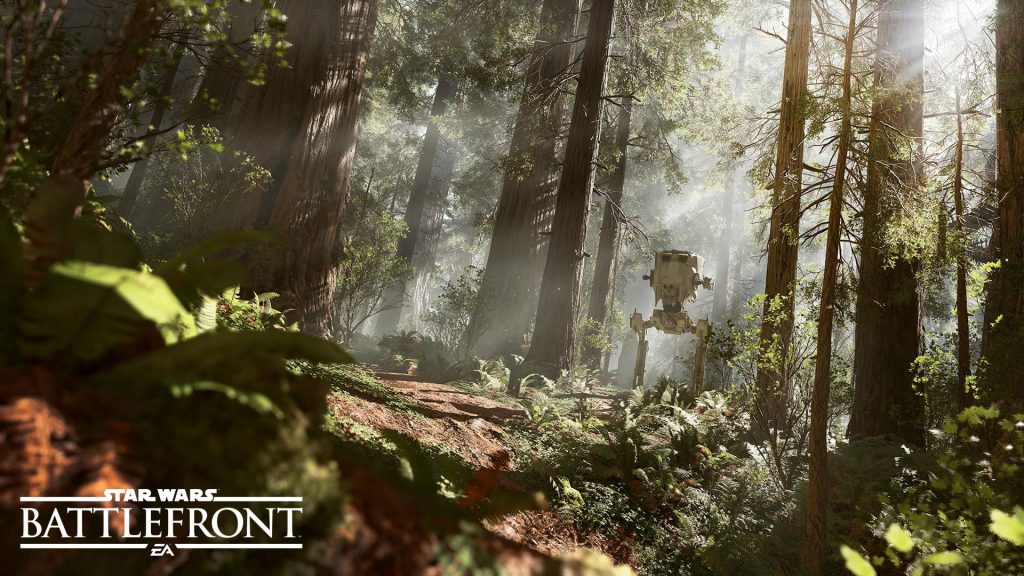
Arguably, the image above looks even more like the Endor forrest than in Return of the Jedi itself. But how did the developer get it to look so realistic? DICE’s Keneth Brown and Andrew Hamilton gave the answer to this question in an hour-long presentation at this year’s Game Developers Conference (GDC) titled Star Wars: Battlefront and the Art of Photogrammetry.
Because the presentation is meant for developers, it’s very technical and goes into all kinds of programming details. That’s why I decided to highlight some take-aways from the talk that are purely about Photogrammetry, so you can l learn from it and apply it to your creative 3D scanning projects.
For those who don’t know, Photogrammetry—or Photo Scanning—is a reality capturing technique that uses regular (2D) photos and computer algorithms to generate textured 3D models. This as opposed to using a dedicated 3D scanner (like in the Gotham post). On an entry level, you can start experimenting with Photogrammetry with free mobile apps. On a professional level, there are solutions like Autodesk ReCap (which I reviewed earlier) and Agisoft PhotoScan (which I will review soon). The artists at DICE mainly used the latter, but also experimented with newer software solutions like RealtyCapture.
The first important take away from the presentation is that Photogrammetry-based 3D scanning was used in combination of “traditional” 3D modeling techniques to create all assets and worlds for the game. Below you see some 3D scans of character props (from the Lucasfilm Archives, no less):
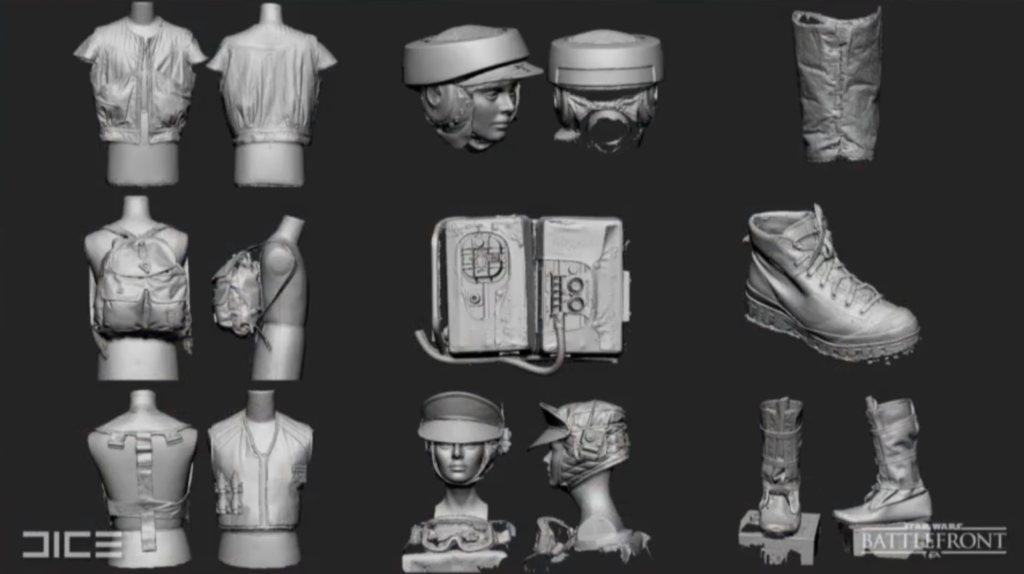
These props where added to the traditionally modeled 3D characters
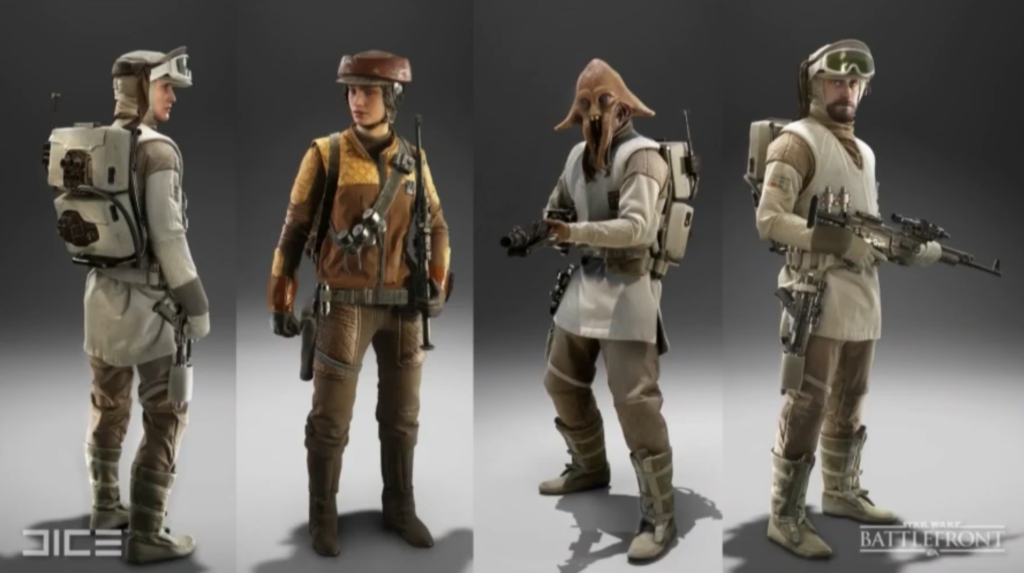
But Photogrammetry was mainly used for creating environmental assets. For this, the team went to the original shooting locations (they made short documentary of their trips) of the four planets mentioned earlier (Sullust being a notable exception because it wasn’t in the original movies. You can read how the location for that planet was chosen in this interview with Battlefront art director Dough Chiang).
Their kit was very simple: just a Canon 6D DSLR camera with a 24 mm lens, a tripod and color chart. They mainly used natural light, avoiding cast shadows where possible. In some cases, like the ice cave interiors, they also used a light kit.
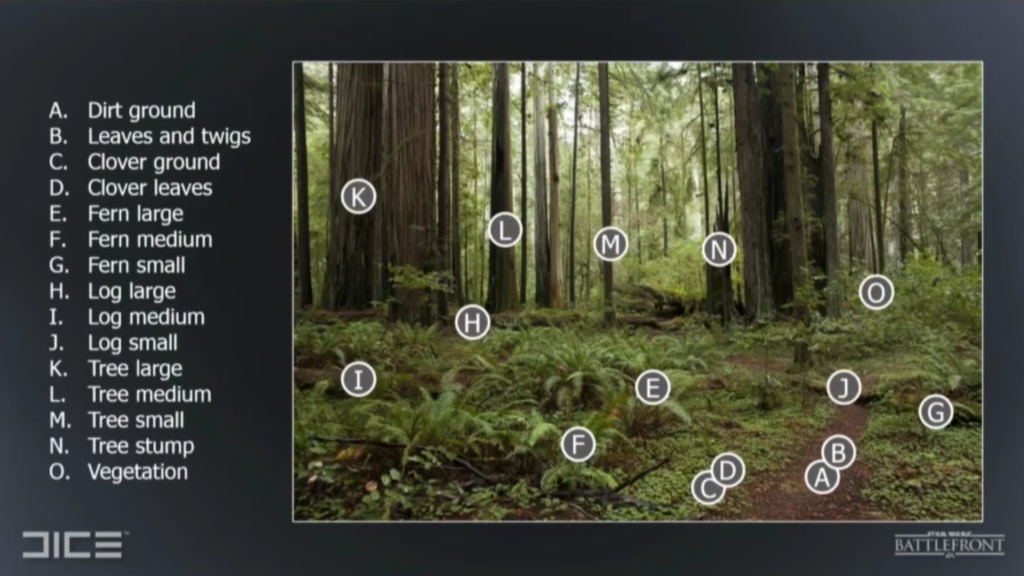
They carefully planned their trips and made a breakdown beforehand so they knew which assets needed to be captured in a session. A lot of effort went into making these shoots efficient, because with Photogrammetry you can easily get lost and shoot either too many or too few photos. For this technique to work, the single most important thing is overlap. This means that the same visual features are present on multiple photos. During this project, the team learned that this is a lot easier to achieve when shooting photos from a further distance to cover more of the object at once. They also stress the importance of shooting from all possible angles to prevent time-consuming retouching during post-production.
The photo below is an example of the breakdown for the assets that needed to be captured for the planet Endor:
To turn the massive amount of photos taken at the various location into usable game assets, the team would go through more or less the same phases as with creating game assets in a traditional way. But they did so in a lot less time. Below you see a comparison between the estimated time to create an asset for an earlier game (Battlefield 4) that used traditional methods and the Photogrammetry pipeline used Star Wars Battlefront.
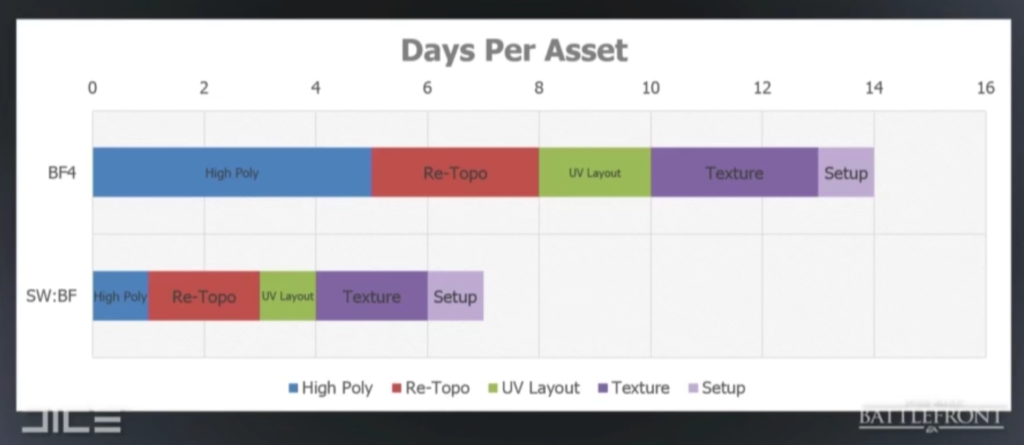
The main difference is in the “High Topo” phase. I’m guessing this would normally consist of doing high-detail digital sculpting in ZBrush or similar software. With Photogrammetry, that phase is mainly retouching—a change that some designers on the team struggled with because it felt less creative to them.
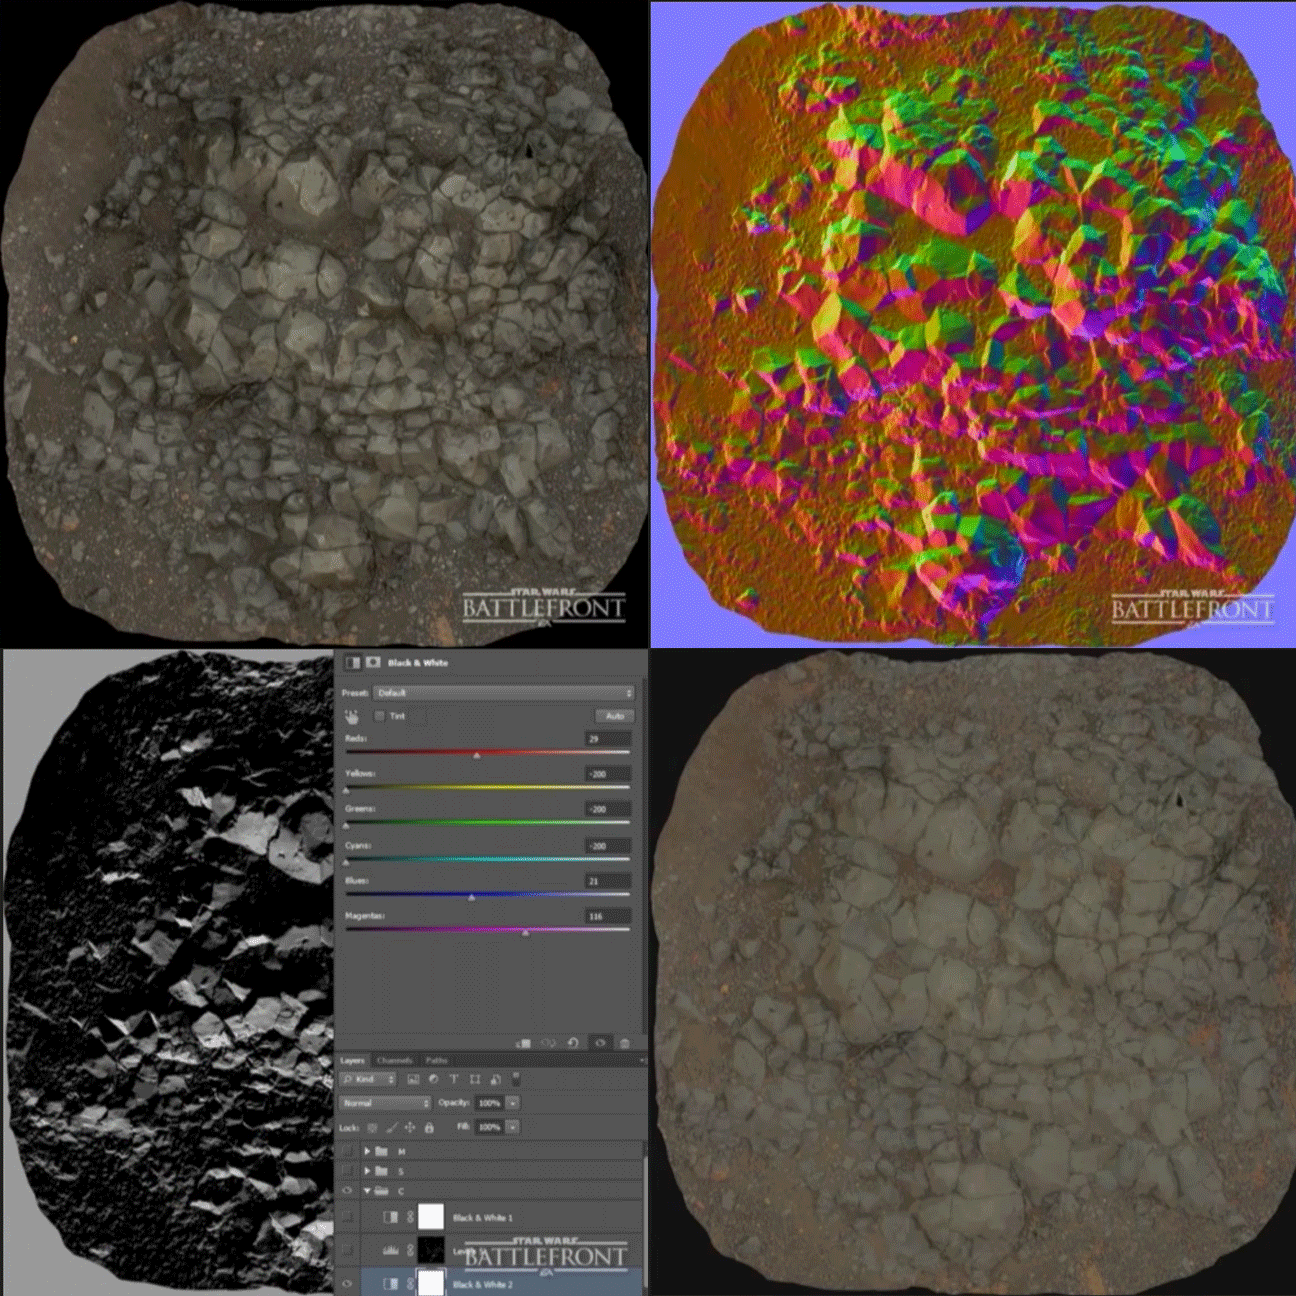
Creating usable textures also took less time, but is still one of the most time-consuming phases of the workflow. One part of that is removing shadows. This is important because the game’s environments are lit dynamically by the game engine so their in-game shadows can be anywhere.
The first shadow removal tip is work in 16 bit and simply use the designated feature in Adobe Photoshop’s Camera RAW panel to get rid of as much shadows as possible. Then they used a technique I personally find very clever: generating a normal map from the 3D data and using Photoshop’s Black & White filter to create masks for the various directions the normals are facing. And then leveling out the differences to create an almost shadow-less result. I decided to make a little animated GIF of that:
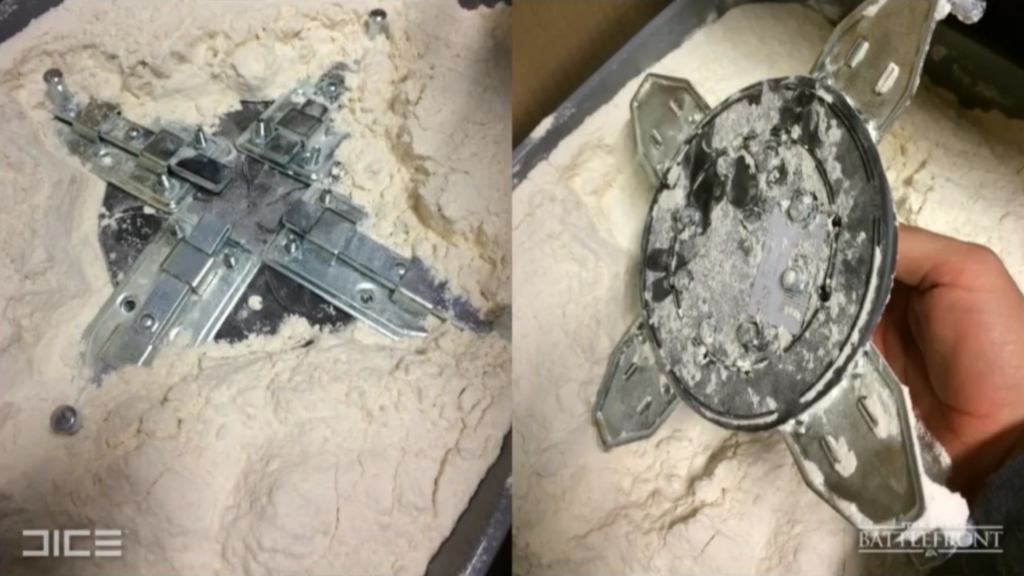
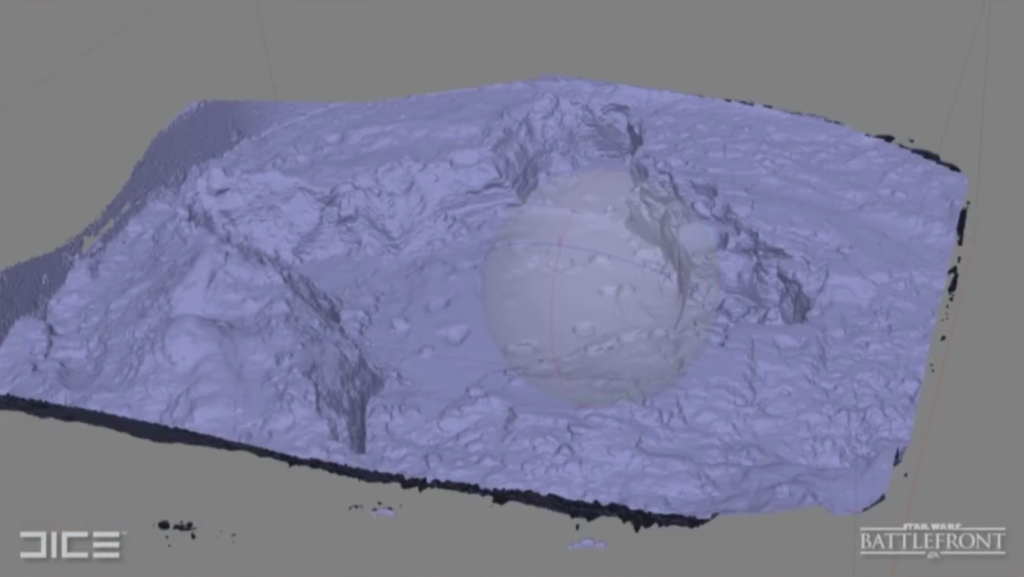
Before I wrap up this post to prevent it from taking more time than watching the full presentation I wanted to show one cool (pun intended) use of photogrammetry for the game that wasn’t a rock or tree stump. The DICE team made a physical AT-AT (you know, those Imperial Walkers) foot from stuff from a local hardware store to make an impression in white powder. This was then 3D captured to create a displacement map that’s used in-game to generate footprints.
Last but not least, here are the Photogrammetry assets the team created for the game’s four planets:
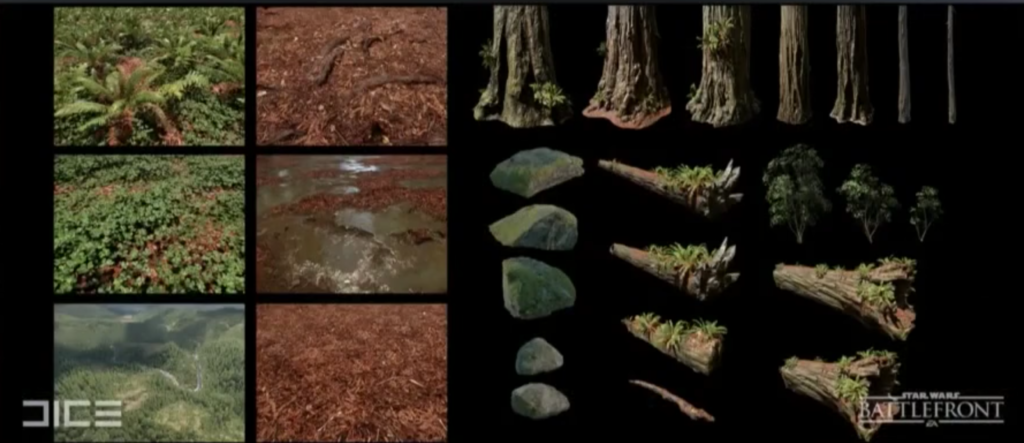
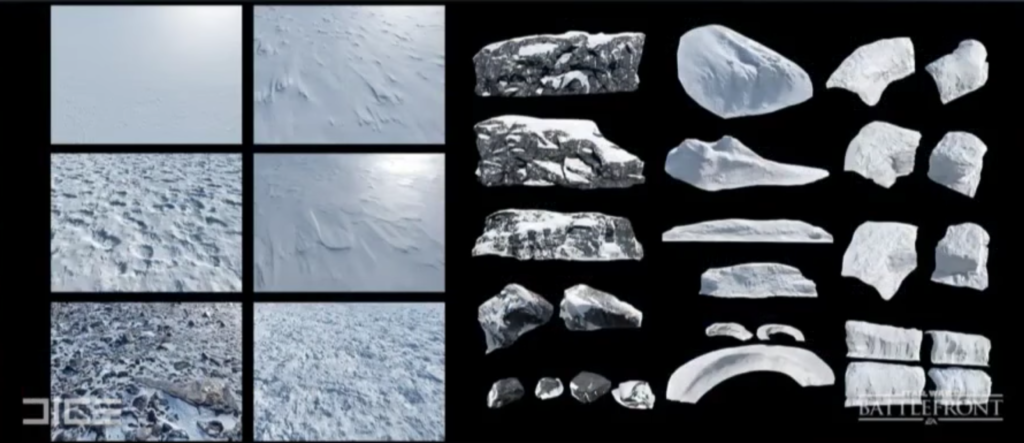
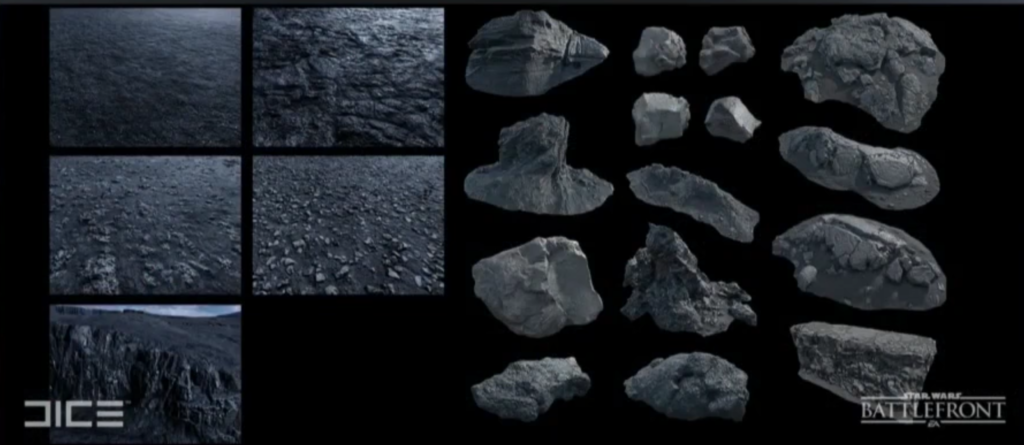
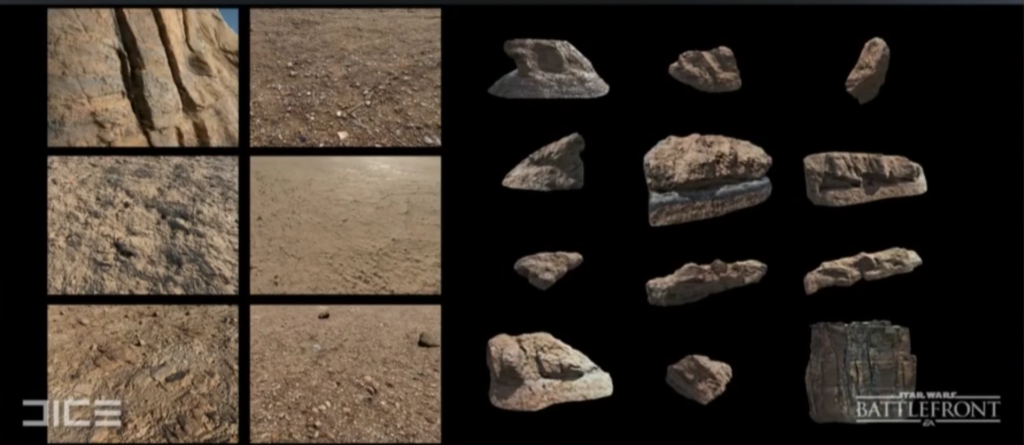
At first I thought the assets above were just a selection, but the Q&A session at the end of the presentation made clear that these are actually all Photogrammetry assets for the game. Of course, they where placed in a larger context. The team actually acquired LiDAR (laser) scans of some areas as a base for the terrain. Plus they shot many—many—photographs on location that were used as traditional textures. Trees, for example, are just Photogrammetry at the bottom which blends into a tiled texture from a certain height. And some plants are textures with alpha channels on basic geometry—some things simply still work.
To combine all assets, DICE created very nice-looking “Level Construction Kits” for each planet. Apparently the original idea was to make this available to users, but in the end it was only used for in-house development. A shame really because as you can see in this video, it works really well—particularly the blending of the Photogrammetry assets with the rest of the terrain.
Saving the best for last, here’s a nice montage of the various environments of Star Wars Battlefront. It’s accompanied by John Williams’ original Star Wars score, so my advice would be to put the video on 1080p Full HD, full screen and dial your speakers to 11—but only after sharing this post with your friends and followers on your favorite social network by using the buttons at the bottom of this post.

Thanks for sharing this article, I am happy to get this. You have the best site and nice posts they very helped us. It’s an impressive one of the best blogs . I am very much impressed with you. Thank u all
Hi, I’m a Chinese student interested in VR&3D scanning. I wish I could translate this wonderful article into Chinese, and post it on my page to share with others. I would introduce you as the author of this article and website .
Could you allow me do that ? appreciate it !