
Summary
In 3D printing, a skirt is an outline printed around the base of an object—without touching it—before the first actual layer. Its main purpose is to prime the extruder, ensuring smooth filament flow and serving as a diagnostic tool for leveling and extrusion. Unlike a brim, a skirt does not aid in part adhesion or prevent warping, as it remains unattached to the print itself. [1][4]

Historical Background
The skirt concept originated with early fused deposition modeling (FDM) workflows in the 2010s, developing alongside the first popular open-source slicer software. Slicers such as Slic3r and early versions of Cura incorporated skirt options to provide users with a way to ensure their extrusion was flawless before initiating a complex print. There is no widely recognized inventor of the skirt; its adoption arose organically in the desktop printing community as hobbyists sought practical solutions to commonly encountered extrusion issues. Today, skirts are nearly universal across hobbyist and professional-grade slicing programs. No reliable figure found regarding earliest specific implementation or precise origin.
Initially, the skirt’s main value was as a diagnostic tool—helping printers confirm correct calibration and that the nozzle and filament were ready to begin each print. [5]
Technical Principles
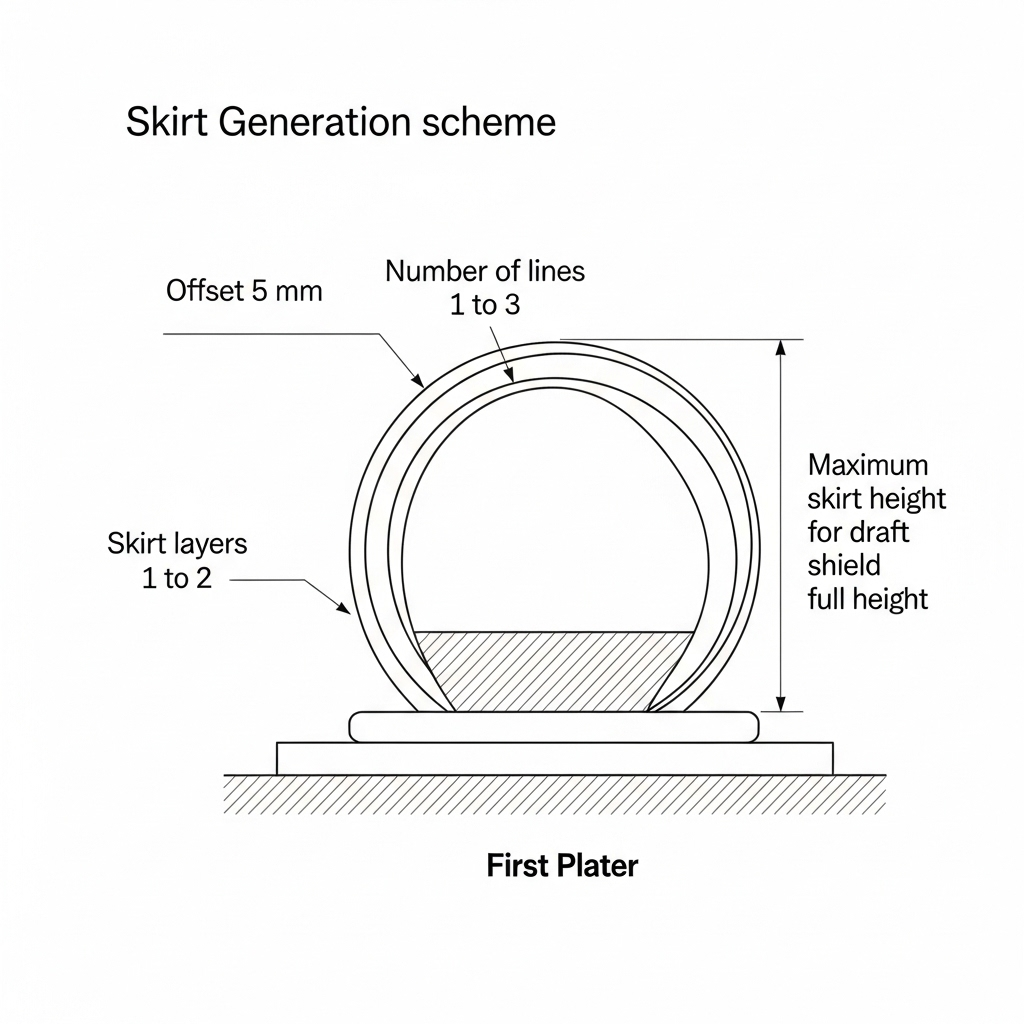
A skirt in 3D printing is generated as one or more outlines offset from the first layer of the intended object—typically by about 5 millimeters—with one or two printed layers. This extrusion skirt primes the nozzle, ensuring material flows smoothly and clogs or residual colors are purged. Common slicer settings allow users to adjust the number of skirt lines, distance from the part, and whether it prints a single layer or more, typically ranging from 1–2. [6]
Advanced use includes setting a tall, even full-height skirt to act as a draft shield—especially for temperature-sensitive materials—helping to reduce the risk of warping or layer separation by blocking air currents around the print area. [7]
Key slicer settings for skirts:
- Skirt distance/offset (commonly ~5 mm)
- Number of lines/outlines (usually 1–3)
- Skirt layers (typically 1–2)
- Maximum skirt height (used for draft shields)
Comparison: Skirt vs Brim
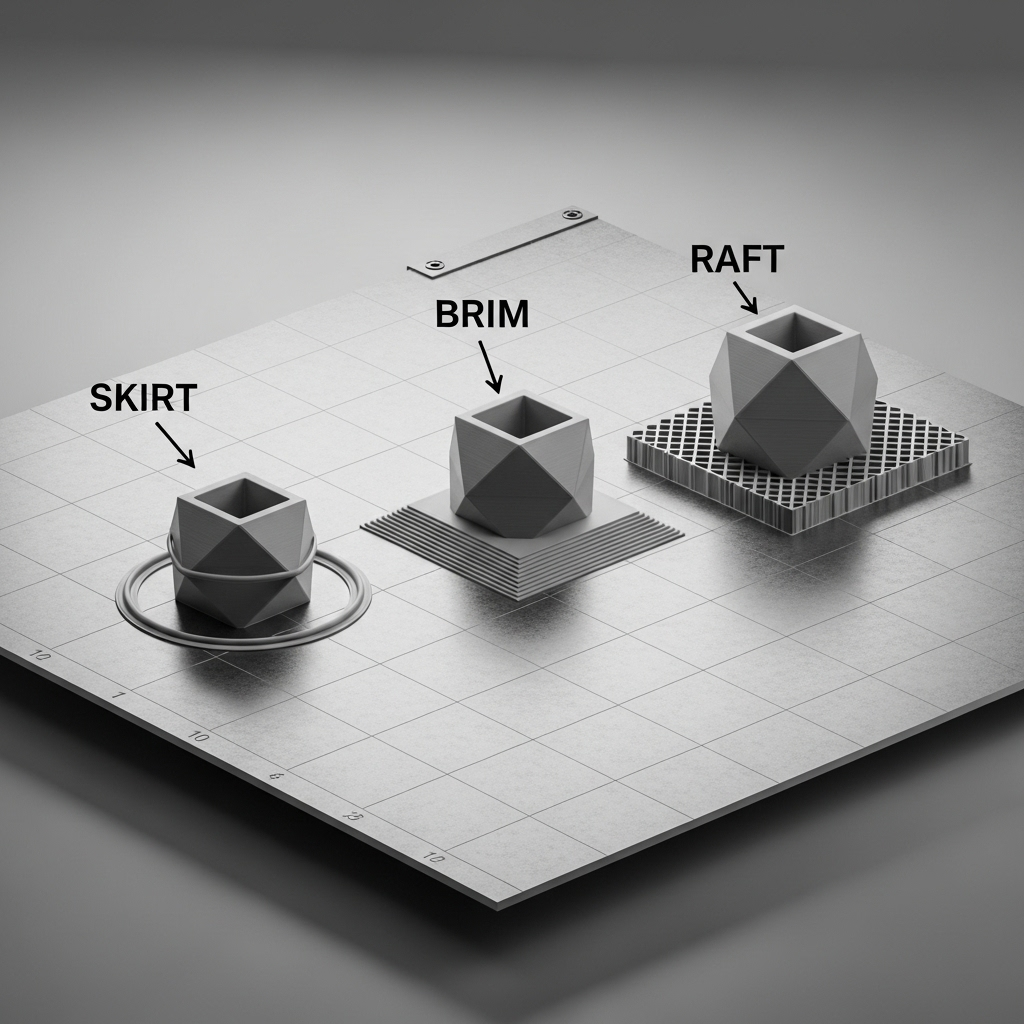
A skirt and a brim both consist of outlines printed around the base of a 3D printed object’s first layer, but only the brim physically touches and extends outward from the object itself. This distinction is crucial: while the skirt serves solely for extruder priming and diagnostics, the brim increases the contact surface area to counteract warping, improve bed adhesion, and stabilize slender prints. Brims are generally recommended for prints that are prone to edge lifting, while skirts are favored when adhesion is not a concern but reliable extrusion is critical. Brims incur slightly higher material and removal time costs but provide moderate adhesion support, making them a middle ground between skirts and rafts. In contrast, skirts use the least material and are fast to remove, since they never contact the model. For especially challenging prints, a raft— a thick, multi-layer substructure—can be used, employing more time and material for maximum adhesion but minimal model convenience. [3][4][8]
| Feature | Skirt | Brim | Raft |
|---|---|---|---|
| Touches part | No | Yes | Yes |
| Adhesion support | None | Moderate | Strong |
| Material use | Low | Medium | High |
| Removal difficulty | Easy | Moderate | Difficult |
| Purpose | Diagnostics | Anti-warping | Maximum adhesion |
Setup Recommendations
To set up a skirt in slicer software, users should specify the number of skirt outlines, distance from the part, and number of layers. A standard configuration uses a 5 mm offset, two or three lines, and a single layer—these provide enough extrusion for priming without excess material consumption. Adjustments can be made according to the part’s complexity, nozzle size, or diagnostic needs, and some slicers allow the skirt to match the full part height for additional shielding. [6]
Best use scenarios for skirts include:
- Calibration prints
- First print after material changes
- Multi-material or color switch operations
- Quick diagnostic runs before important builds [5][8]
For parts prone to warping or edge-lifting, or those with very small bed contact areas, switching to a brim is recommended.
Applications and Advanced Usage
Skirts are especially helpful for purging previous filament after a material switch, checking for recurring clogs, and verifying that bed leveling is correct before committing to a long build. In multi-material systems, repeated use of the skirt helps maintain clean color transitions. A niche application is the use of tall, full-height skirts to reduce drafts or provide limited thermal shielding, supporting the printing of sensitive polymers such as ABS that can warp in response to even small temperature fluctuations. [7][5]
Q&A (FAQ)
1. What is a skirt in 3D printing and what does it do?
A skirt is an outline printed around but not touching a part; it primes the extruder, establishes smooth filament flow, and serves as a diagnostic tool. [1]
2. How many skirt lines and what distance should I use for priming extrusion?
The default skirt distance is about 5 mm from the part, with one to two layers commonly used to ensure adequate priming of the extruder. [6]
3. What is the difference between skirt vs brim?
A skirt surrounds the part but does not touch it and only primes the nozzle. A brim attaches to the part’s edge and increases the first layer’s surface area for better adhesion. [3][4]
4. When should I use a skirt instead of a brim or raft?
Use a skirt when you need to prime the extruder or diagnose setup issues but do not need extra adhesion. Brims and rafts are better when warping or adhesion is a concern. [8][5]
5. Can a skirt help prevent warping or is that the brim’s role?
A skirt does not prevent warping—it only primes the extruder; preventing warping is the brim’s role, as it provides extra first-layer surface area and holding force. [3]
6. How can I use skirts as a draft shield or thermal shield for printing ABS?
By increasing the height of the skirt to match the object’s height, you can block drafts and provide limited thermal shielding, especially valuable for ABS or similar materials. [7]
Sources
- 3D Printing the First Layer — Solid Solutions blog (2019)
- What are the main differences between rafts and brims? — StackExchange community (2016, 2020)
- Why do 3D printers need a skirt, brim, or raft? — 3D Print Schooling
- What is a skirt in 3D printing? Purpose and setup tips — 3D-P.eu Course
- Polar3D User Guide — 3D Printing Skirt Section
- Raft, Brim, Skirt Comparison — Anycubic Official Blog (2023)